This article explains how to create, edit, and remove users, and how to manage the main profile settings available for each user.
Note:
Only users with Admin rights can access USER SETTINGS in the SETTINGS section.
To control which modules and sections a user can see, refer to User Access & Permissions (Hide Module Sections) .
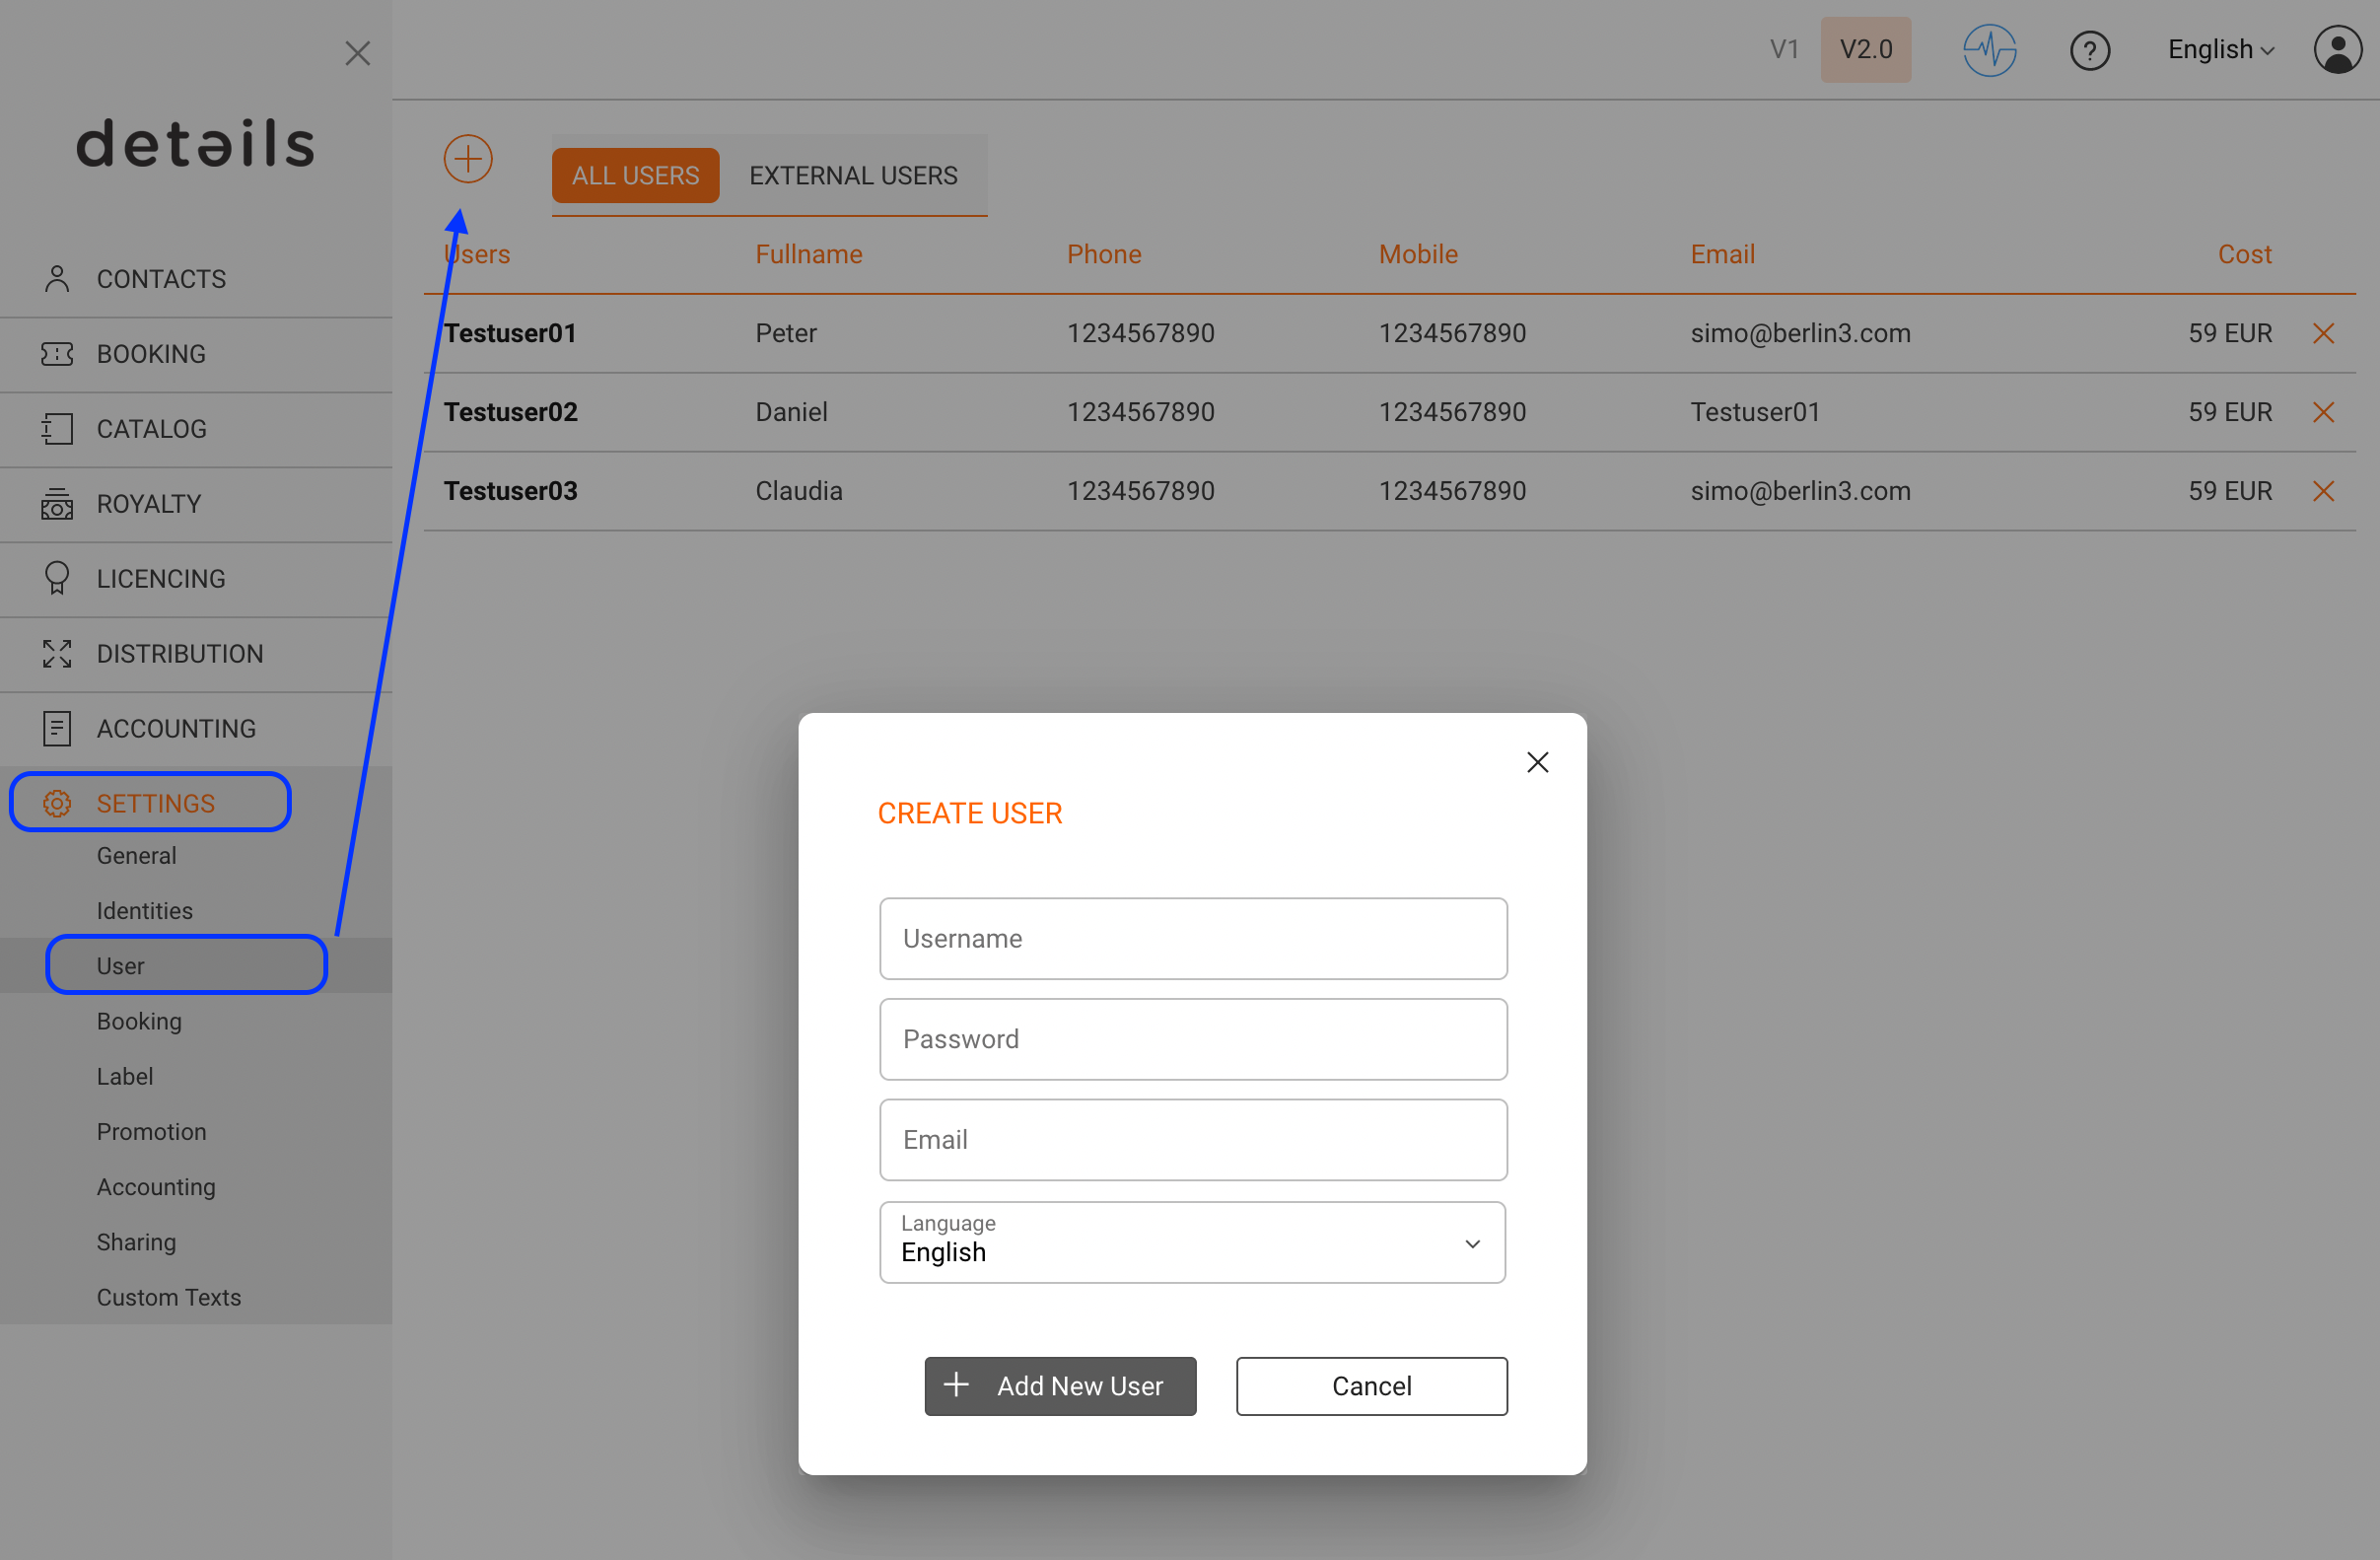
► CREATE A NEW USER
As an administrator, you can manage users under SETTINGS / USERS.
- Go to SETTINGS / USERS.
- Click [+] in the top-right corner.
- Enter the required information: Username, Initial password, and Email address.
The username is required to log in to the application. The email address is used for notifications and password reset links.
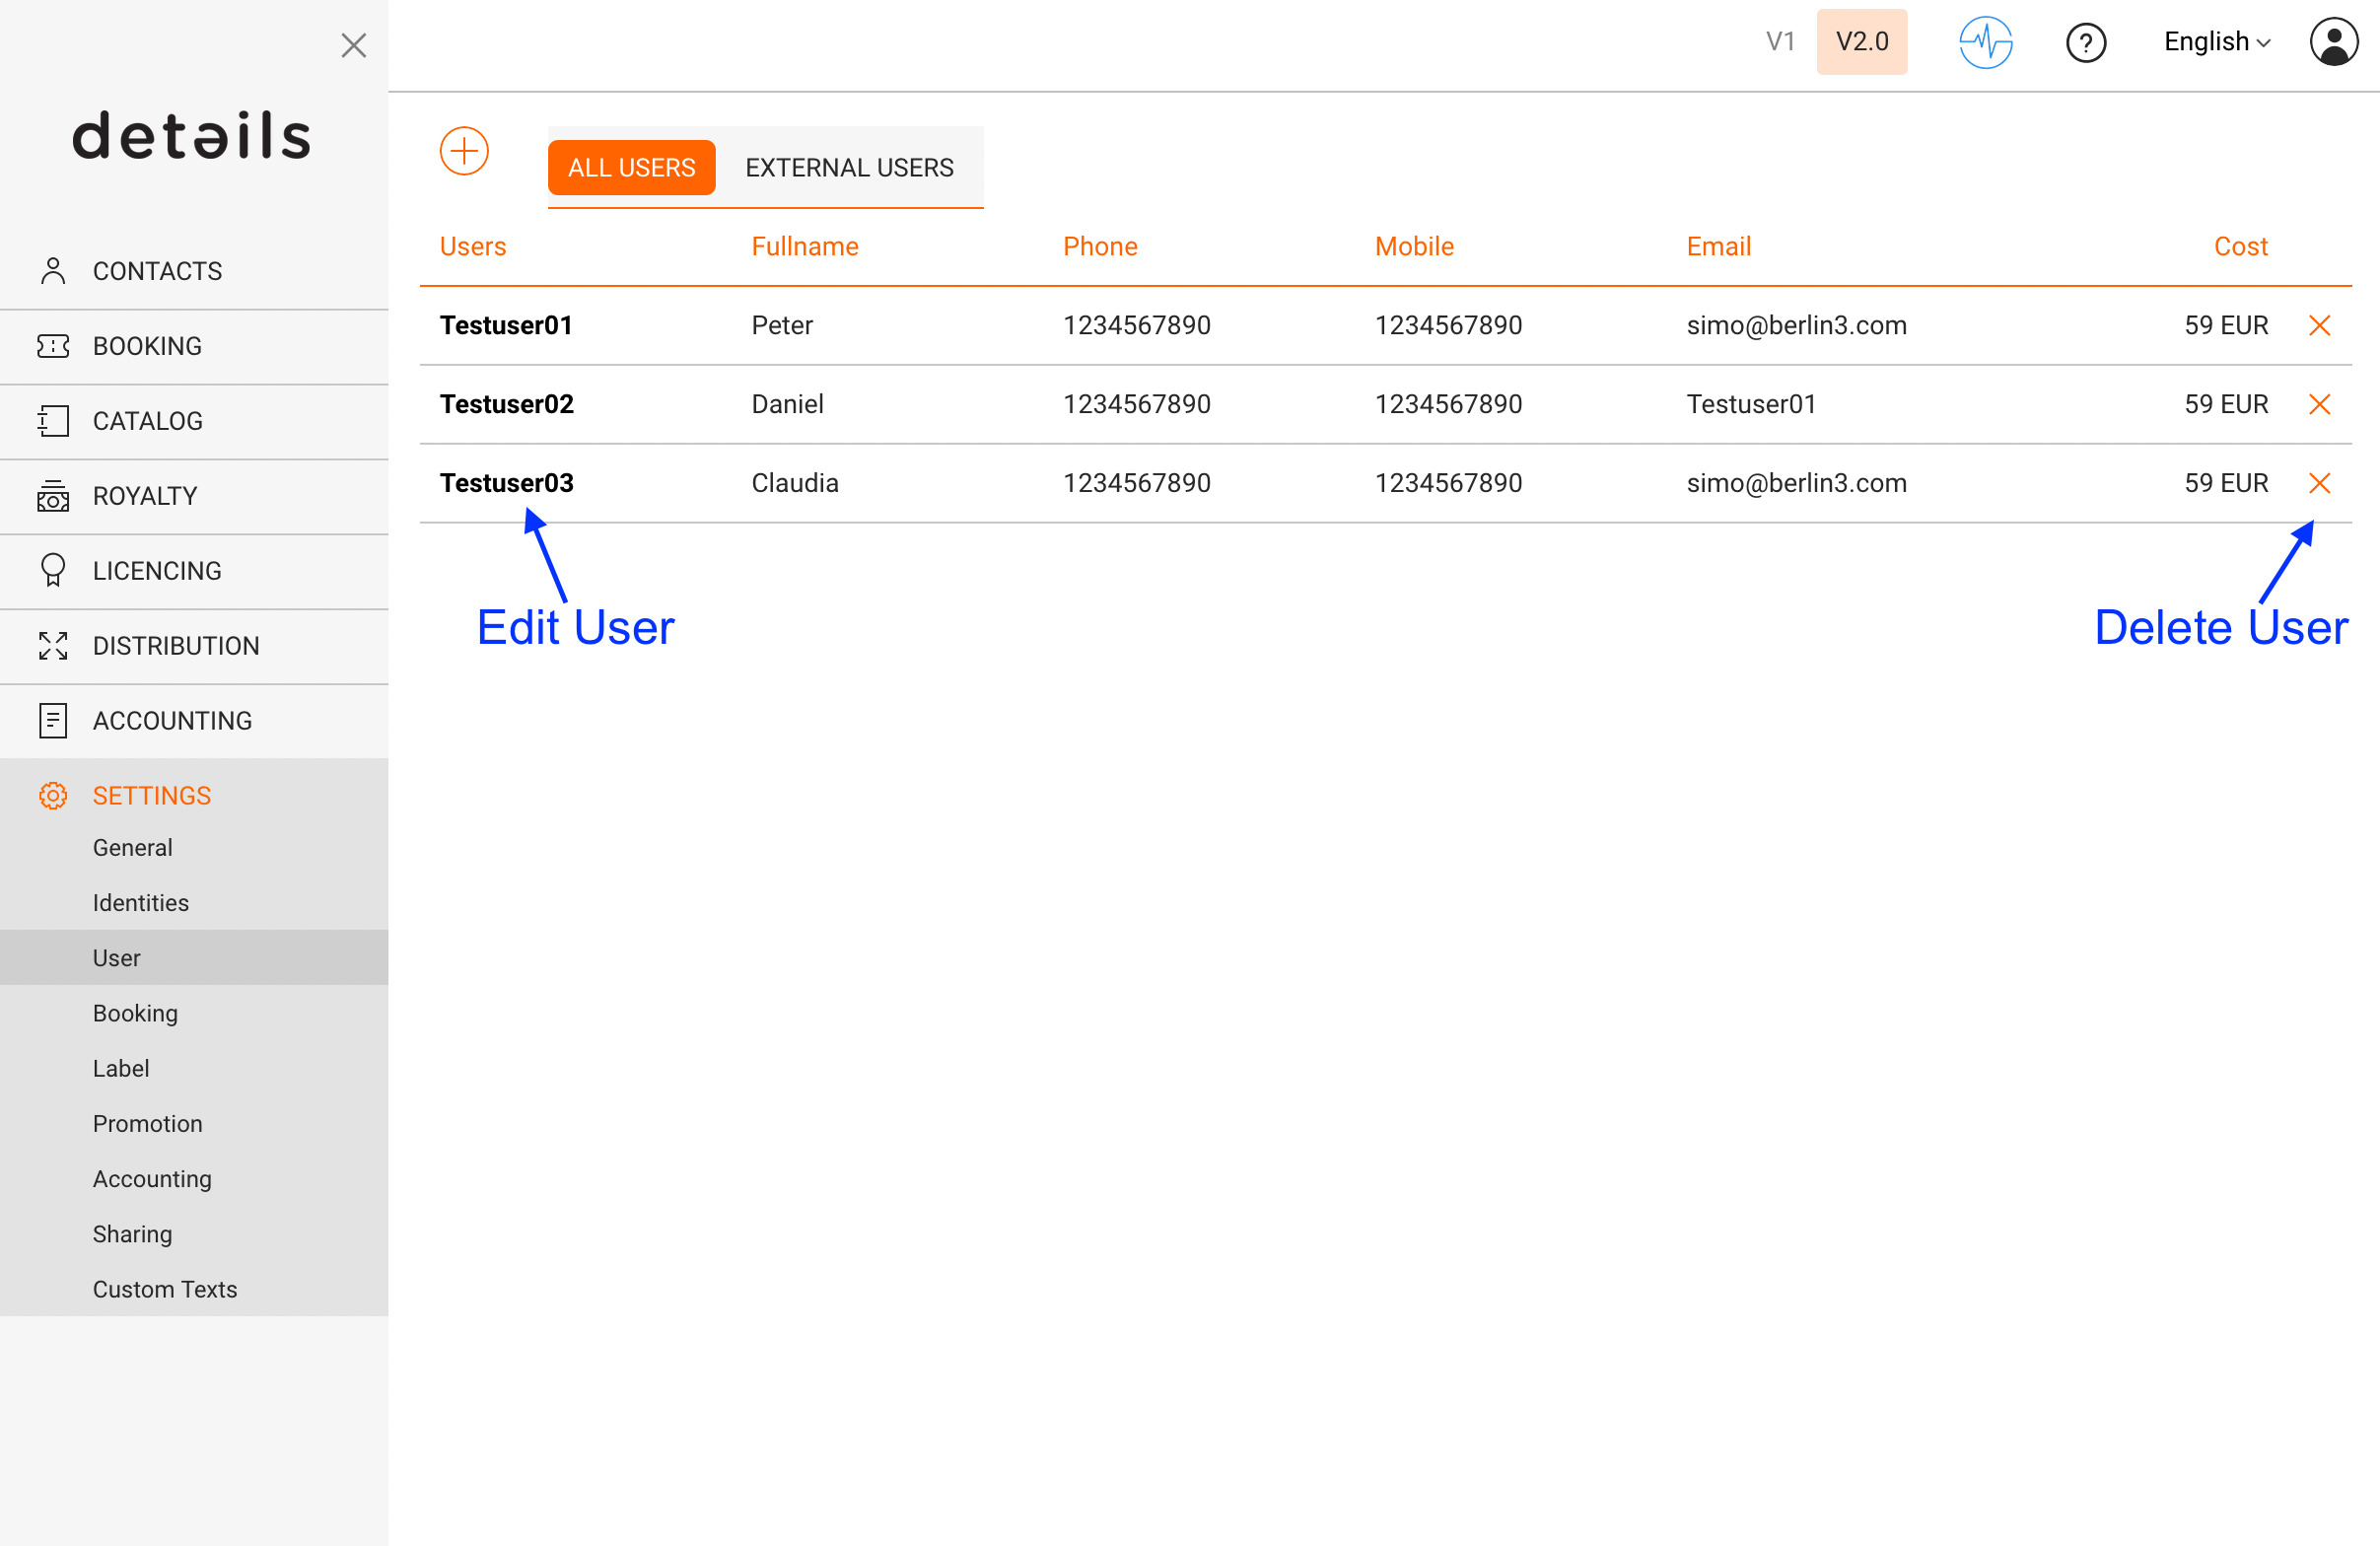
► EDIT AN EXISTING USER
To edit a user:
- Go to SETTINGS / USERS.
- Click on the name of the user you want to edit.
You can update the user s profile information and settings at any time.
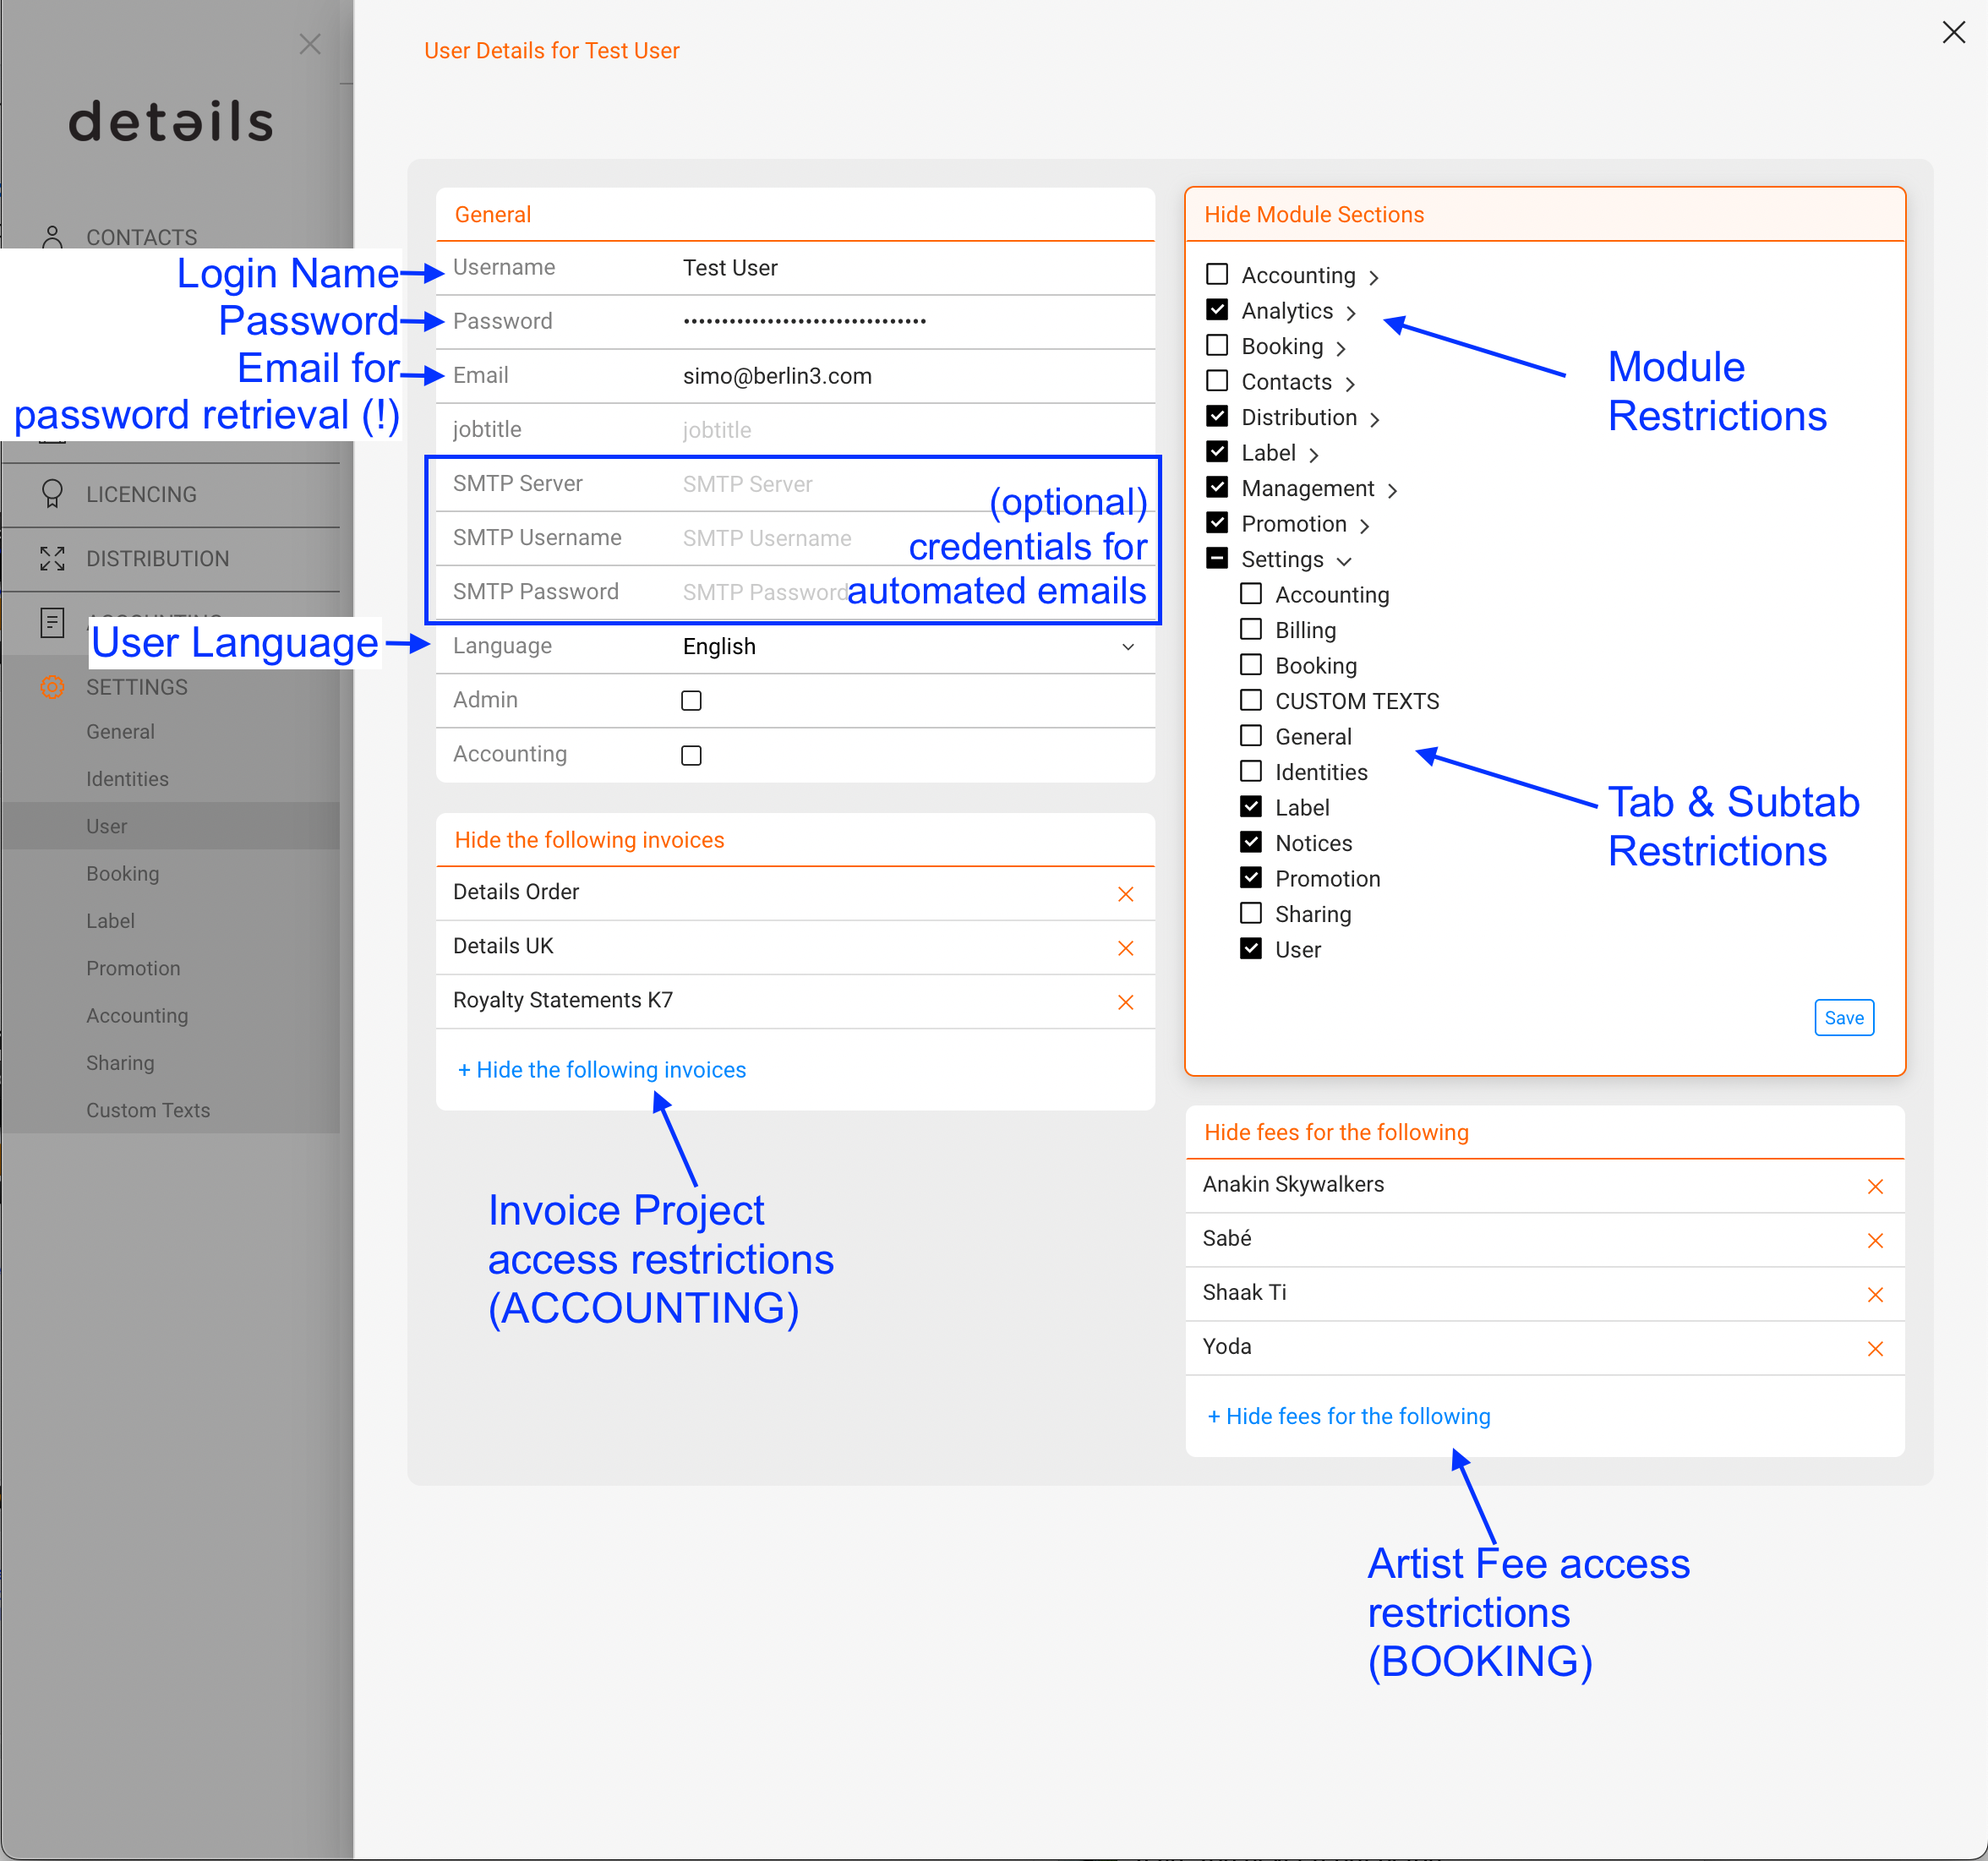
► USER PROFILE SETTINGS (FIELDS & FLAGS)
Each user profile contains the following settings:
- Username The login name used to access details. This field is essential.
- Email The primary communication address.
All notifications from details are sent here, including alerts, confirmations, reports, and password reset links. - Language Defines the interface language.
- Job title Optional descriptive field.
Optional email delivery settings:
- SMTP server
- SMTP username
- SMTP password
These settings are only required if emails should be sent through the user s own mail server.
Administrative flags:
- Admin Grants access to administrative areas, including USER SETTINGS.
- Accounting Grants access to accounting-related data.

► REMOVE A USER
To remove a user:
- Go to SETTINGS / USERS.
- Click the [x] icon next to the user.
Note:
If a user has been active for more than 14 days within a billing month, the user can only be removed after the next billing cycle.
Next step:
Learn how to control module visibility and booking-only access in User Access & Permissions (Hide Module Sections) .