For giving a person access to the B2B section you first need to set up the person as an External User.
(see HERE how to set up external user).When this is done go to SETTINGS – IDENTITIES and choose the invoice layout.
(Then go to the SHARES EMAIL tab and fill out the subject. It is possible, but not mandatory, to add a variable period to the subject field, so the respective period(s) will automatically be inserted to the email subject.
Please note that the period is the only variable that can be used in the subject.
To insert the period variable in the subject you need to add $period$(e.g. “Statement for $period$”
For the email text you can create a standard text with the variables GIVEN NAME $given_name$, ROYALTY ACCOUNT NAME $royalty_account$ and PERIOD $period$.
e.g. “Hi $given_name$,( get your $royalty_account$ statements for $period$ and previous periods.”
You also be able to add a trailing text, that will appear under the ACCESS STATEMENT Button.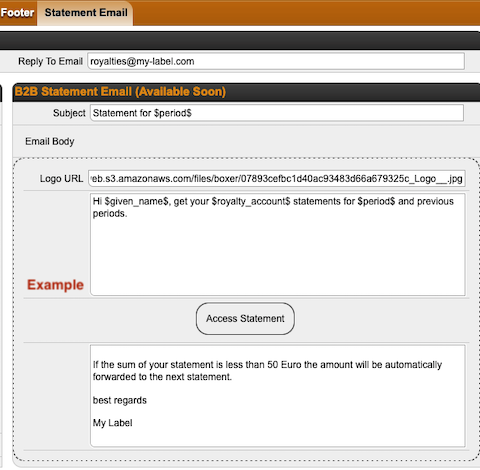
(To add your logo to the email you need to follow this steps unless you have not already uploaded a logo into Details:
1) go to CONTACTS / FILES and upload your new picture, logo file etc. to FILES.(NOTE: Don’t forget to name the file in a way that you will allow you to find it again.
2) Right Click on the uploaded file and select “Copy link location”.(This will copy the link of the file into the clipboard and allows you to paste the URL to the Logo URL field. ((

To have an overview of all Royalty Accounts that give access to external user we’ve added a new icon.
In the LABEL – ROYALTY ACCOUNT – STATEMENT list and in the LABEL – STATEMENTS list overview you will find the icon beside all relevant statements.
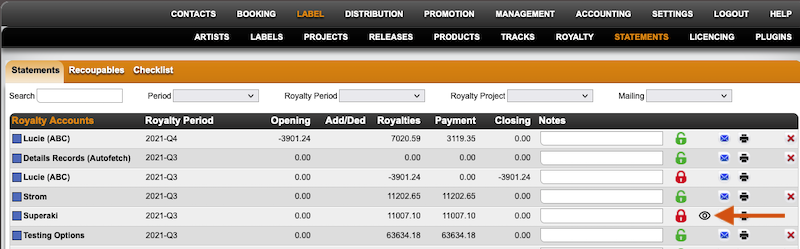
(All statements showing this icon allow one or more external user(s) access to the royalty account. By clicking on the icon you will find all users that have access to the respective account.
Please note, that only locked statements allow access to external user and will be used for the reporting overview.
If you want to add the complete statement history (incl. unlocked statements) to the B2B data you can go to LABEL – ROYALTY – SELECTED ROYALTY ACCOUNT – STATEMENTS.
(There you find the button UPDATE B2B DATA.
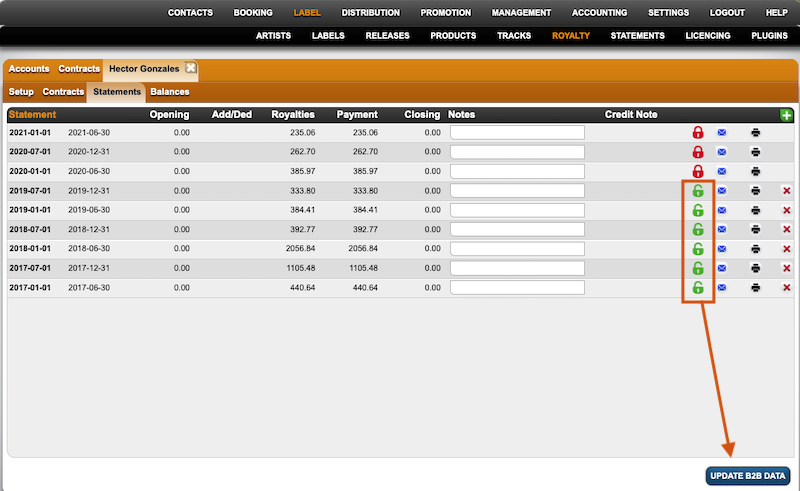
By clicking this button all unlocked statements will be locked and all sales data will be included to the sales history in the B2B account.
(By sending the statement, every external user will receive a link for a landing page where to register or to log in.