Setting Up your ARTISTS correctly from the very beginning is one of the most important steps to be done during the SetUp process. Please, be sure to get all the required info inside the ARTIST profile. This way you won’t miss the information later on in the templates. Here’s how you set up your artists in details:
1) First go to BOOKING / ARTISTS and select the artist you want to set up 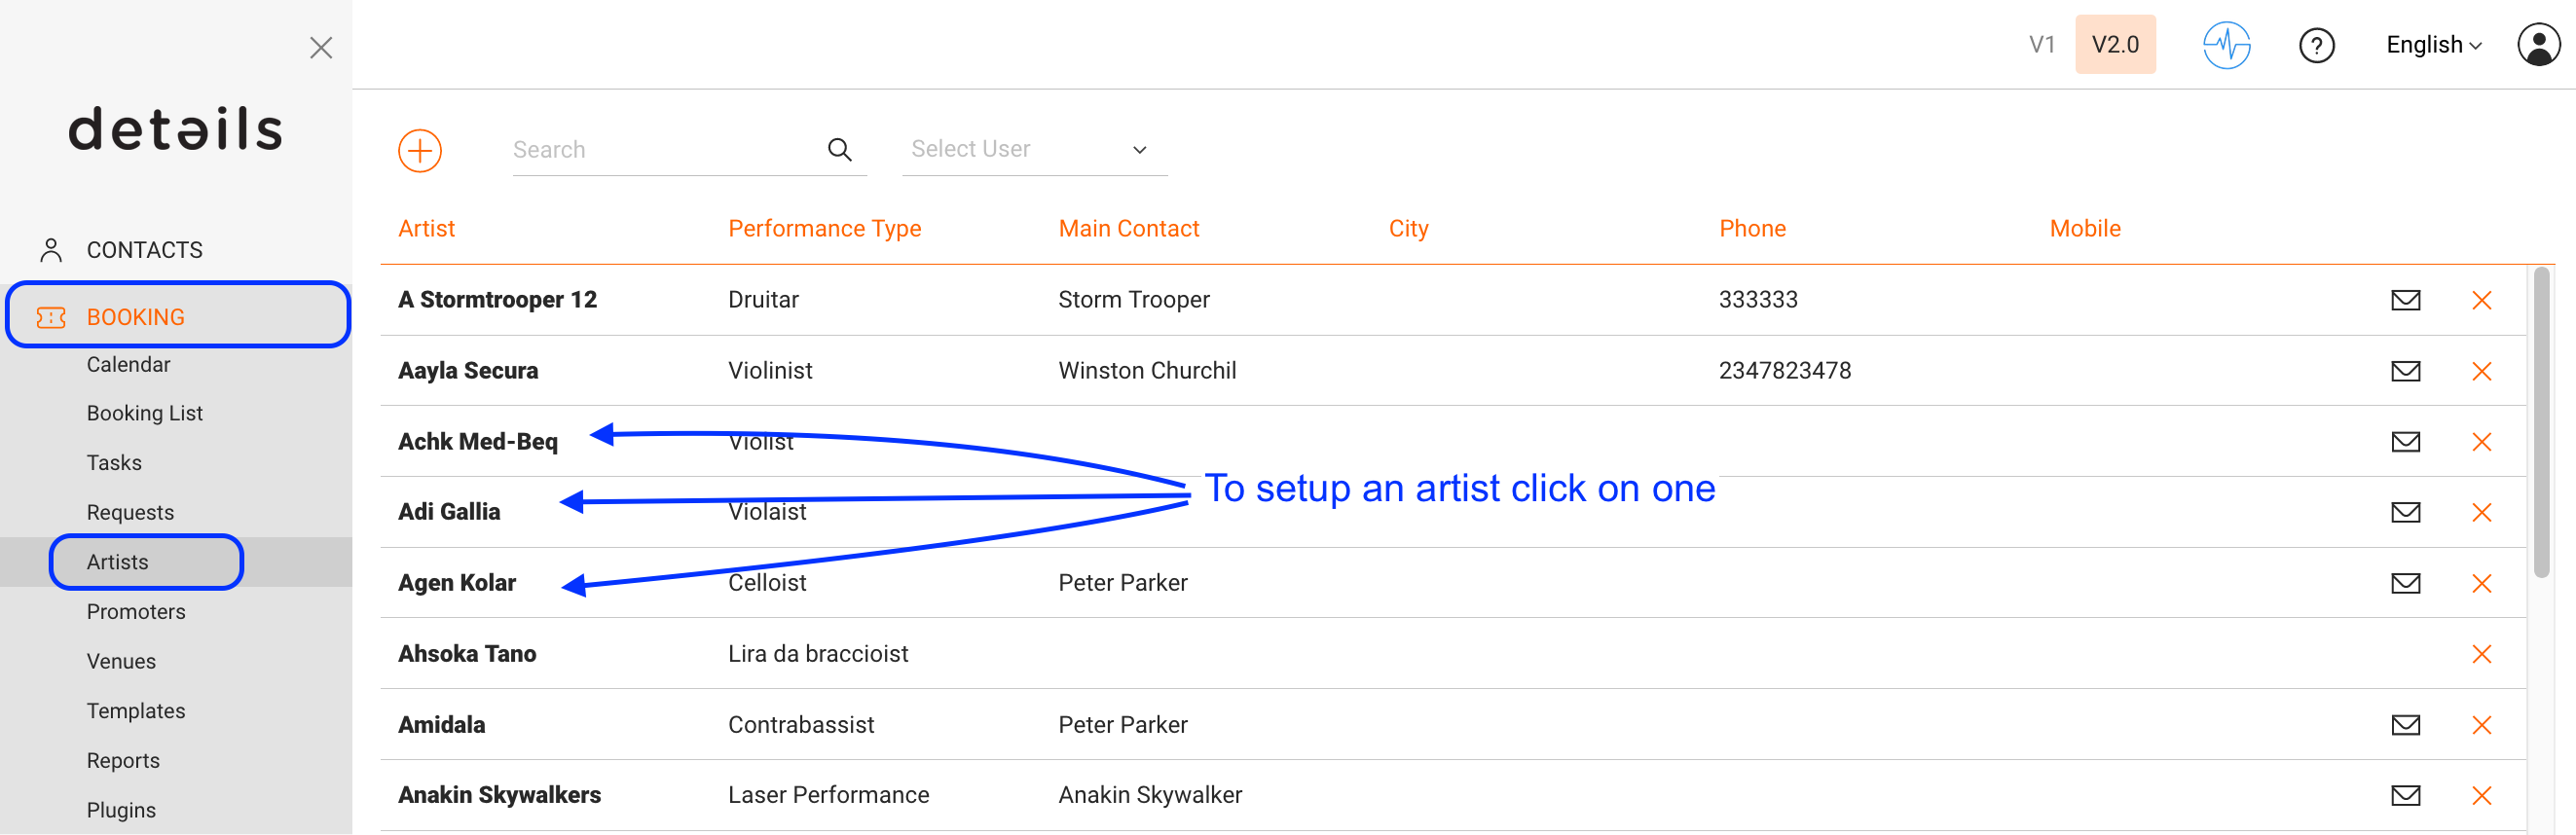
2) For the basic setup please
* add the billing name of the artist (“announce as“)
* select the TYPE of the artist (“exclusive” or “non-exclusive”) NOTE: Only Artists with TYPE = “exclusive” will be displayed in the Online Request Form
* type the PERFORMANCE TYPE of the Artist (“DJ”, “Live” or both)
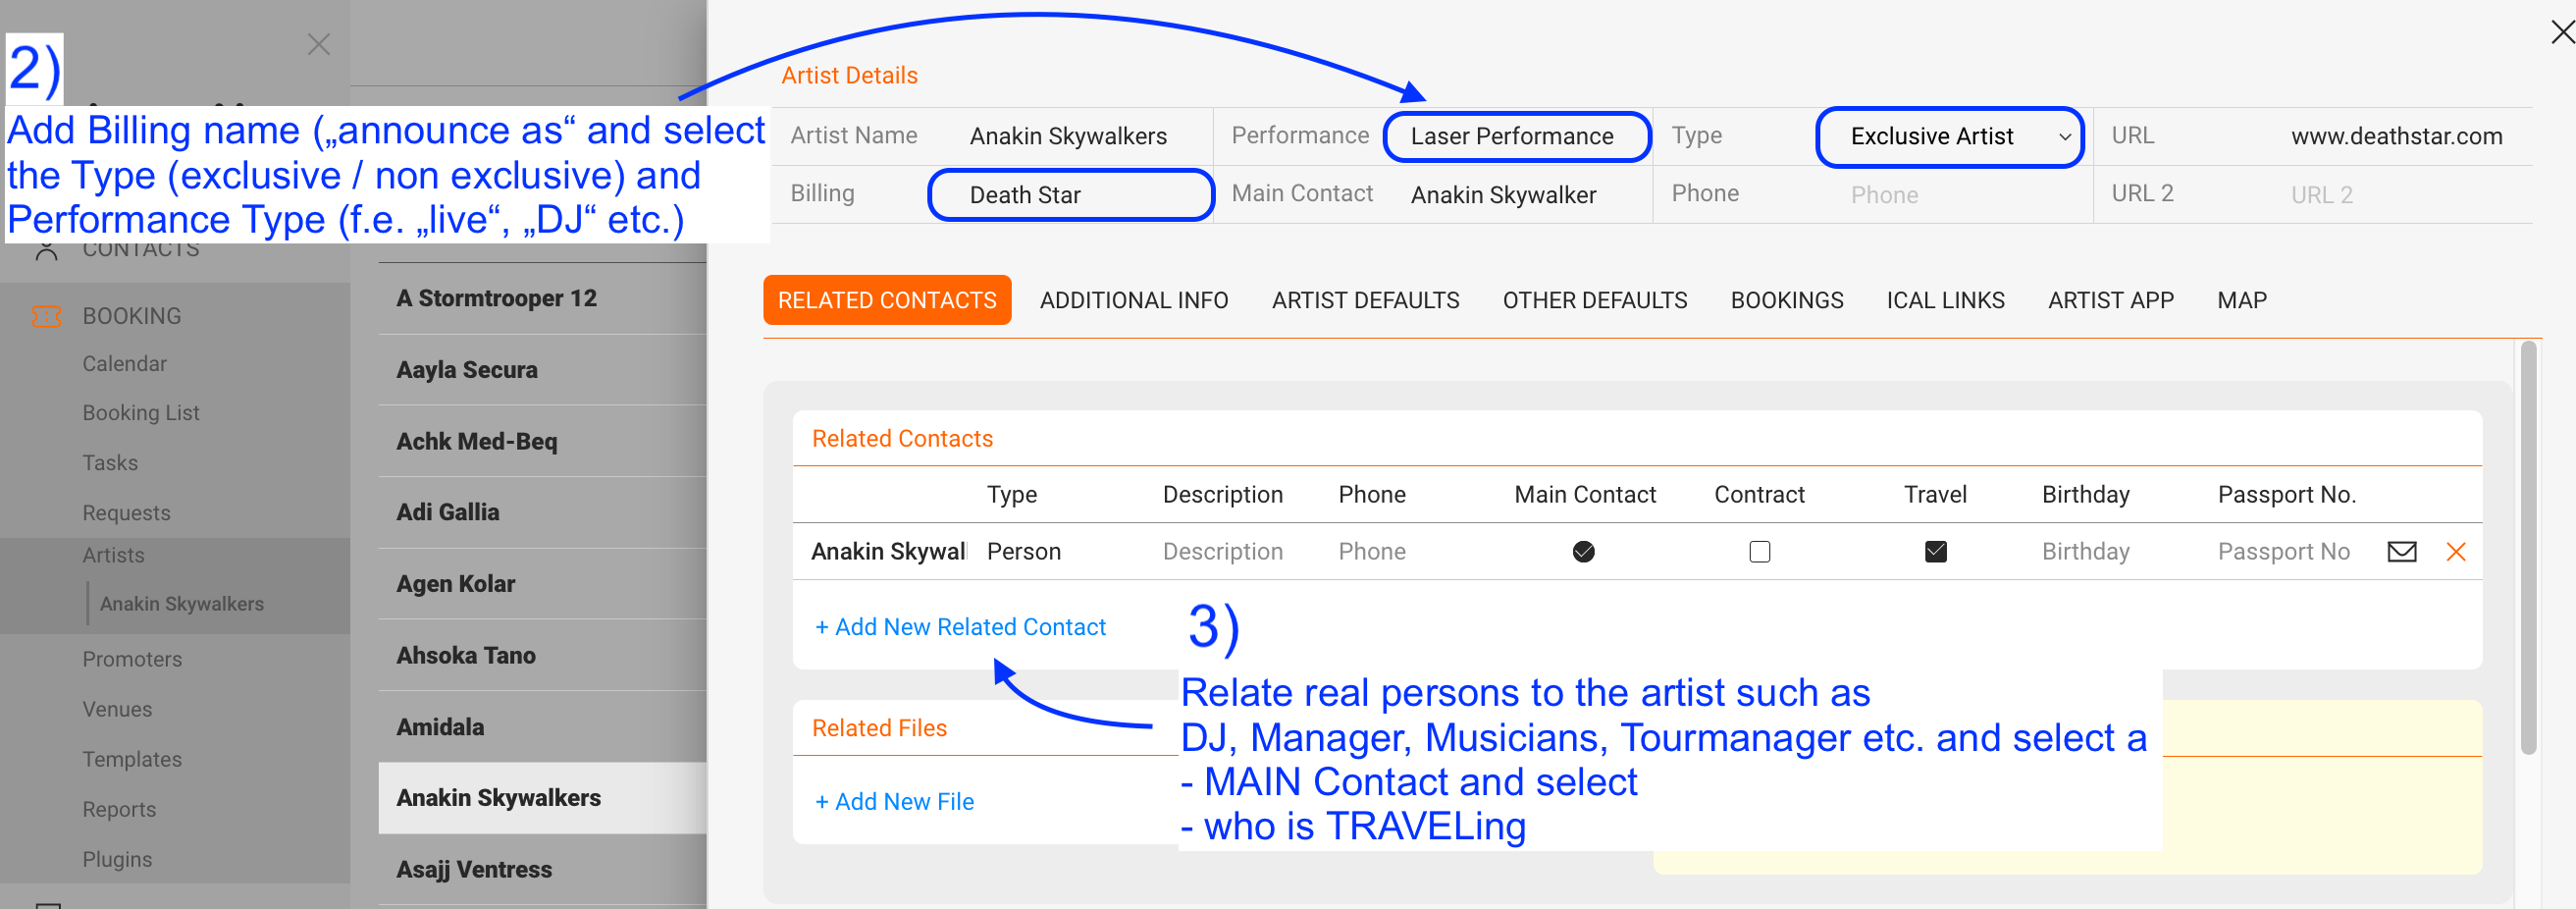
3) Then you need to RELATE one or multiple CONTACTS to your ARTIST – this is important! Example: ARTIST might be “Anakin Skywalker”, but his related CONTACTS will be all the contacts that are already in the system, related to his gigs. This means: His real name (important info to take the plane), his manager “Stephan Rombach” (who always flights with him), “Carla Daz” (his Tour Manager)…etc. To add a related contact click on the PLUS icon on the top right of “Related Contacts” in the Artist “Overview”
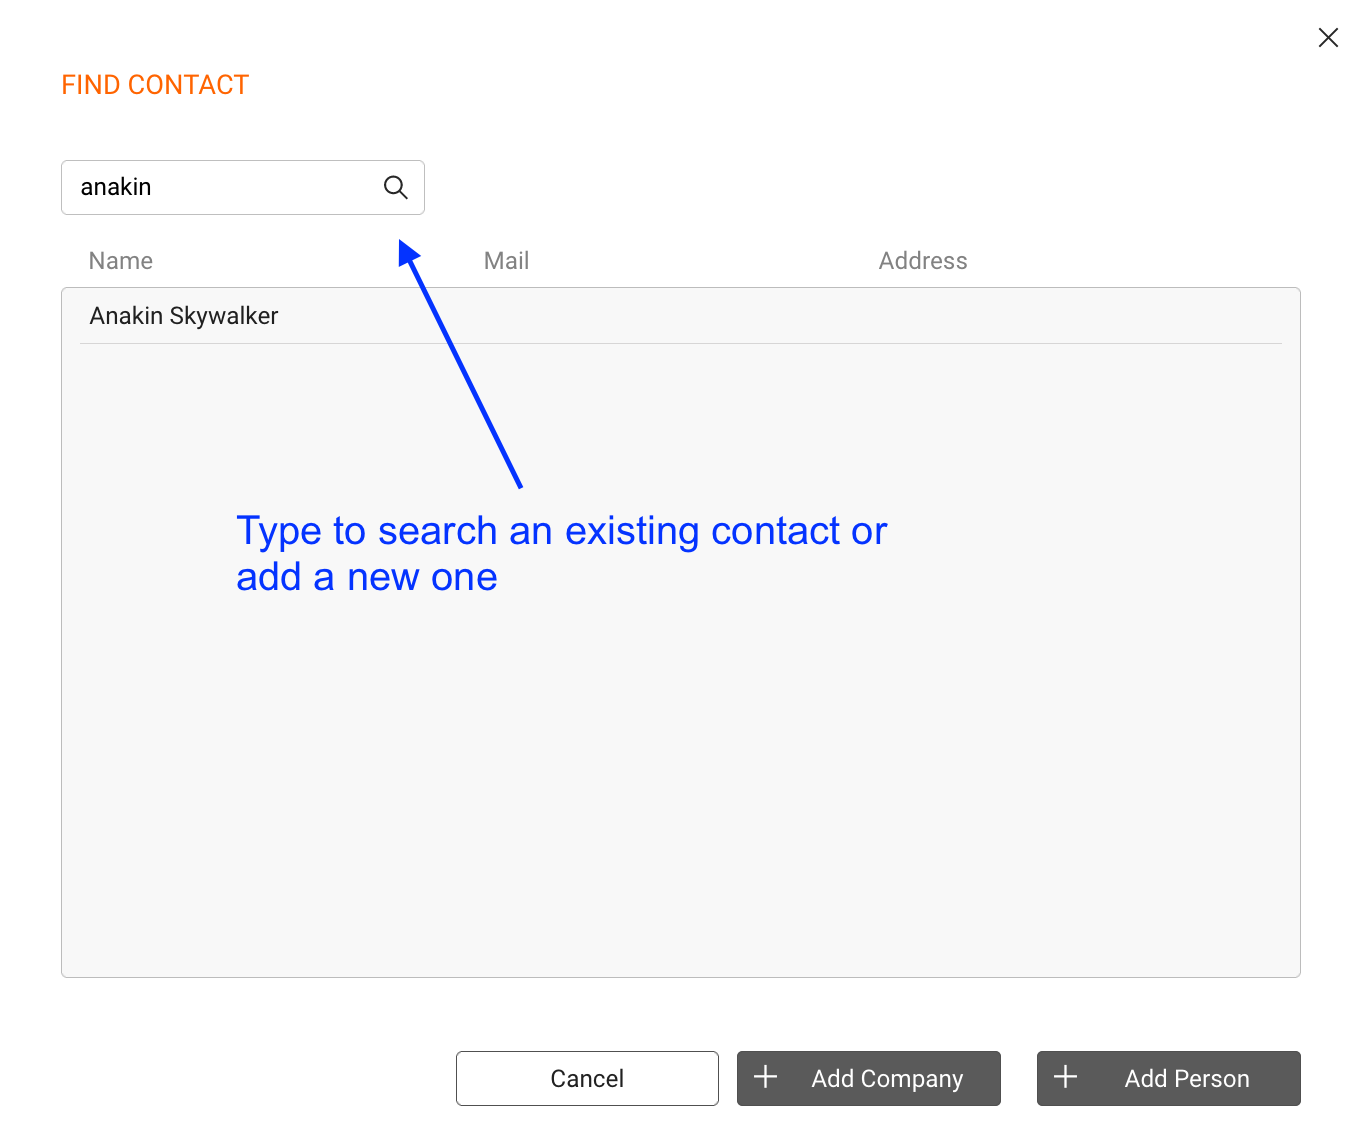
4) In the popup window you need to TYPE in the search field to search a contact or ADD a new one.
5) After you add a RELATED CONTACT to an artist, give him a job title (“Artist”, “Tour Manager”, etc.): *IF the person normally travels, click TRAVEL. *Don’t forget to add the REAL NAME of the artist as a related contact, because *Select who’s the MAIN CONTACT (main contacts have the bank details to receive the payments) 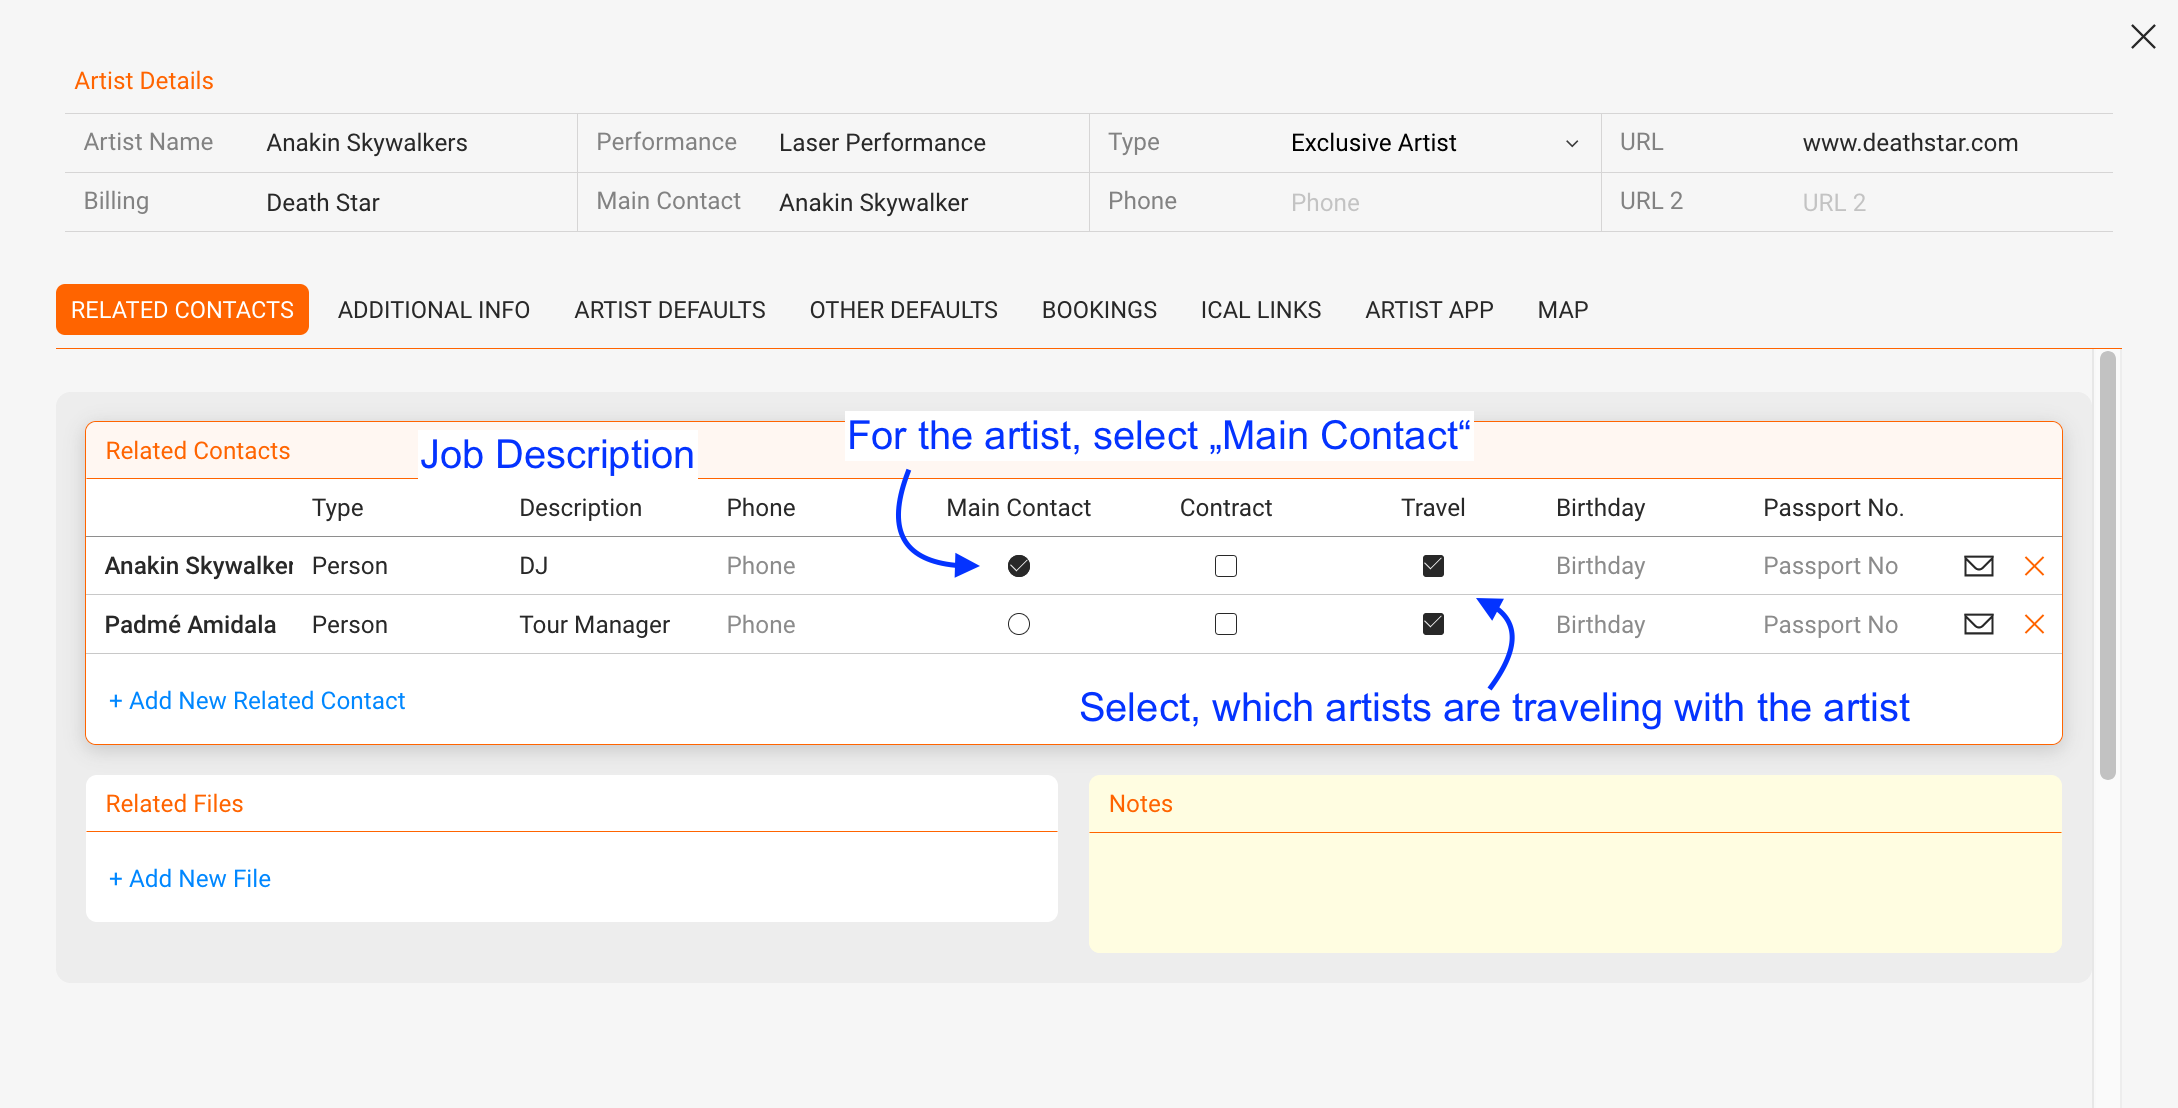
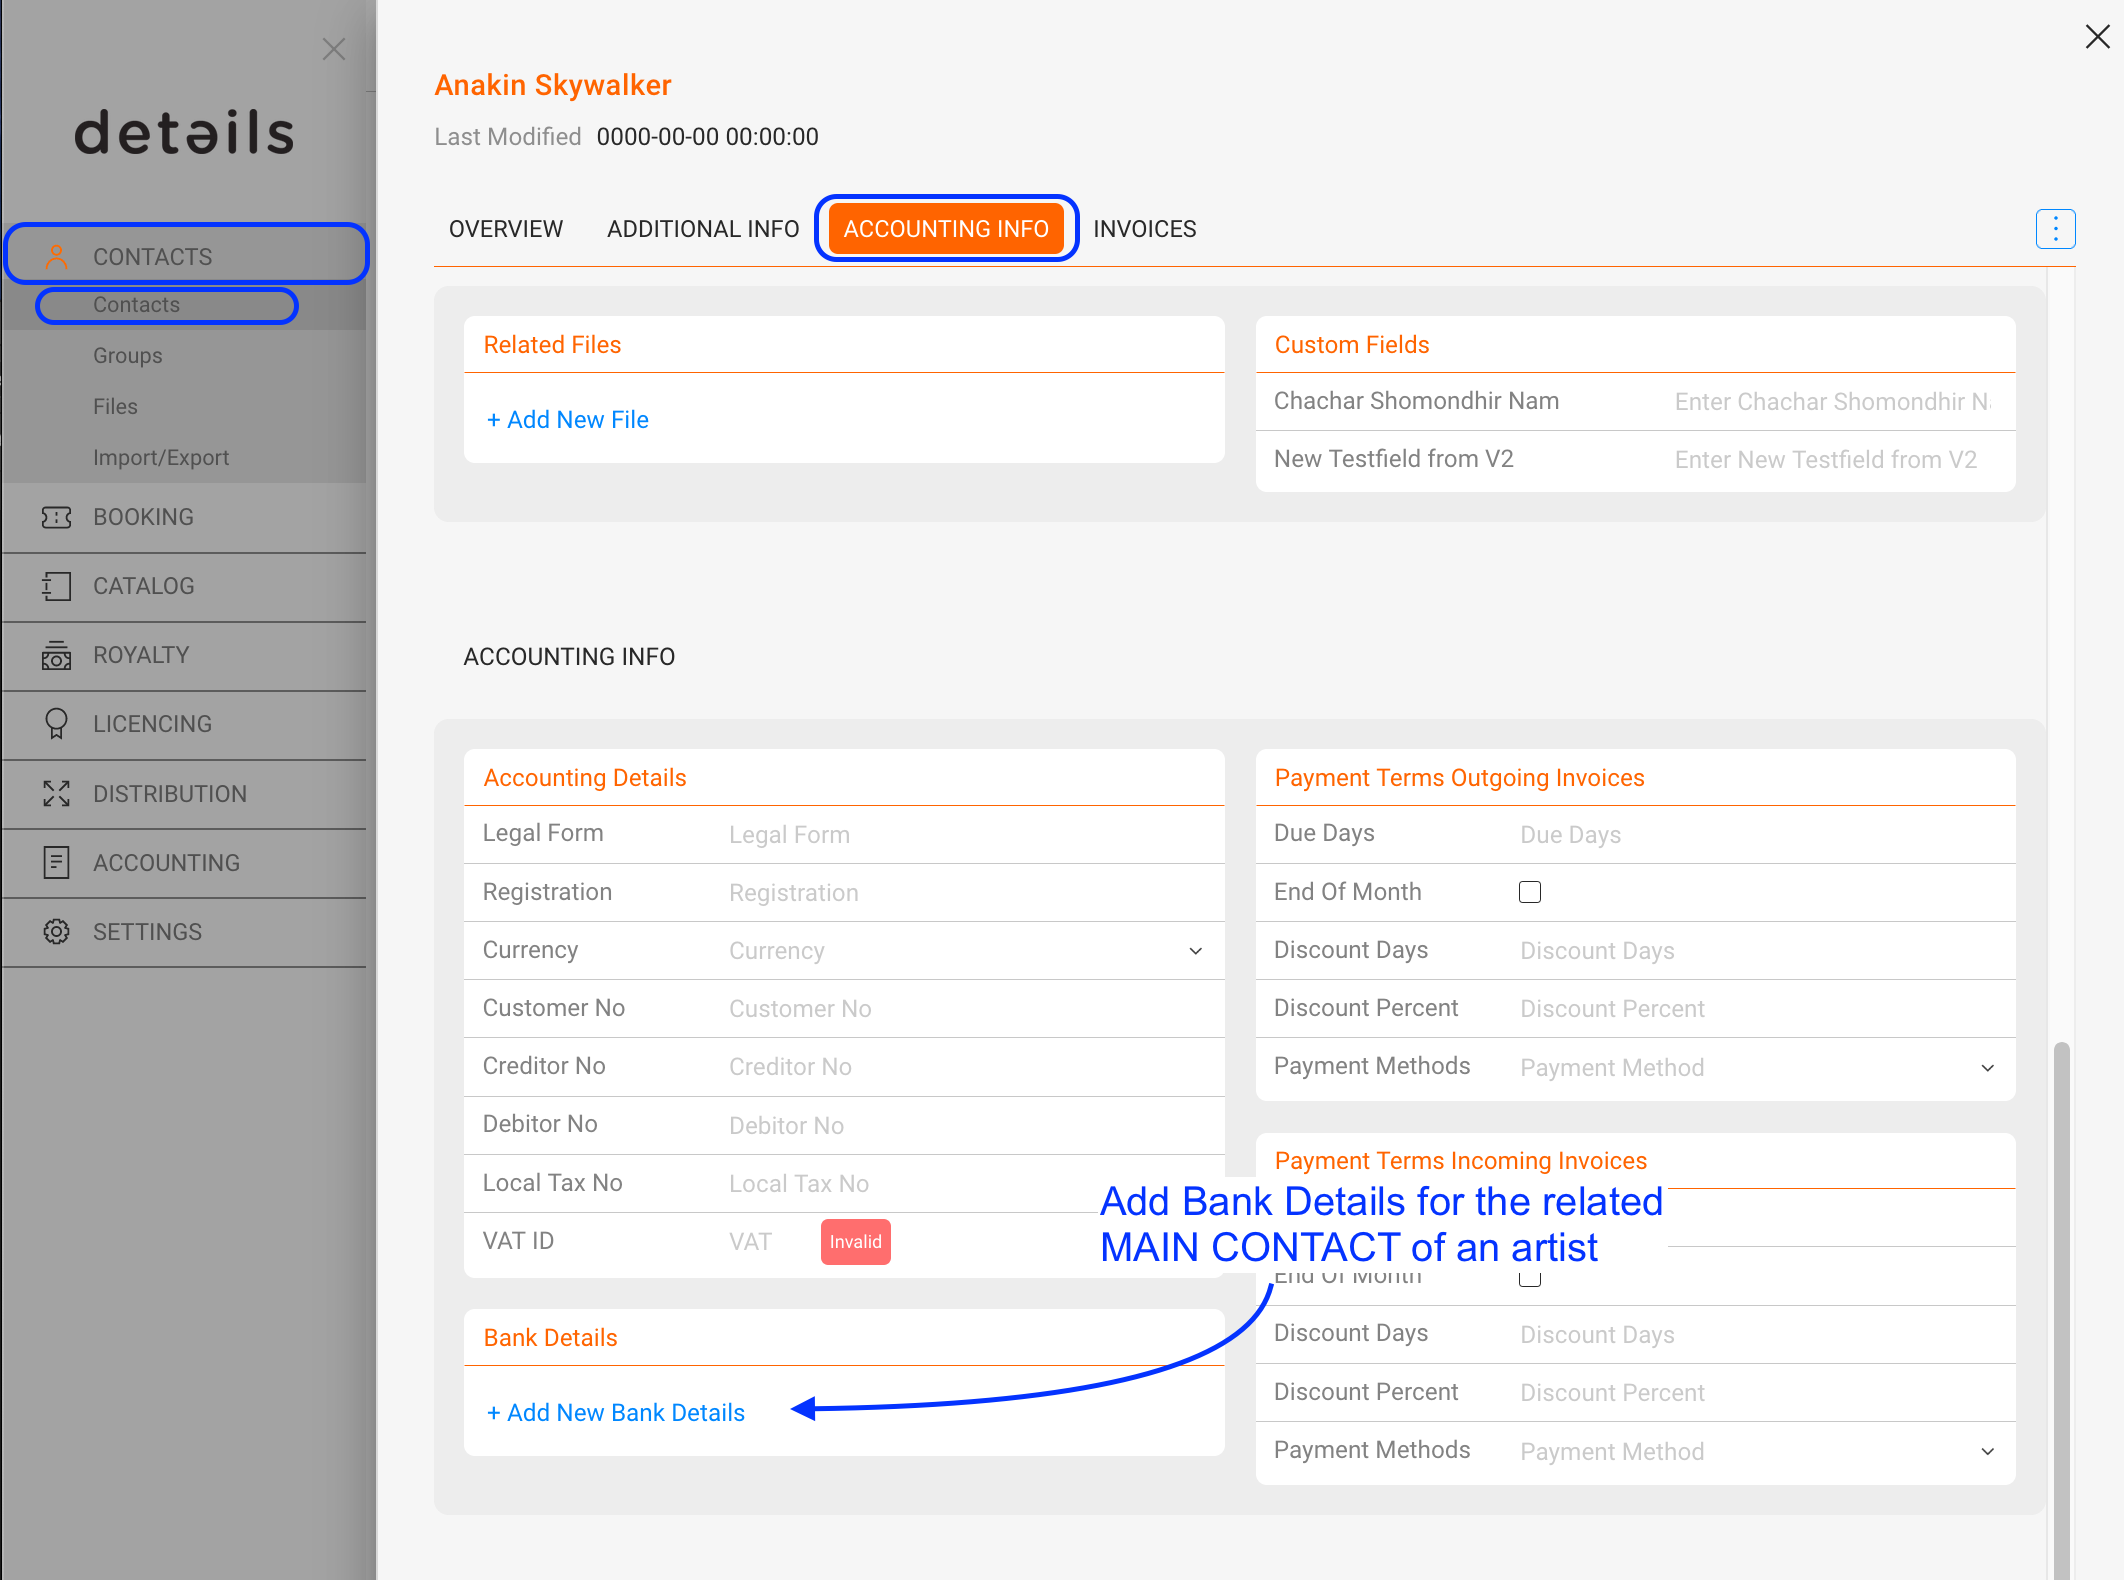
6) To add the ACCOUNTING INFO: click on the name of your main contact to open this contact, then select subtab Accounting Info and add bank details for this artist to appear in the contracts
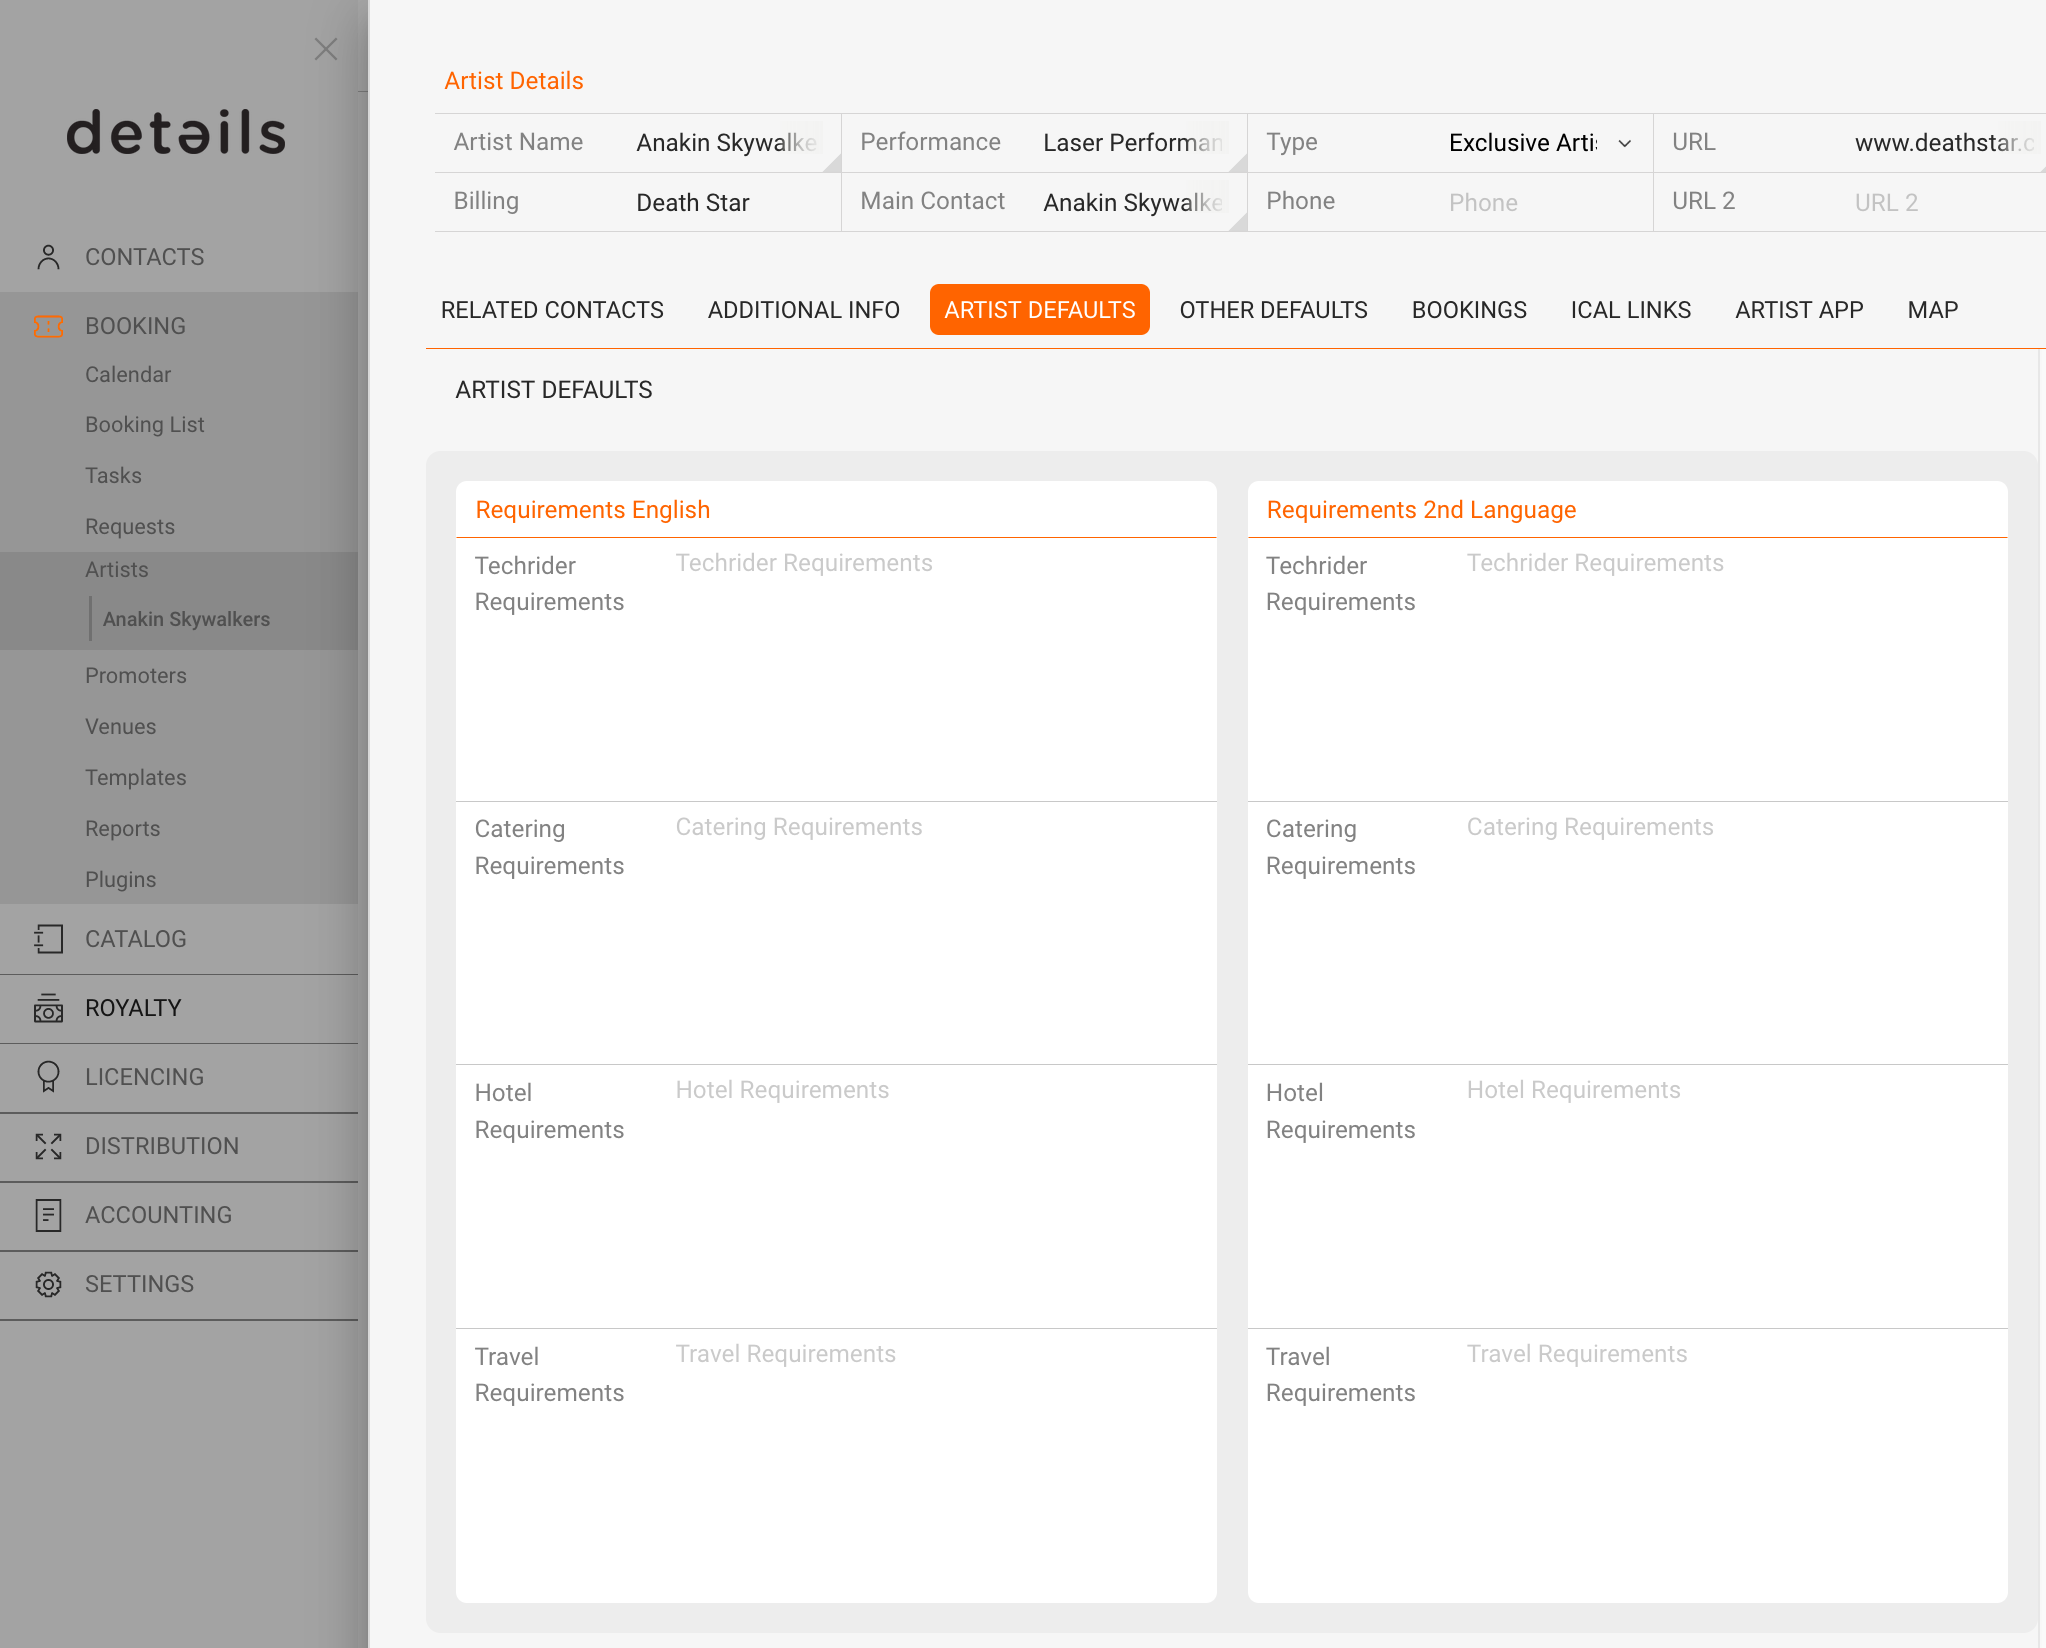
7) Then you can fill out the ARTIST DEFAULTS for Techriders, Catering, Hotel Requirements and Travel Requirements in both English and Spanish (2nd Language)