Table of contents
Merging releases is a smart way to clean up duplicates and unify your catalog.
Use this tool to combine two releases that refer to the same record but may differ in metadata, contract assignment, or track structure.
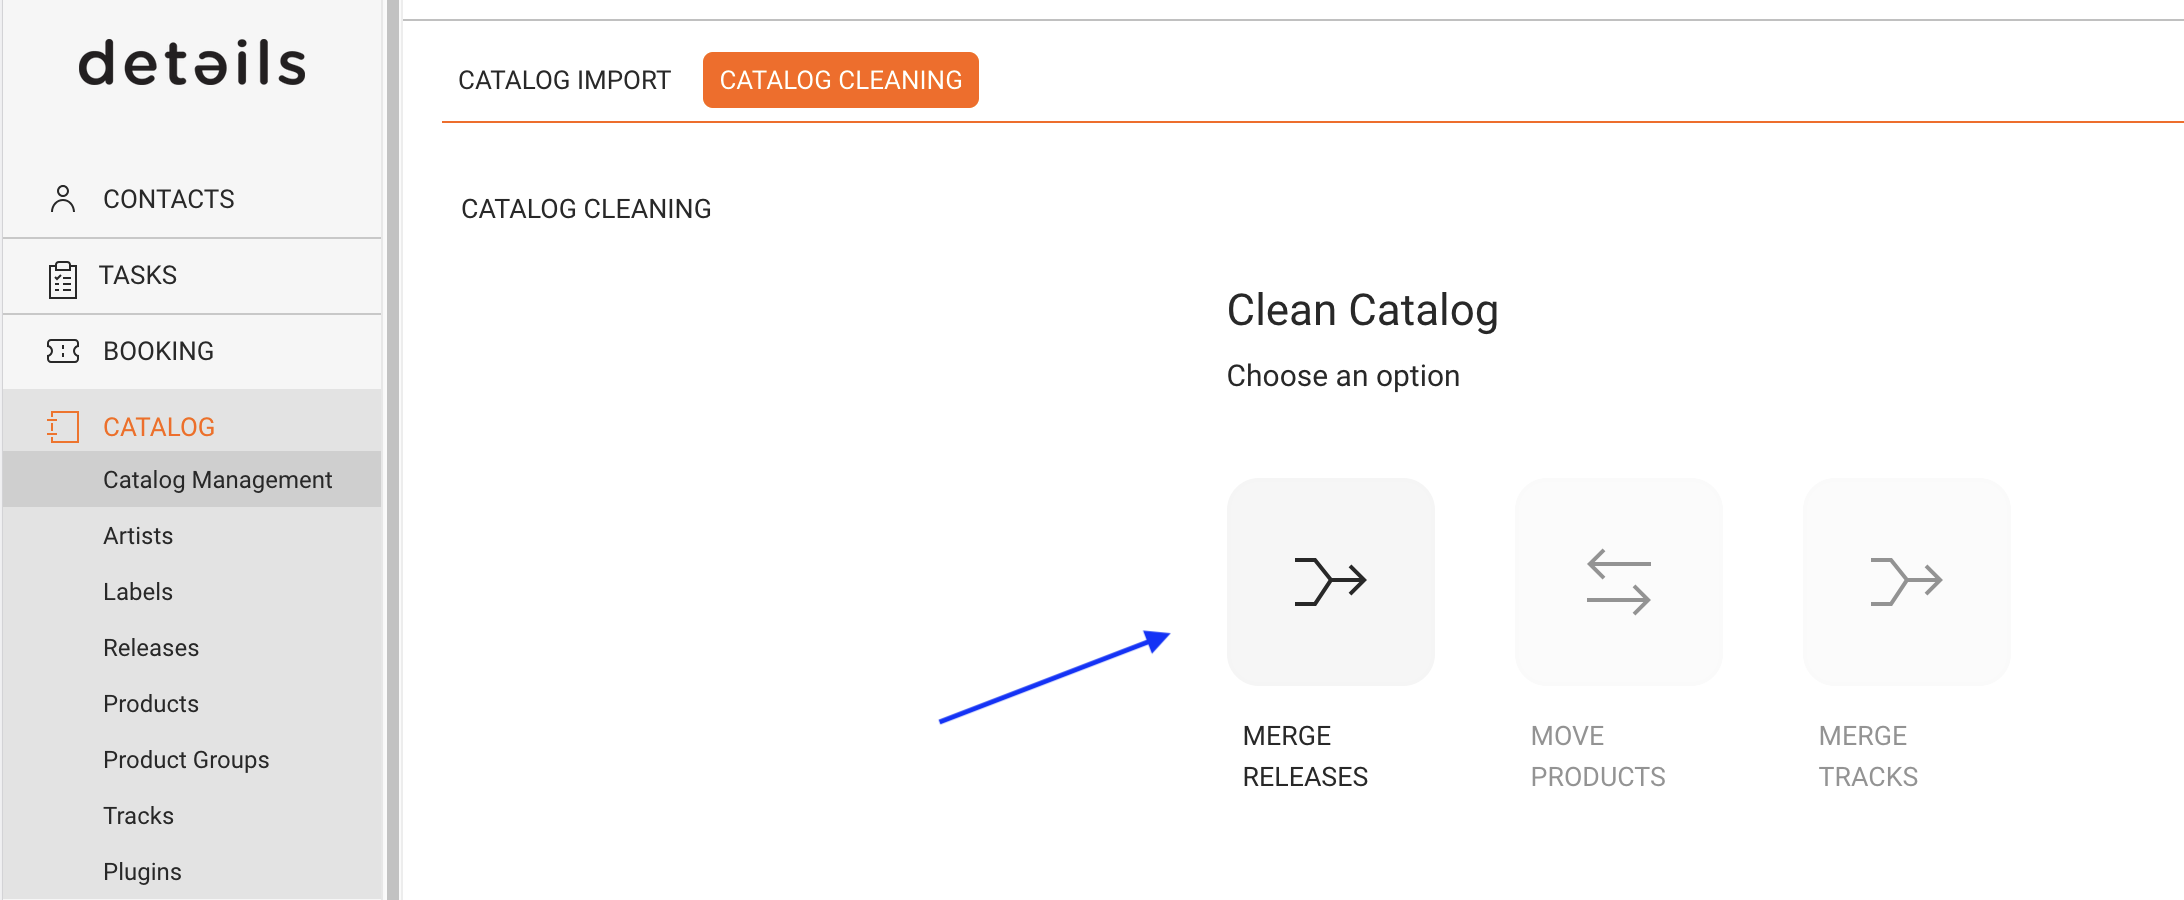
You’ll find the Merge Releases function in CATALOG MANAGEMENT / CLEAN CATALOG.
Step-by-Step Guide
1. Open the [MERGE RELEASES] Option
To begin, click [MERGE RELEASES]. A side window opens.
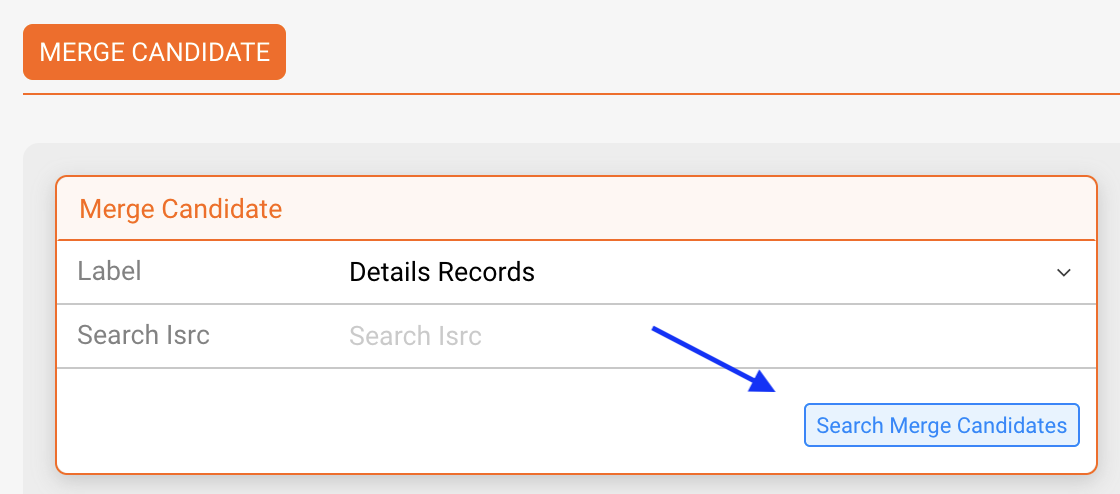
2. Search for Merge Candidates
To narrow down your results, either use the dropdown to select the label whose releases you want to check or enter an ISRC to find all releases containing a specific track. Then click [SEARCH MERGE CANDIDATES].
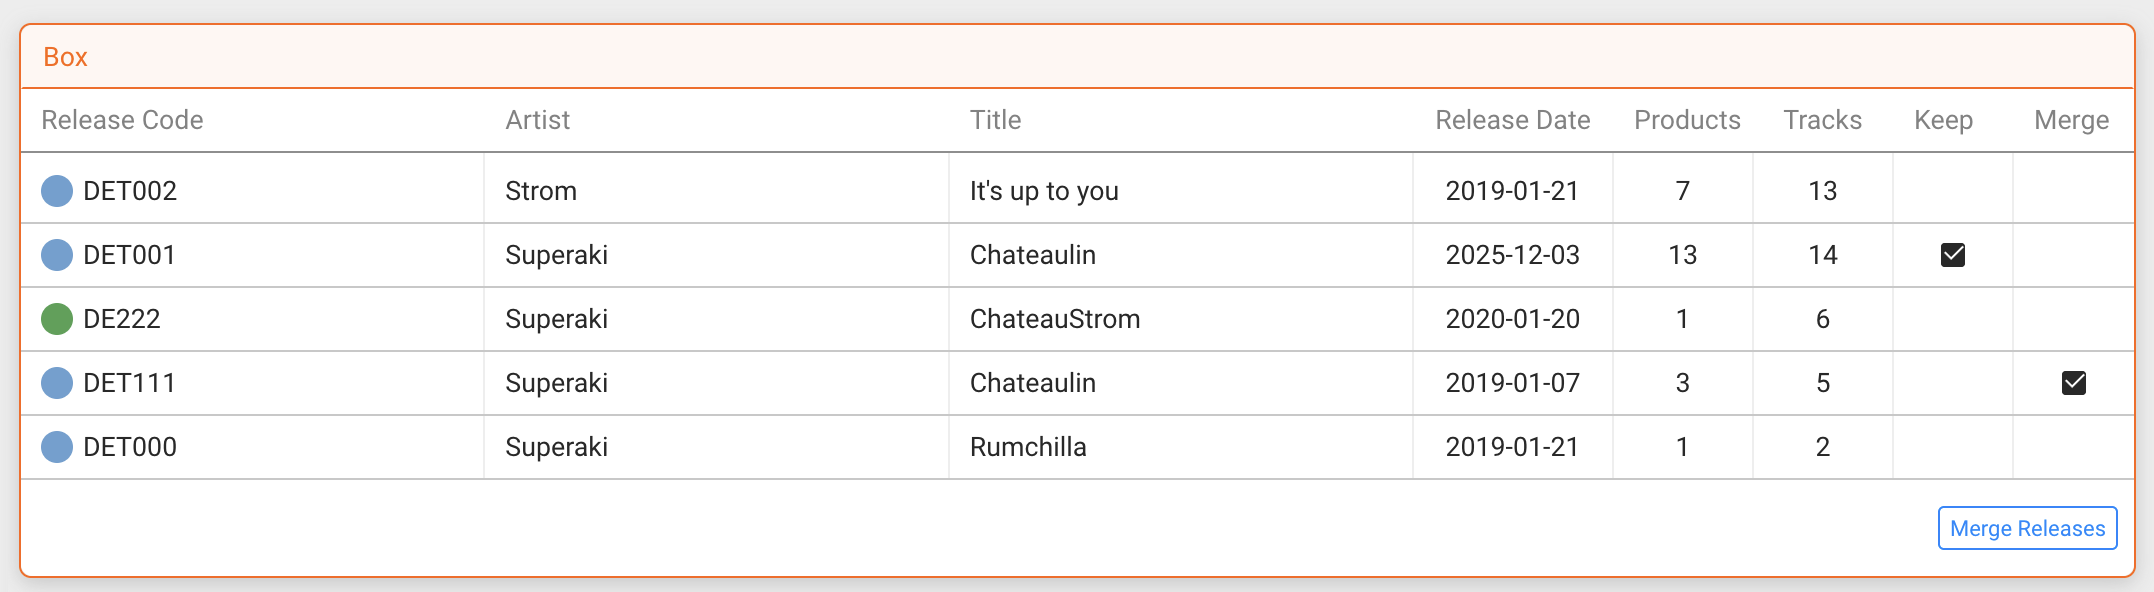
3. Choose Two Releases
When you click [SEARCH], details will show you a list of releases that could potentially be merged. From the results table, choose:
- one release to Keep
- one release to Merge into it
Use the radio buttons in each row to mark your choices.
4. Check for Conflicts
If the two selected releases have different contract settings, you’ll see a warning. Here you can either:
- click [CANCEL] to stop the process
- or click [SHOW CONFLICTS] to inspect what’s incompatible
5. Confirm the Merge
If there are no conflicts, a confirmation modal will appear showing both releases side by side:
- Left: the release you want to keep (green background)
- Right: the release to merge (red background)
Click [CONFIRM MERGE] to proceed.
Post-Merge Steps in Contracts
After merging, the system may prompt you to complete the process by handling missing contract data. Follow the modals that appear:
Modal 1: Add Tracks to Contracts
If new tracks were introduced, you’ll be asked to assign them to contracts. Click [ADD TO CONTRACT] to complete this step, or [CANCEL] to abort.
Modal 2: Add Products to Contracts
If product-level data is missing, the system will show a list of items needing updates. Review and click [ADD TO CONTRACT].
Modal 3: Final Check
If needed, you’ll see a list of tracks without contract assignments. This is only for your reference. Click [OK] to close the modal.
Done!
Your selected releases have now been merged. All tracks, products, and metadata from the merged release have been moved to the kept release. You can now manage this unified release as usual.
Notes & Tips
- Merges are permanent. Be sure to review all data before confirming.
- If you need to stop at any point, use [CANCEL]. Partial changes may or may not be saved depending on the step.
- This process works similarly to imports. Each step is modular and confirms your input before proceeding.
Let us know if you encounter errors or unexpected behaviors. Our support team is happy to assist.