Table of contents
In details, not every product represents a musical release. Labels and companies often need to manage services, promotions, or manufacturing jobs they provide alongside traditional music products. To keep your catalog structured, it is best practice to group your service offers under dedicated container releases.
Why use a container release?
Products can never exist independently; they must always belong to a Release. If you add services or non-musical products without structuring them, they will mix with your artist releases, making cost tracking and royalty handling confusing.
By creating a dedicated release (e.g. Services, Manufacturing, Promo Packages), you create a clear container under which you can add each service or job you provide as a product.
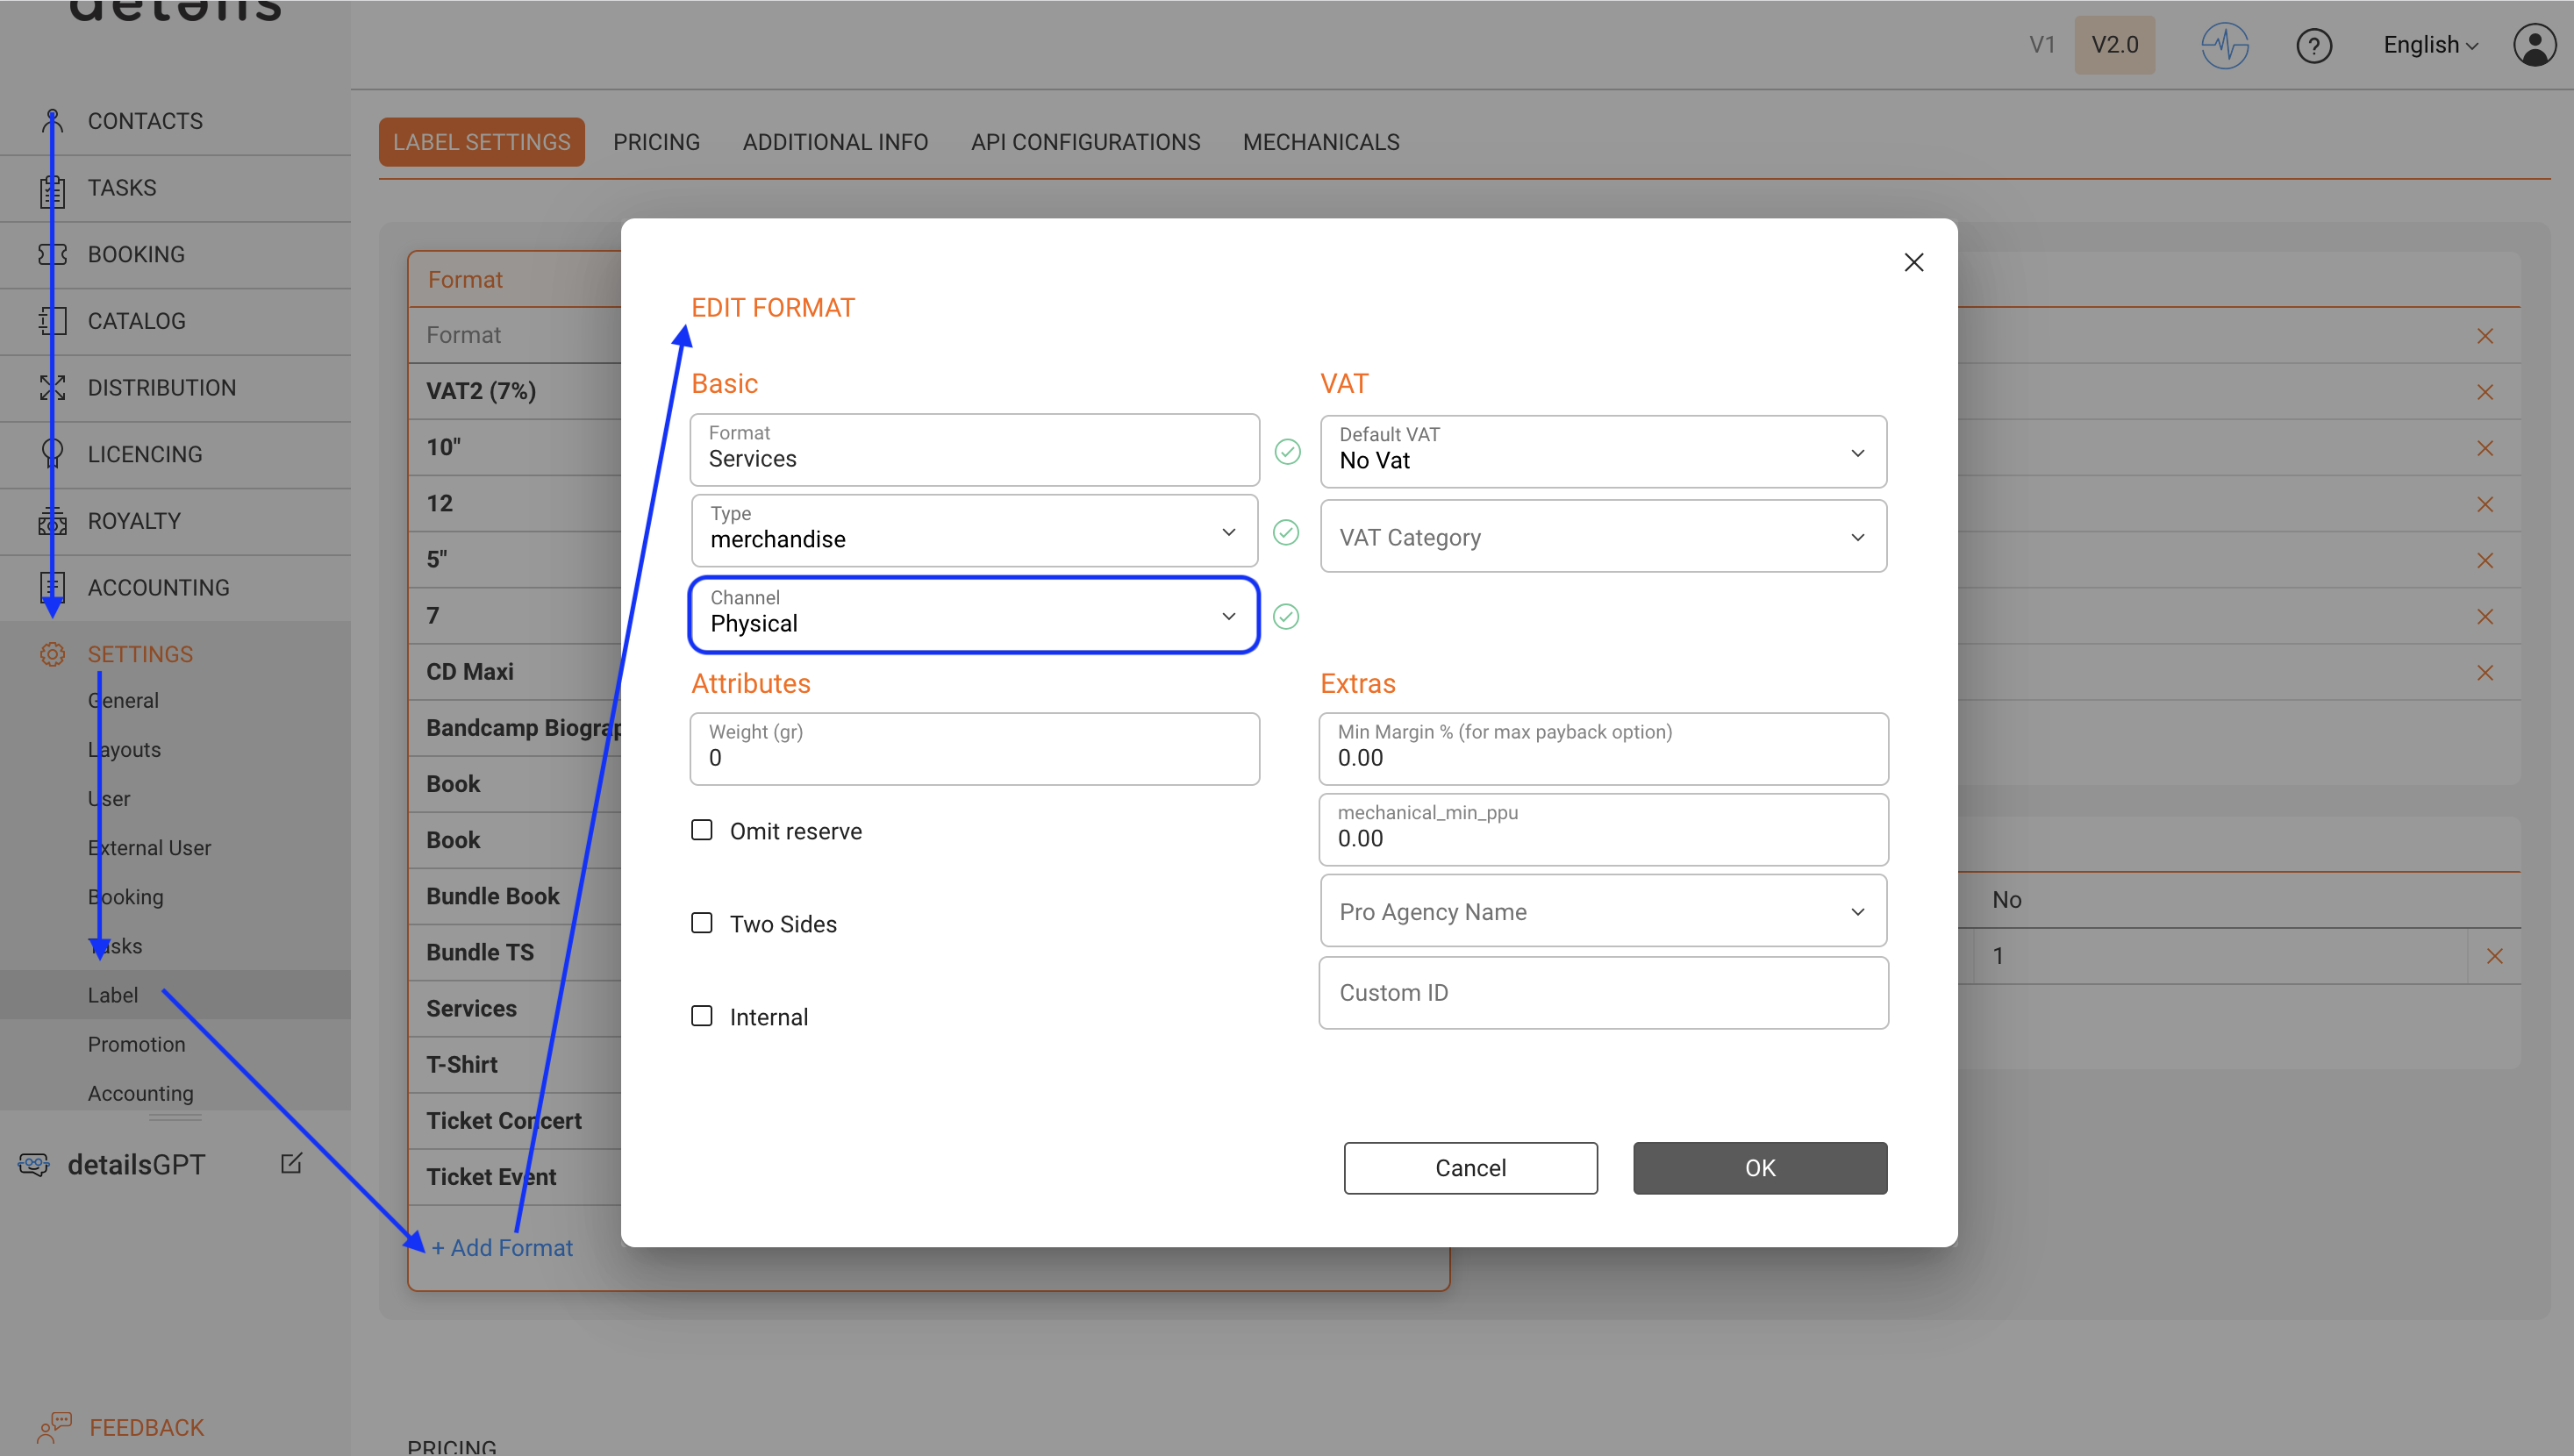
Step 0: Define Format in Settings
- Go to SETTINGS / LABEL.
- Create clear, consistent formats that help with filtering and reporting. Give them descriptive titles such as Services, Promo Packages, or Manufacturing.
- The type is not very relevant. It is best to use a less musical option, for example merchandise.
- For Channel, use Physical so you can create invoices from these products later on.
- Add more information in the fields if generally applicable for the format.
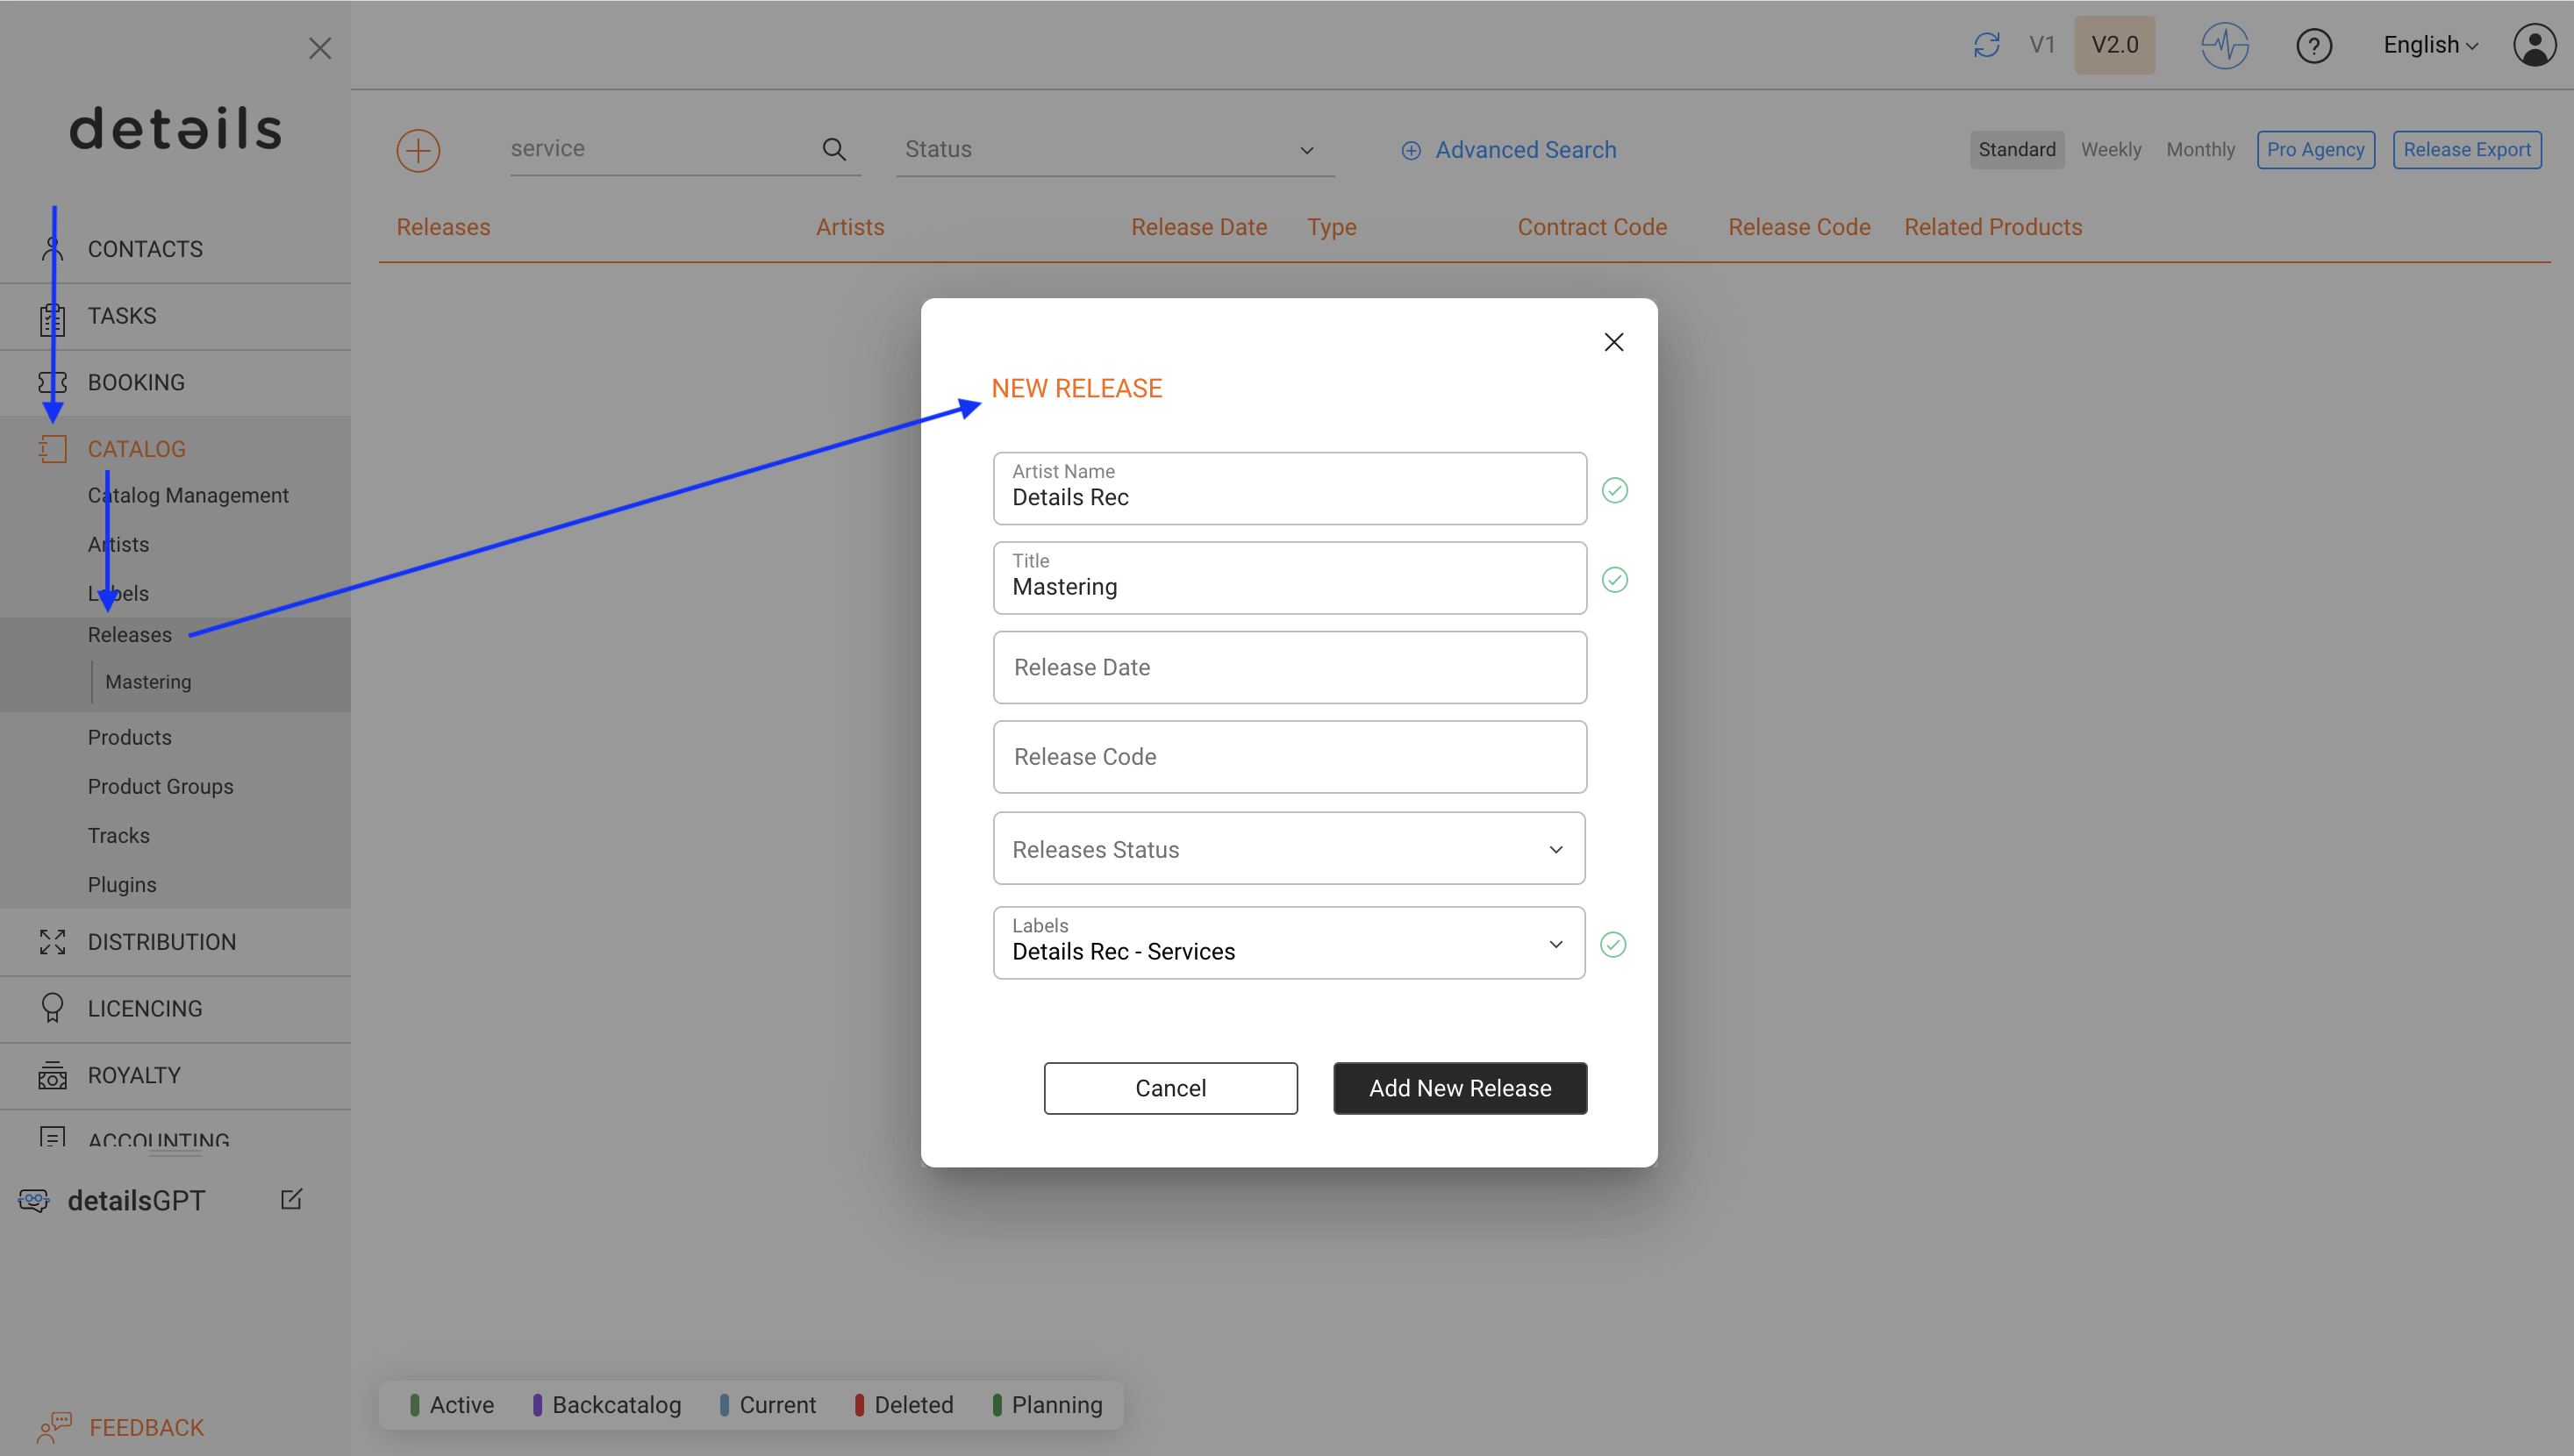
Step 1: Create a container release
- Go to CATALOG / RELEASES.
- Create a new release and give it a descriptive title such as Services, Promo Packages, or Manufacturing.
- Use your Label or company name as the artist to keep it consistent.
- Choose your Label or create a designated “Service Label” to evaluate business performance separately from other revenue streams.
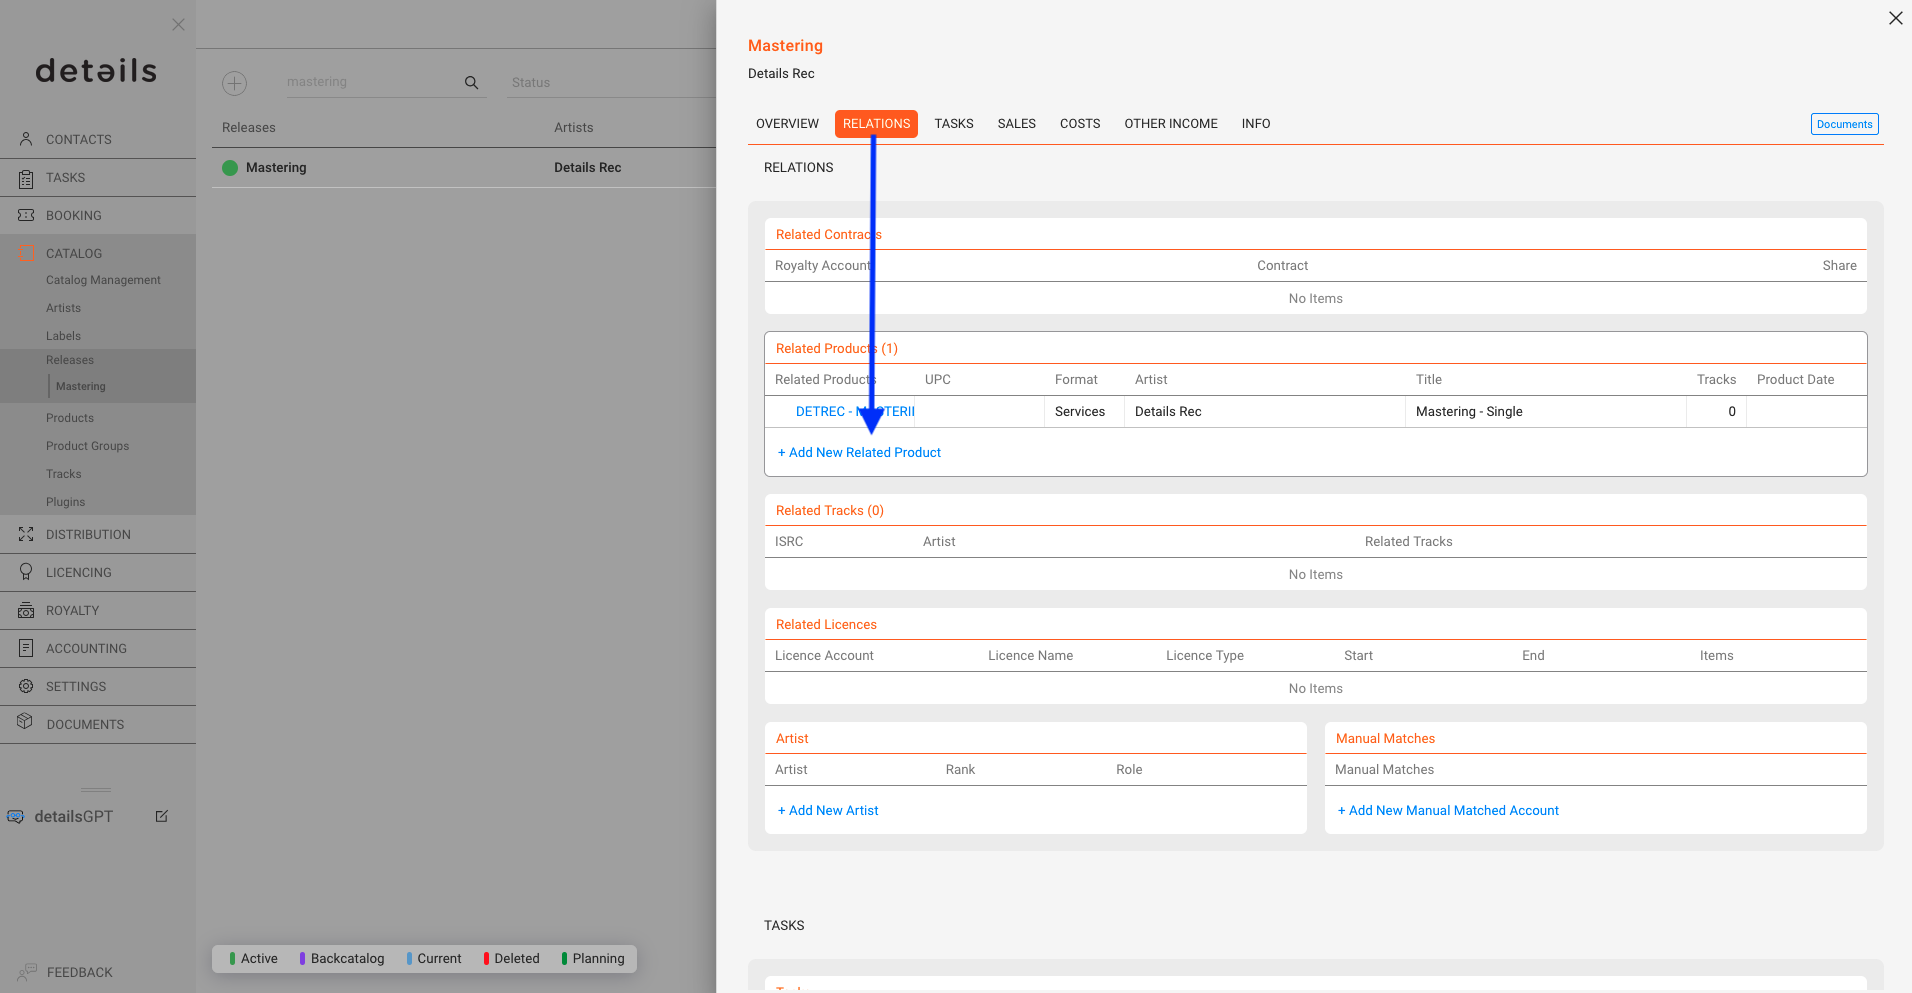
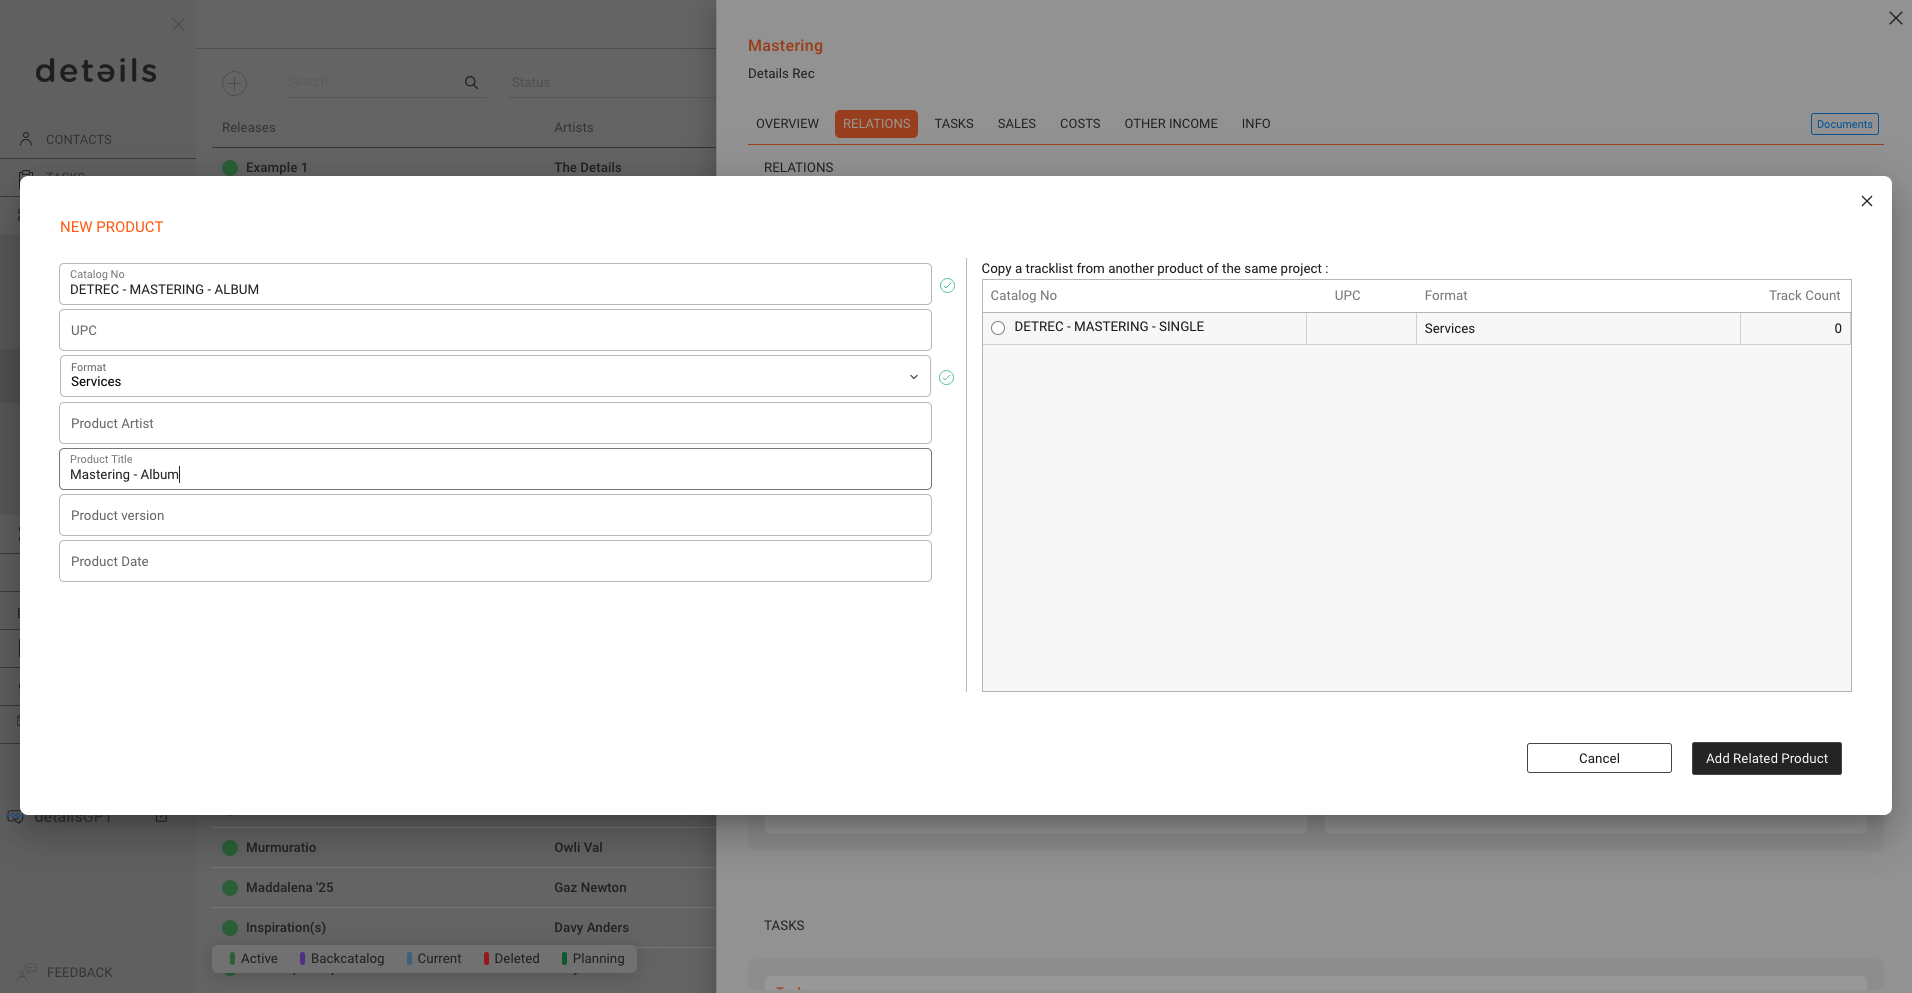
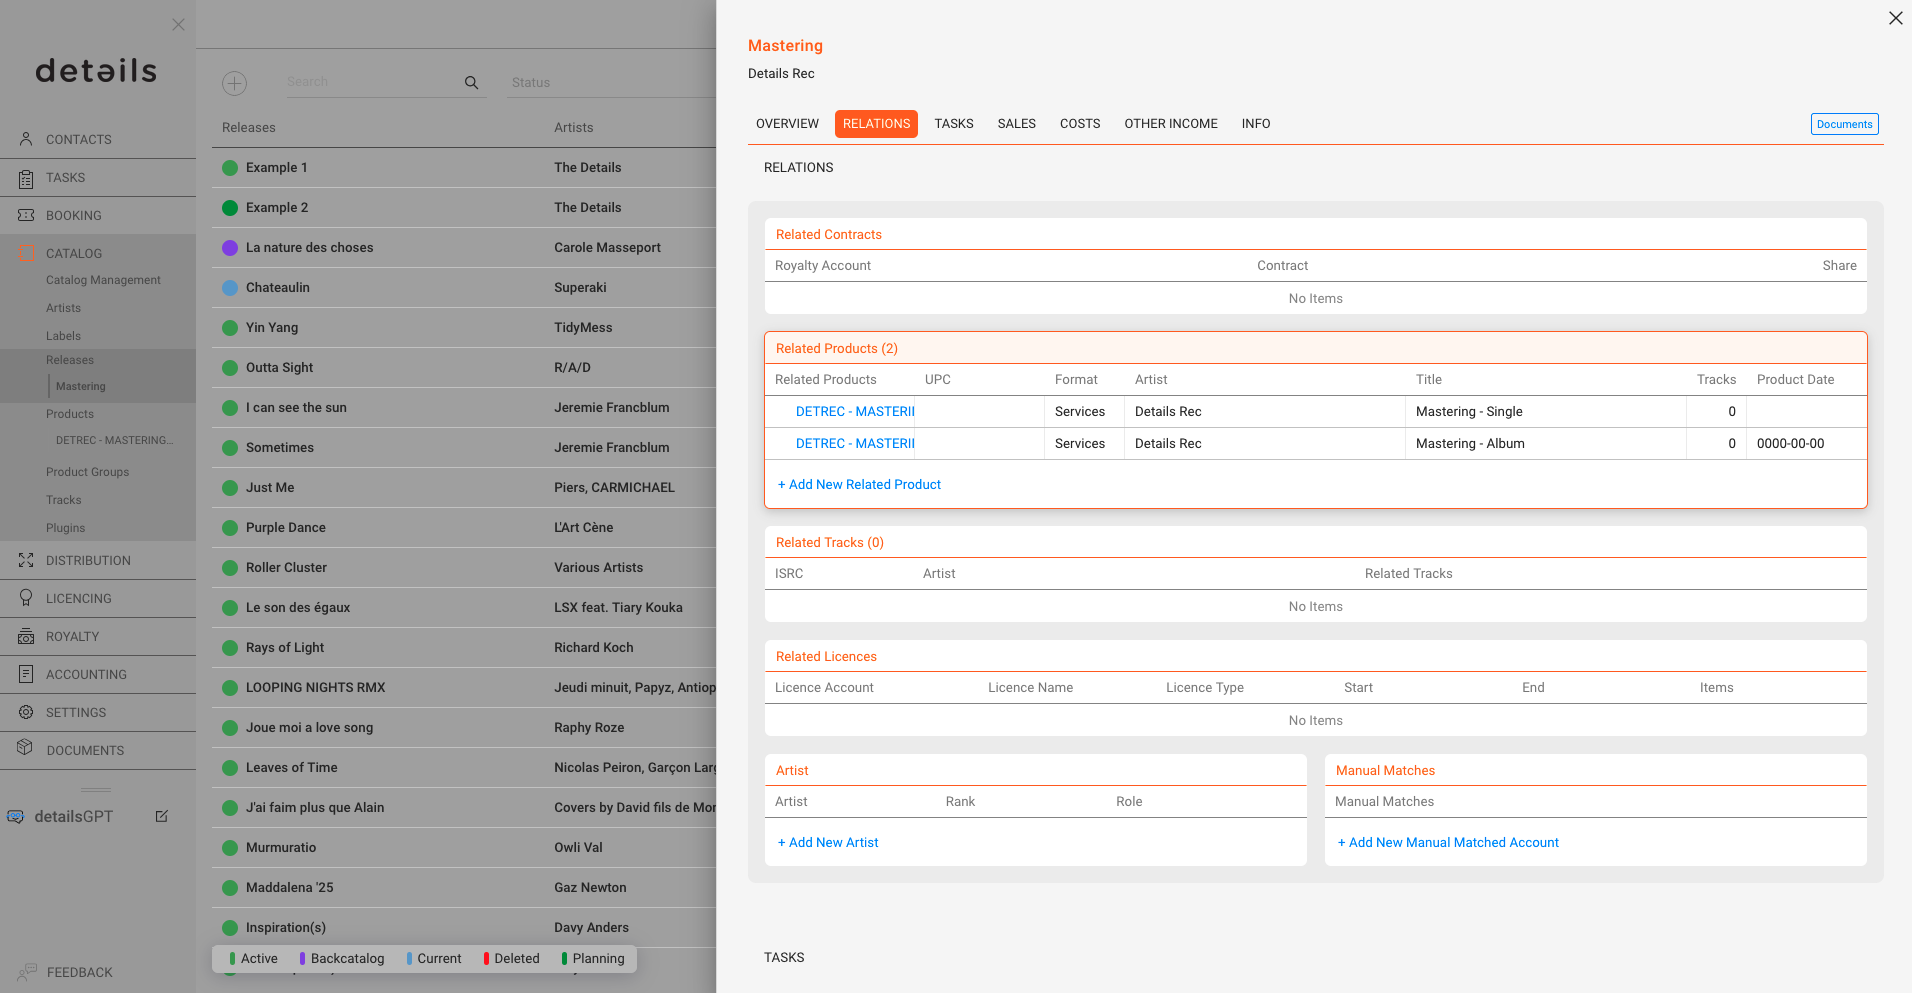
Step 2: Add service products under this release
Within the container release, go to RELATIONS / PRODUCTS and add products such as:
- Mastering Single (Format: SERVICE)
- CD Digifile 500 Units (Format: MANUFACTURING)
- Digital Distribution EP (Format: SERVICE)
- Social Media Campaign (Format: PROMOTION)
How to use non-musical products in orders
Once you have set up container releases and added your non-musical products, they can be used as order items to create invoices or offers.
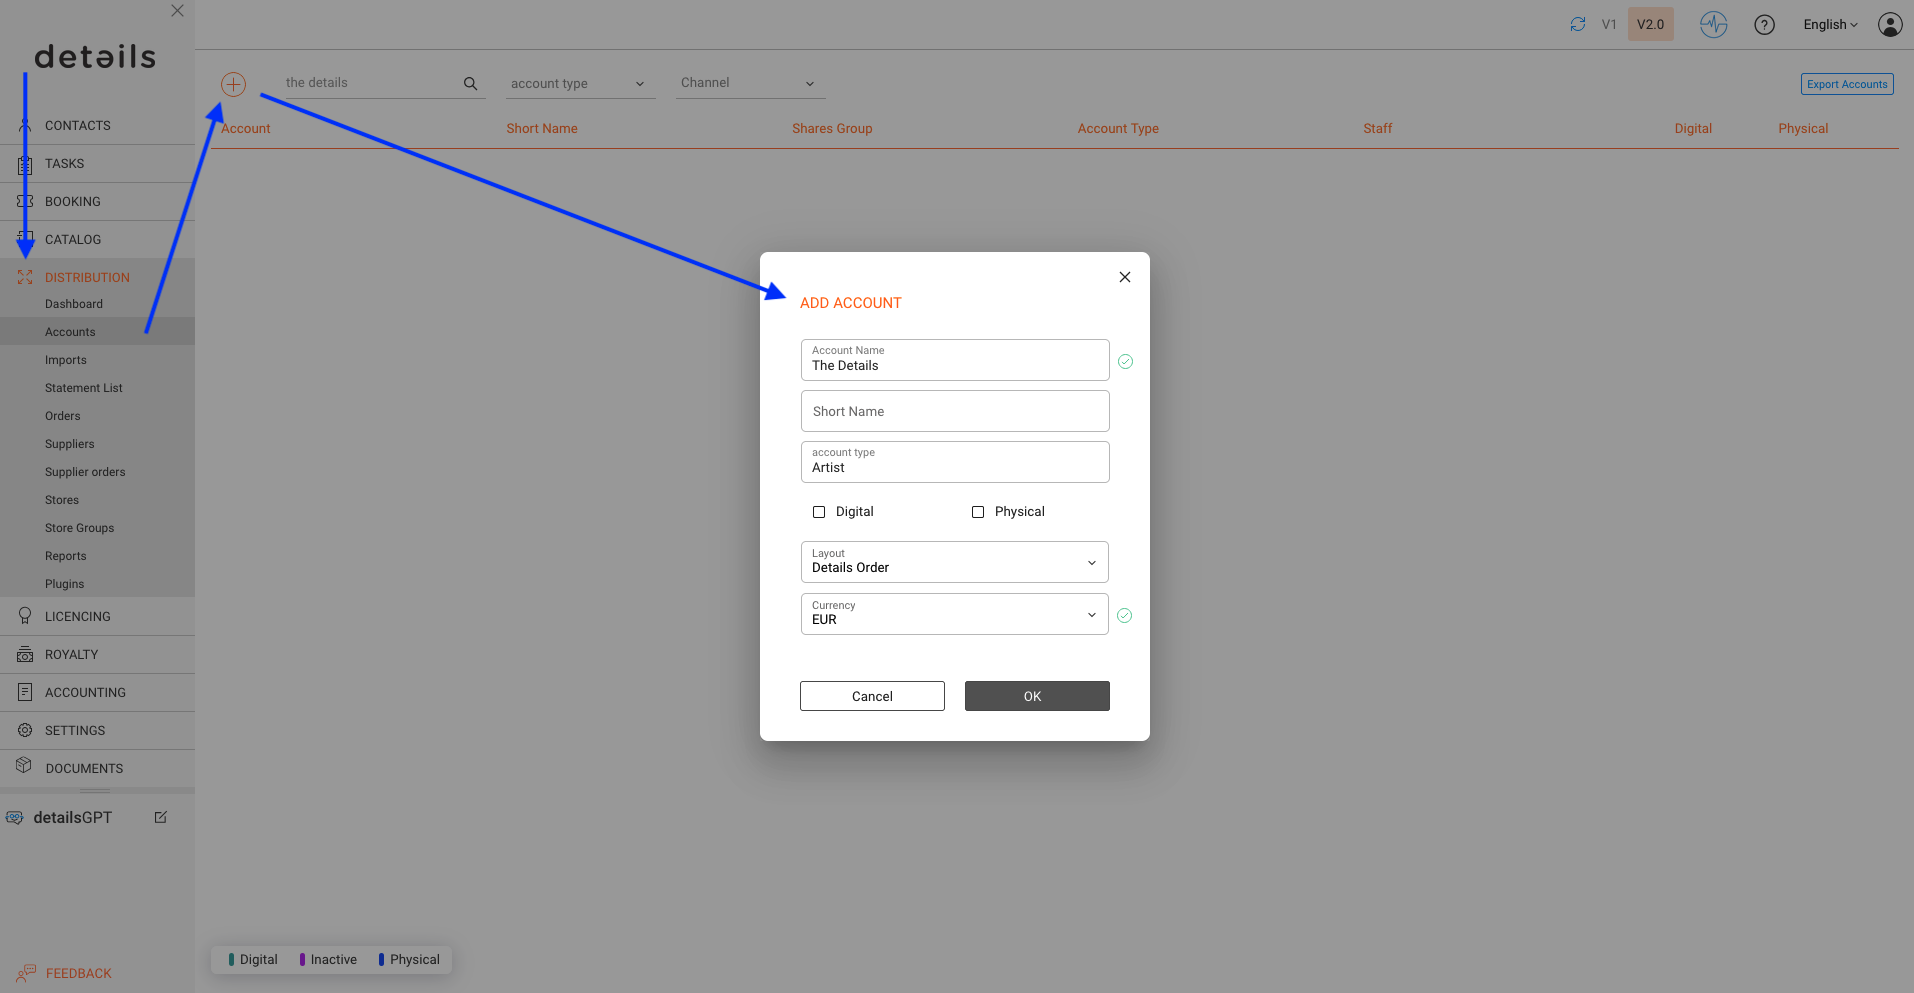
Step 1: Create an Order Account
- Go to DISTRIBUTION / ACCOUNTS and set up an order account for the client you want to bill by clicking the [+]. This is required so that invoices can be issued in their name.
- Connect the account to an Invoice Contact. You may need to create this contact first in the contact database.
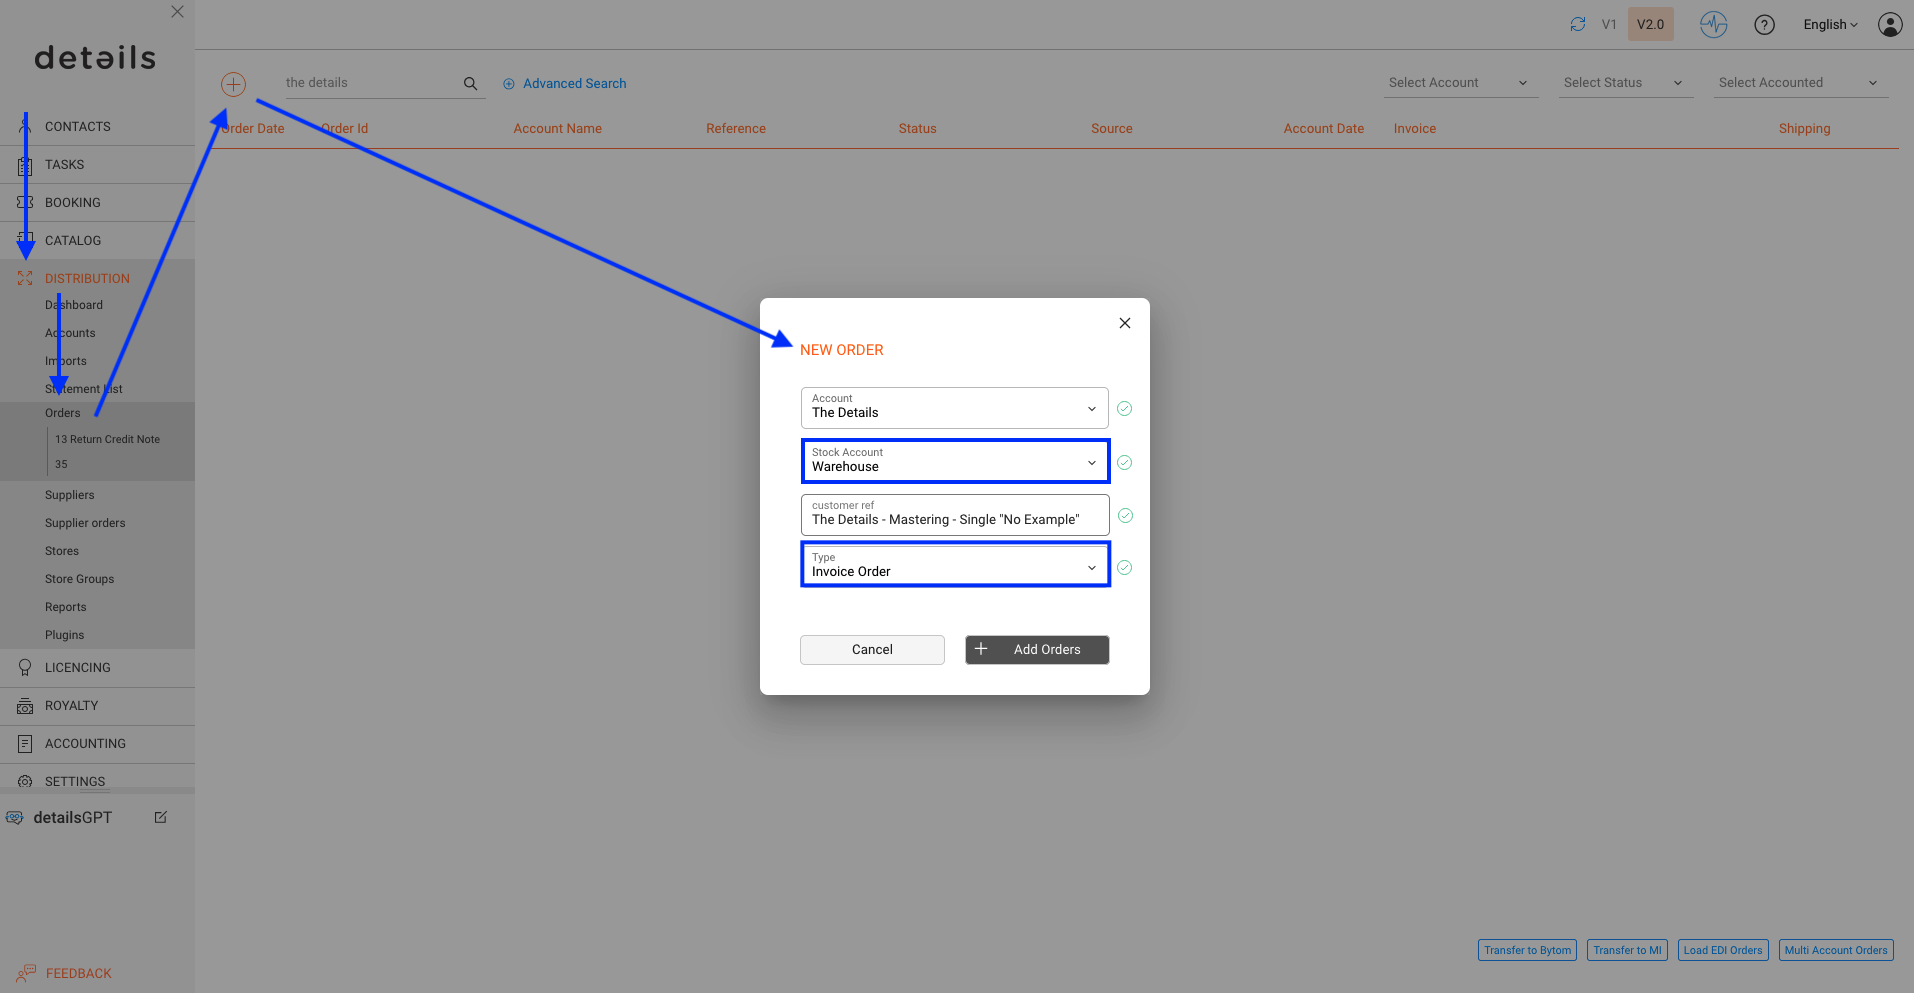
Step 2: Create a new Order
You can create a new order in two ways:
- Go to DISTRIBUTION / ORDERS and click on the [+].
- Or create an order from the Distribution Account in the Orders section.
Choose Invoice Order as the type if you want to generate a client invoice.
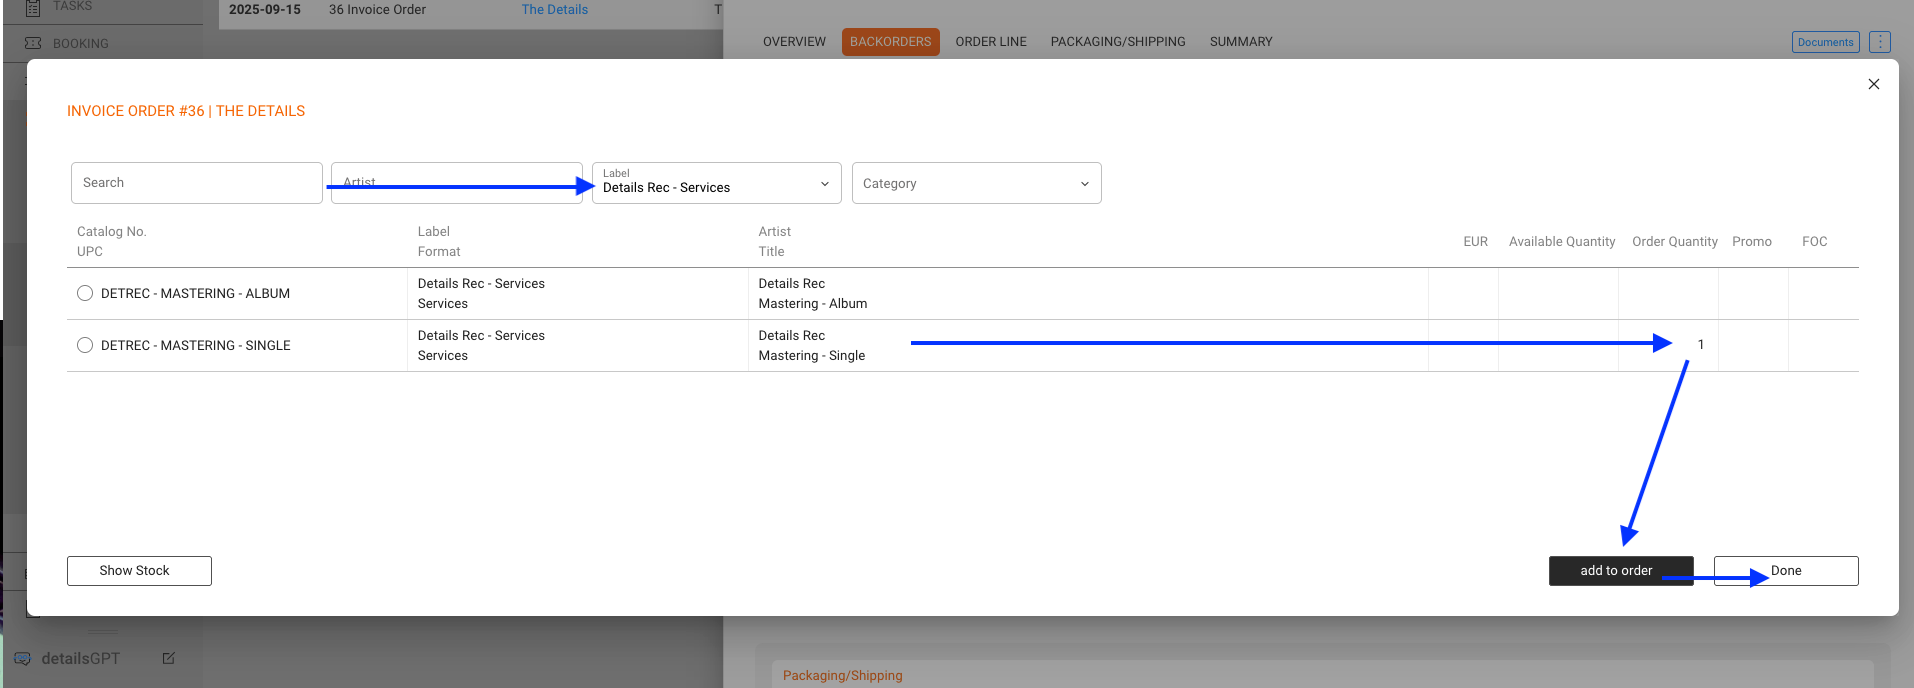
Step 3: Add Orderlines from the Container Release
Add new order lines and choose the relevant Products from your container release (for example Mastering, Pressing, Distribution, Promotions). These predefined products keep your invoicing structured and standardized.
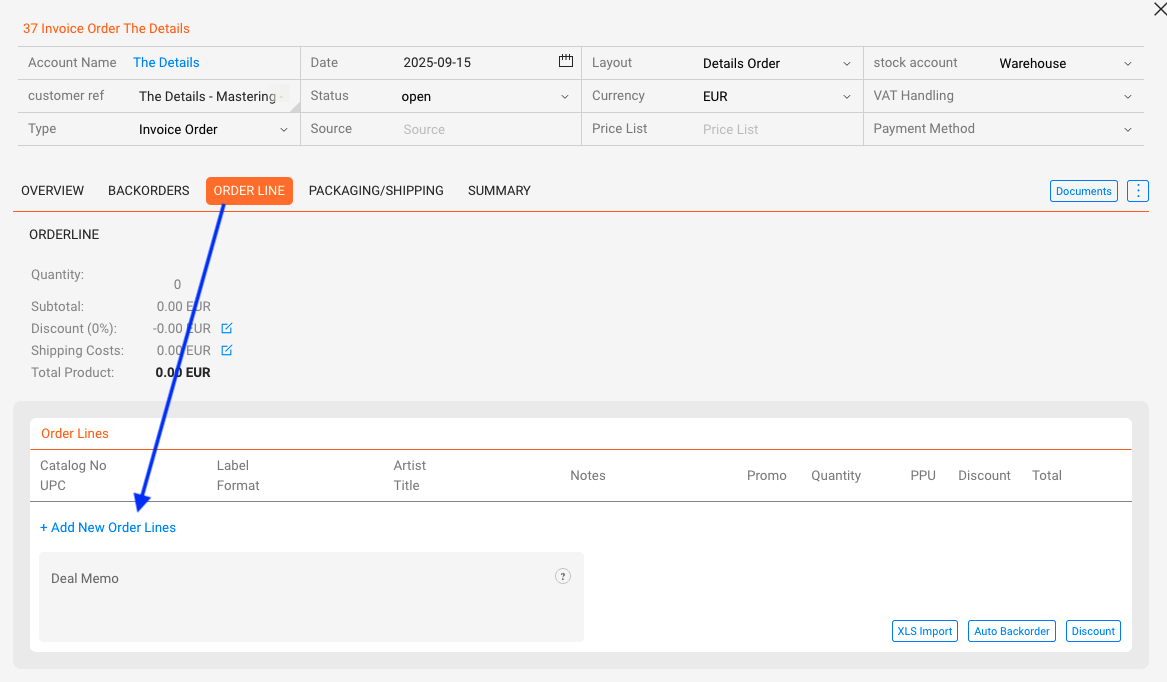
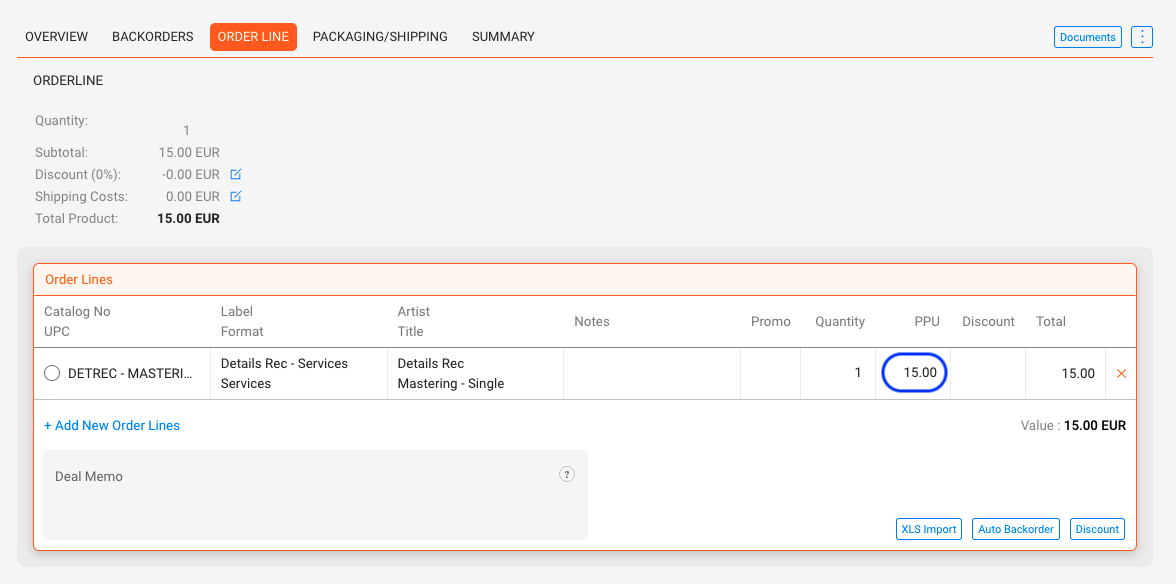
Step 4: Define Pricing
If a product already has a Price Code set, the price will autofill. Otherwise, enter the correct price manually, for example per track for mastering or per unit for pressings.
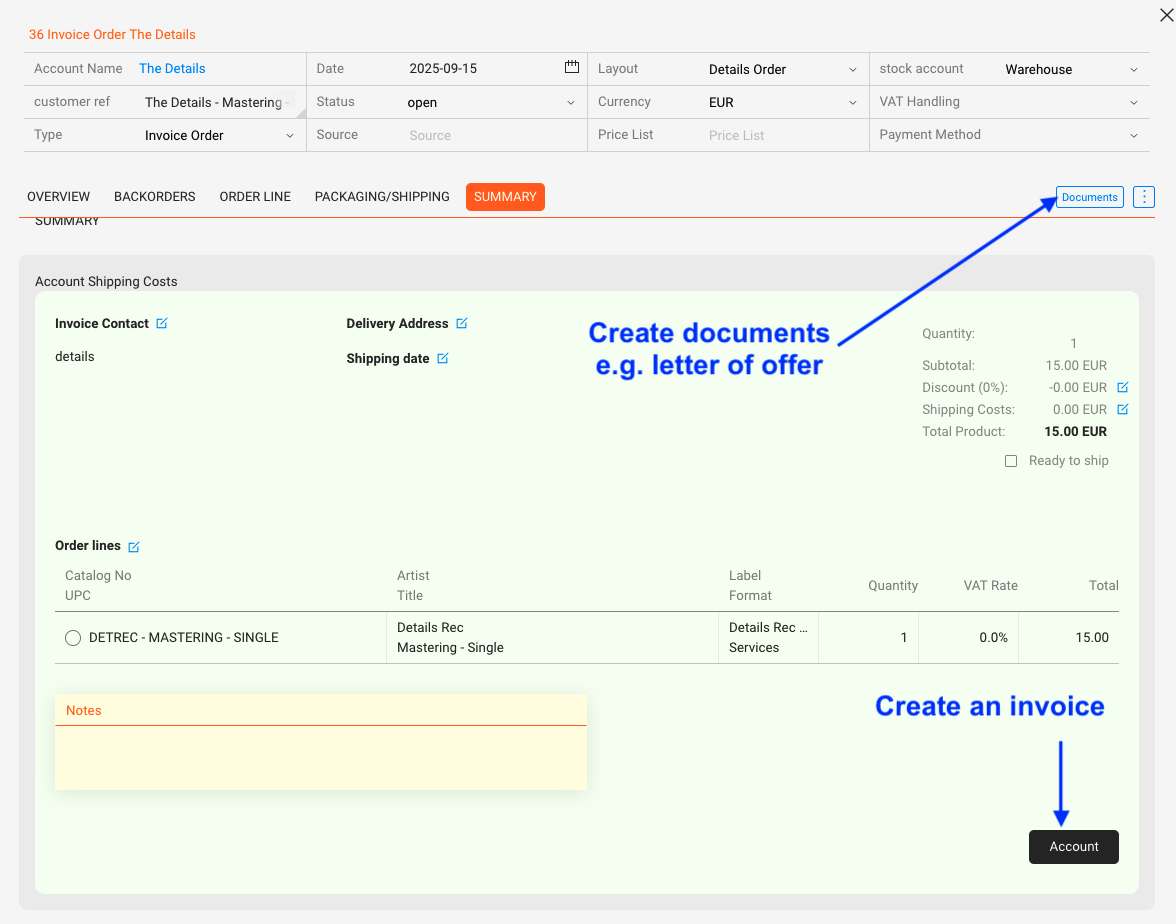
Step 5: Generate Documents and Invoice
- You can create offer proposals via a template in [Documents]. If you need a template for this, please contact the details team.
- To finalize the order in the system, account.
- Then you can generate and send the invoice to the client.
Best practices
- Keep container releases general, for example one Services release, rather than creating a new release for every job.
- Use clear, short product titles so service items are instantly recognizable.
- Define formats consistently. Do not mix SERVICE and PROMOTION formats if they mean the same thing.