Table of contents
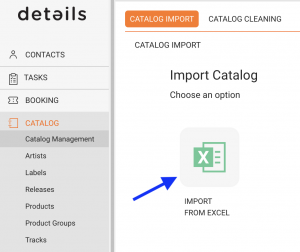
You can import digital and physical releases using standardized Excel templates directly from the Catalog Management section under CATALOG IMPORT.
This is the classic way to bring your repertoire into details, whether you are working with albums, singles, vinyl products, or merchandise.
Step 1 Prepare Your Excel File
Start by downloading one of our pre-formatted templates from the CATALOG IMPORT section:
- Label Standard Upload – Digital and physical with tracklists
- Minimal Upload – Only mandatory fields
- Physical Products Upload – No tracklists
If you use your own Excel file, the column headers must match our templates exactly.
Each template has three color-coded sections:
- Pink – Release-level info
- Orange – Product-level info
- Blue – Track-level info
Fields with bold headers are mandatory.
For physical products without tracklists, skip the Blue section.
We strongly recommend using a unique Release Code for each release.
Step 2 Fill in the Template Sections
Fill in all relevant fields according to template structure:
- Pink (Release Info)
- Orange (Product Info)
- Blue (Track Info)
Make sure all required fields are completed correctly.
Step 3 Double-Check Before Upload
Before importing, make sure:
- All mandatory fields are filled
- Formats match your system settings
- Release Codes are consistent
Important: Remove the explanation row before uploading.
Step 4 Upload Your Excel File
Click the [Upload] button and select your file.
- Validate Labels
- Validate Formats
- Preview Products
- Preview Tracks
Confirm with [Process] to finalize.
Step 5 Review and Finalize
After import, review your catalog and make adjustments if needed.
Common Mistakes to Avoid
- Missing mandatory fields
- Duplicate formats without unique identifiers
- Wrong date format (use YYYY-MM-DD)
- Using commas instead of semicolons
- Incorrect column headers