To create a new product format, go to LABEL / SETTINGS. Here you can add, edit, and remove all formats you need for your label.
To add a new format, click on [+ Add Format] at the end of the format list.
Enter the format name and configure its attributes. These include:
- Channel: Physical or Digital. Determines applicable royalty rules and product display.
- Type: Single, EP, Album, etc., for classification.
- VAT Type: Full rate (VAT1), reduced rate (VAT2), or no VAT (NoVAT).
- Weight: Default shipping weight for logistics calculations.
- Omit Reserve: Skip physical return reserves for this format.
- Other Attributes: Two Sides, Internal, and advanced fields like Minimum Margin or Mechanical Min PPU if applicable.
When ready, click [OK] to confirm.
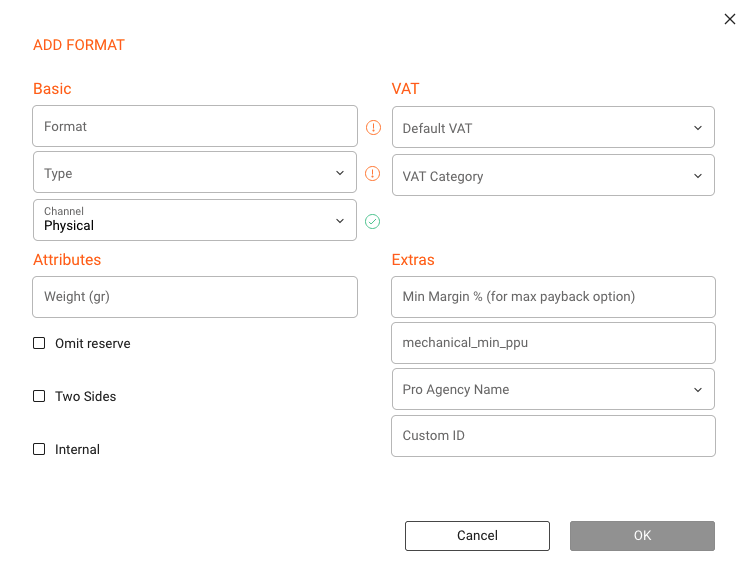
Important: Select the correct CHANNEL (Physical or Digital) when creating the format. This setting affects royalty rules and product display. Do not change it once the format is in use, as it can disrupt accounting and reporting.
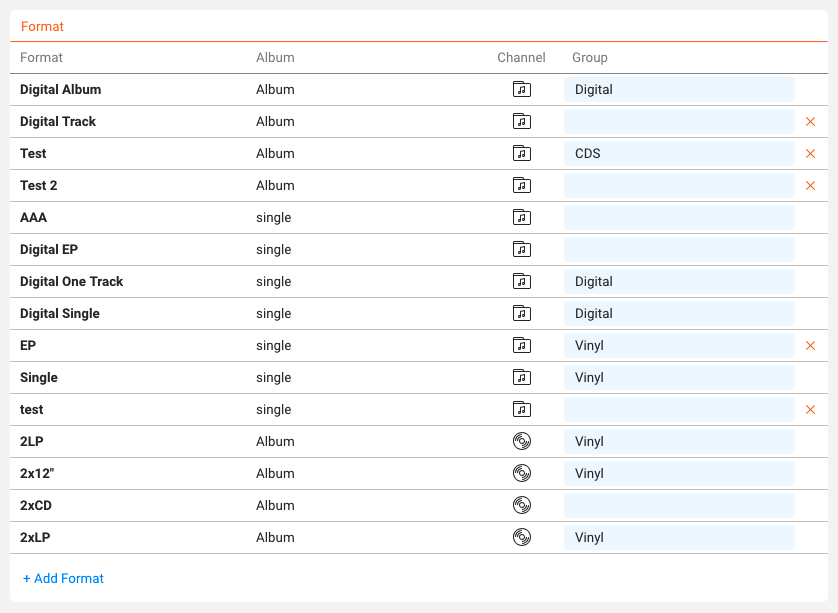
Editing & Deleting Formats
To edit an existing format, click on its title in the list. To delete a format, click the [x] icon. You can only delete formats that are not currently in use by any products. If a format is in use, move those products to another format (keeping the same channel) before deletion.
Assigning Formats to Products
Once created, formats can be assigned to products in CATALOG / PRODUCTS.
Best Practices
- Decide early whether a product is Physical or Digital and stick with it.
- Keep formats simple only create as many as needed for pricing, logistics, and reporting.
- Use Omit Reserve for formats with low return risk (e.g., tickets, limited editions).
- Set accurate VAT and weight defaults to reduce errors; override per product only when needed.
- Use advanced fields like Minimum Margin or Mechanical Min PPU only when required by contracts.