Table of contents
Here’s how you can create and manage a Release in details, step by step. This guide shows you what to click and where to enter data.
Use these instructions whenever you’re setting up a new release or updating an existing one. Every step below corresponds to a specific tab or function in the interface.
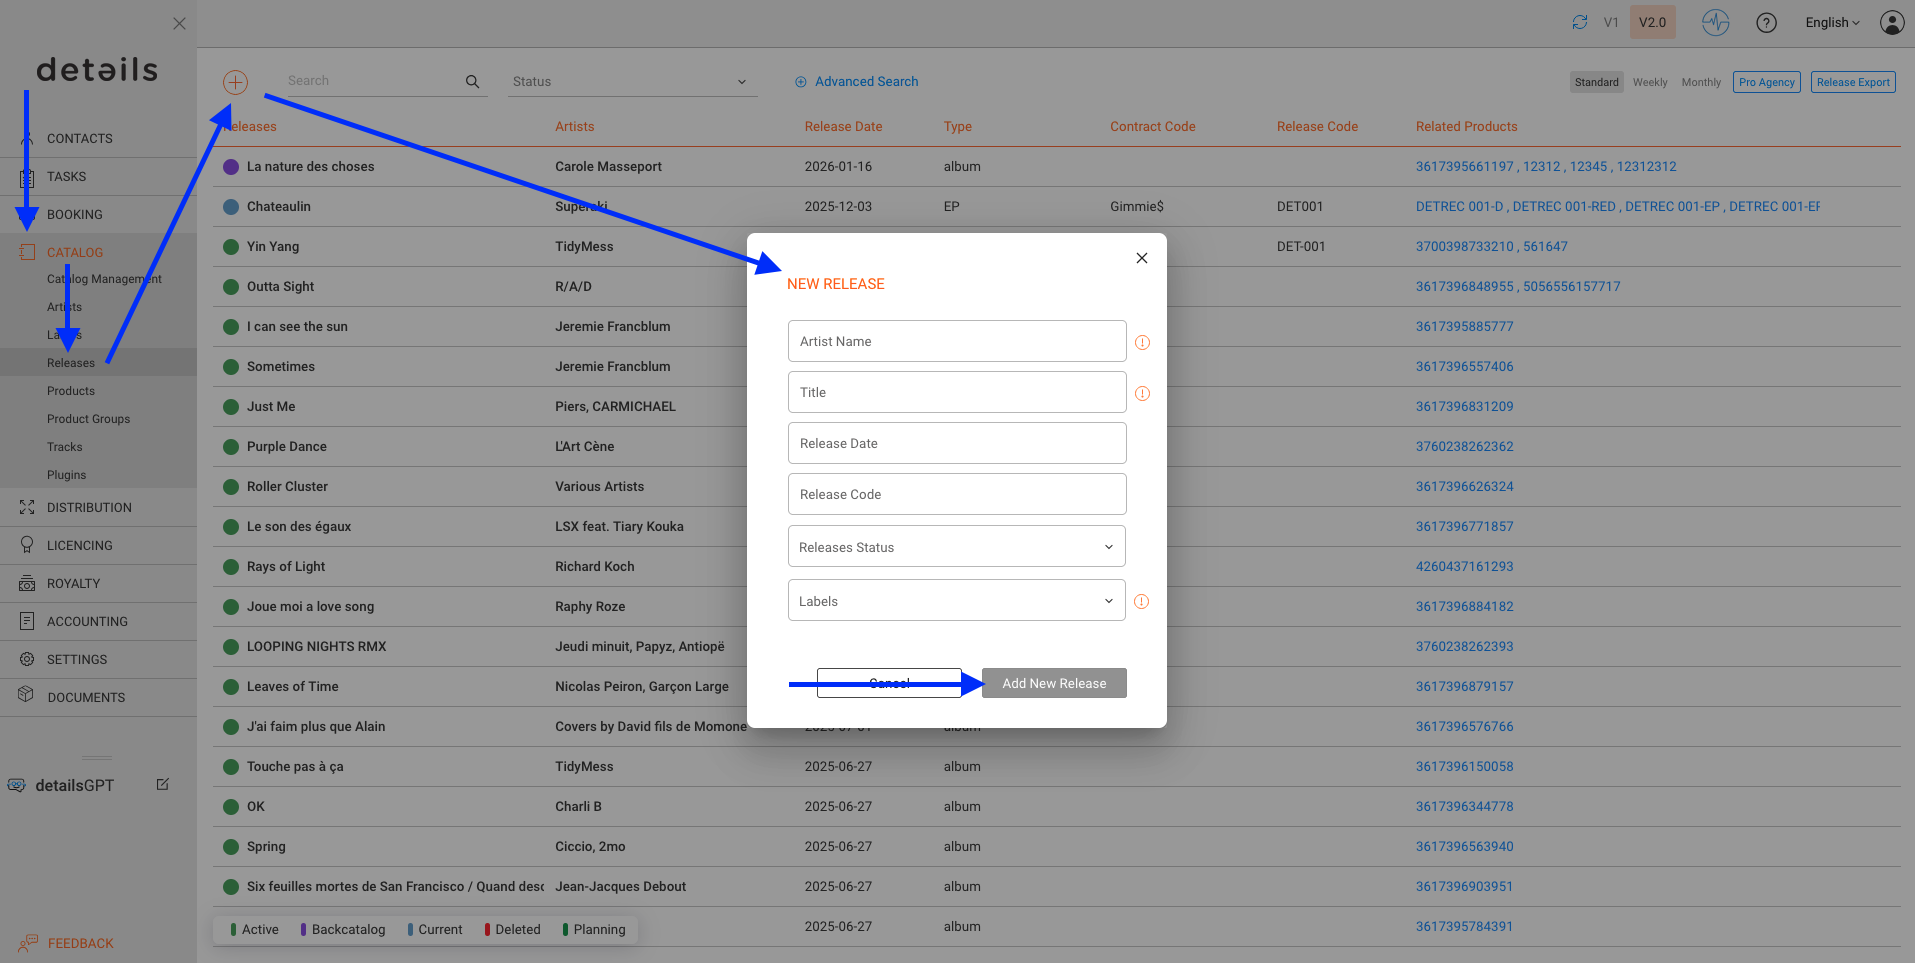
Option A: Import via Releases List
- Go to CATALOG / RELEASES.
- Click the [+] icon to add a new Release.
- Fill in the following fields:
- Artist
- Title
- Label
- Then click [ADD NEW RELEASE].
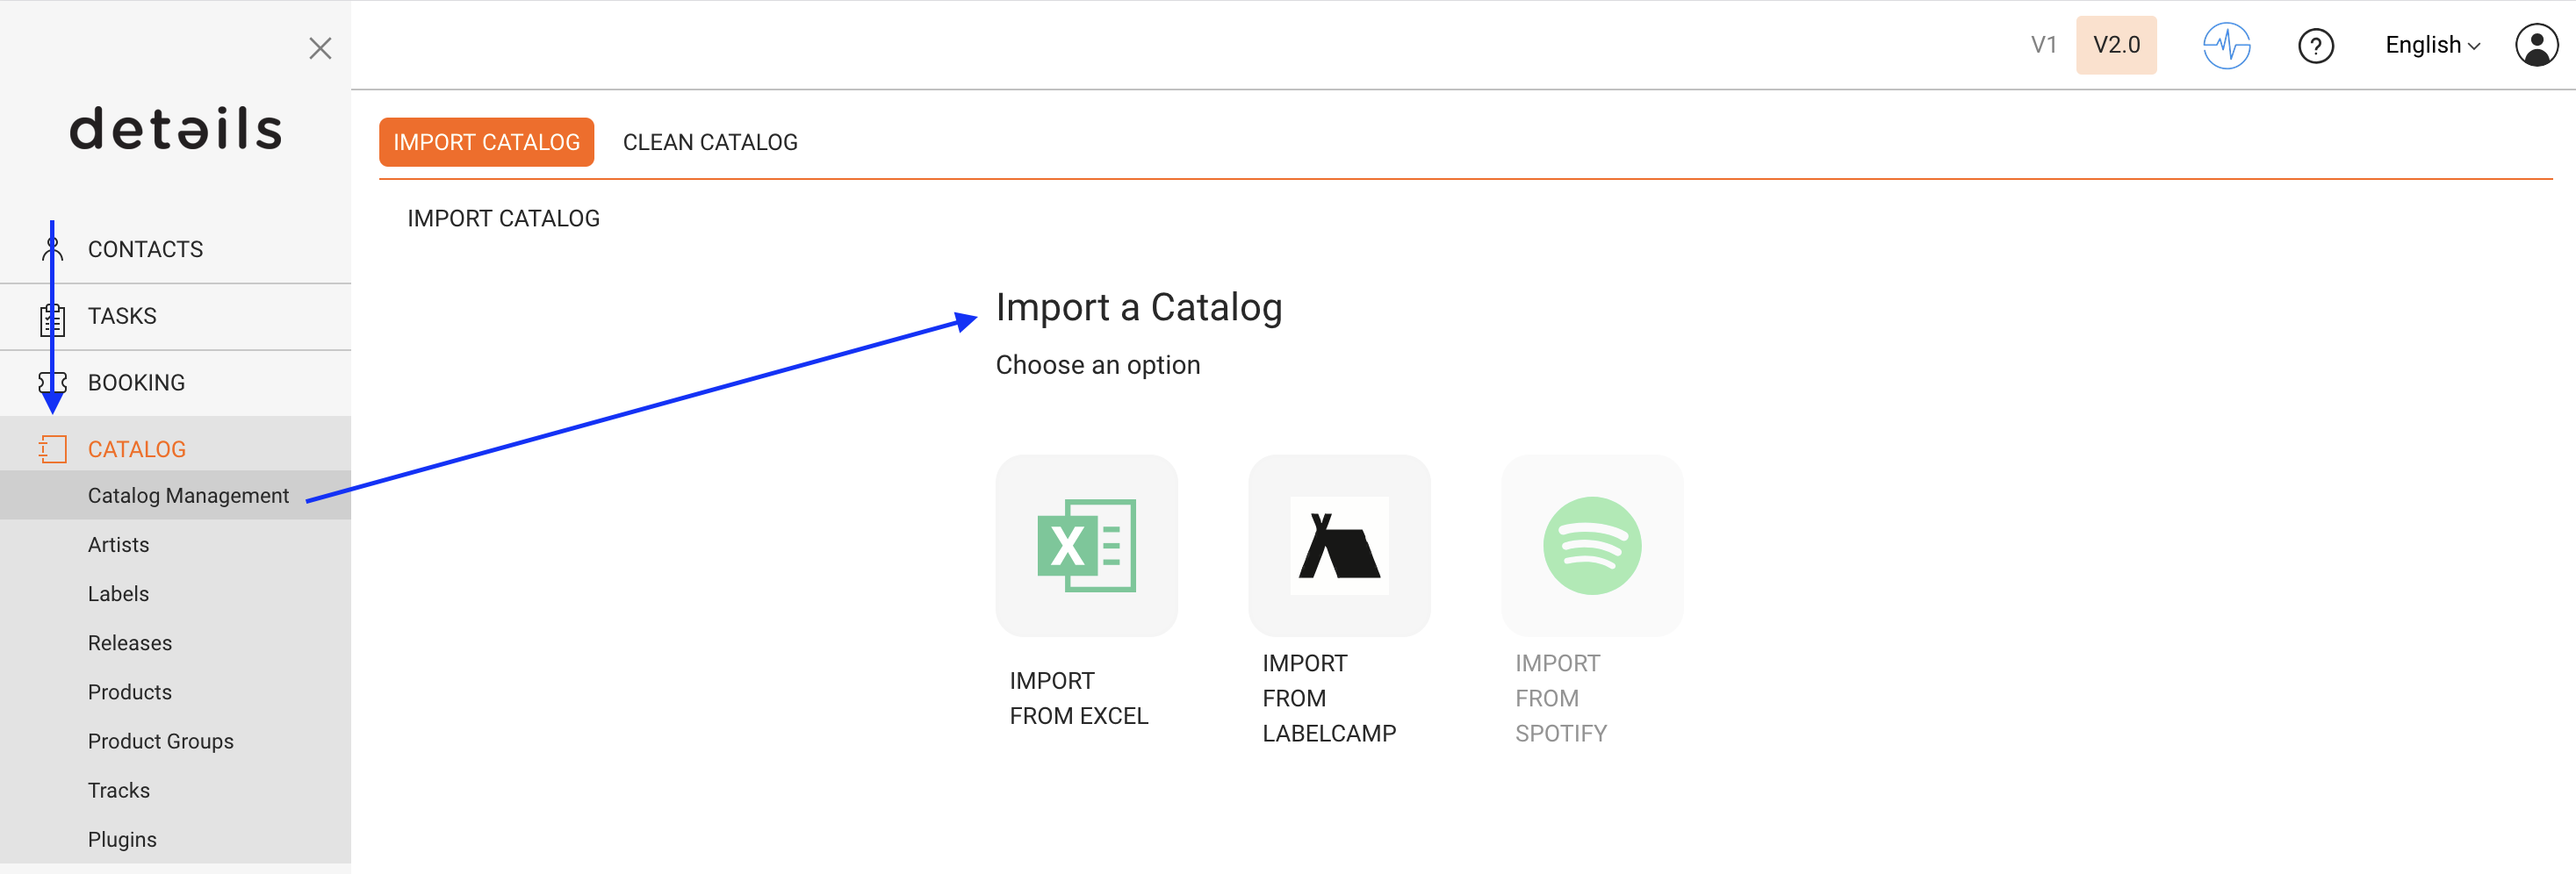
Option B: Import via CATALOG MANAGEMENT
Best for adding several releases (and products) at once.
To add Releases in bulk you can use several import tools you can find in CATALOG / CATALOG MANAGEMENT:
- via Excel Templates
- via IDOL Labelcamp API
- Soon there will be a Spotify API and an AudioSalad API as well.
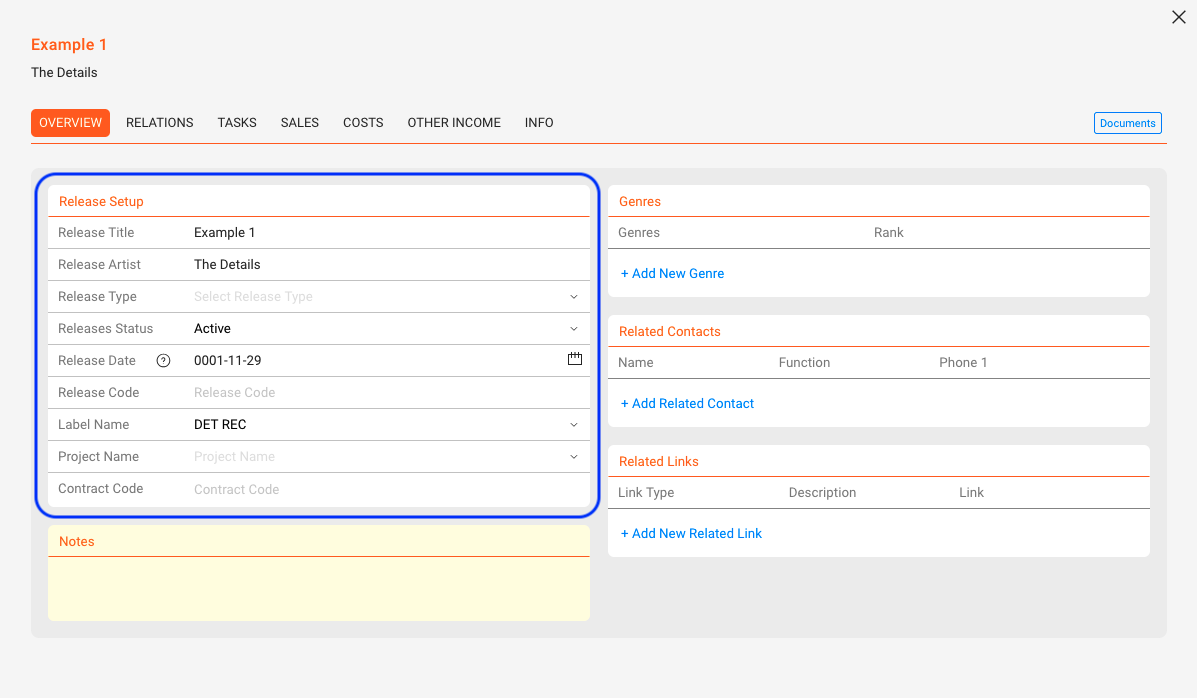
Edit the Release Setup
Once the Release is created, you’ll land on the OVERVIEW tab.
You can configure the following fields:
- Release Title
- Release Artist(s)
- Release Type (e.g. Album, EP, Single, Compilation, Promo, Merchandise, Audiobook, Book, Movie)
- Status (custom: e.g. Active, Back Catalogue, Promo; color-coded if needed)
- Release Date (plus optional product-specific street dates)
- Release Code (e.g. DET010, often used as prefix for product codes)
- Label
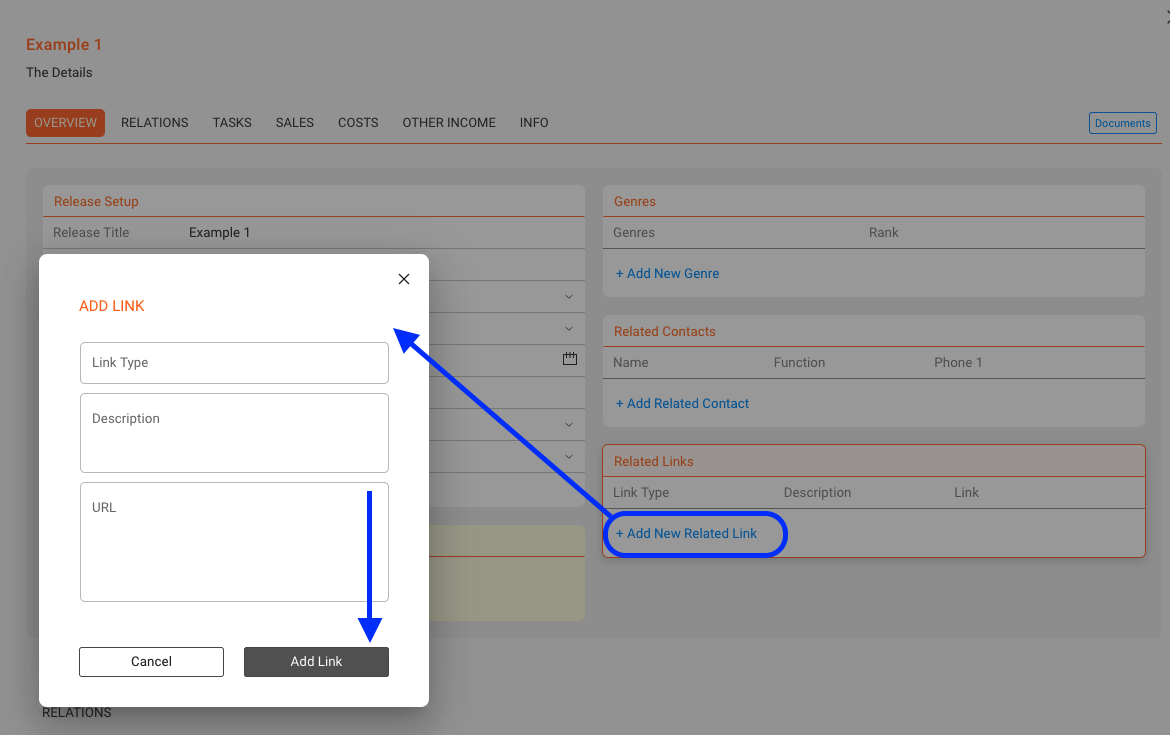
Add genres, links & notes
Still in the OVERVIEW tab, you can also:
- Click [+ Add New Genre] to assign genres:
Choose from the list or create new ones by typing and clicking [OK]. Set main/sub genre from the dropdown.
- Click [+ Add New Related Link] to add URLs like Spotify, Apple Music, Dropbox or Fire:
Define link type and description for clarity.
- Use the [Notes] field to write comments or internal notes.
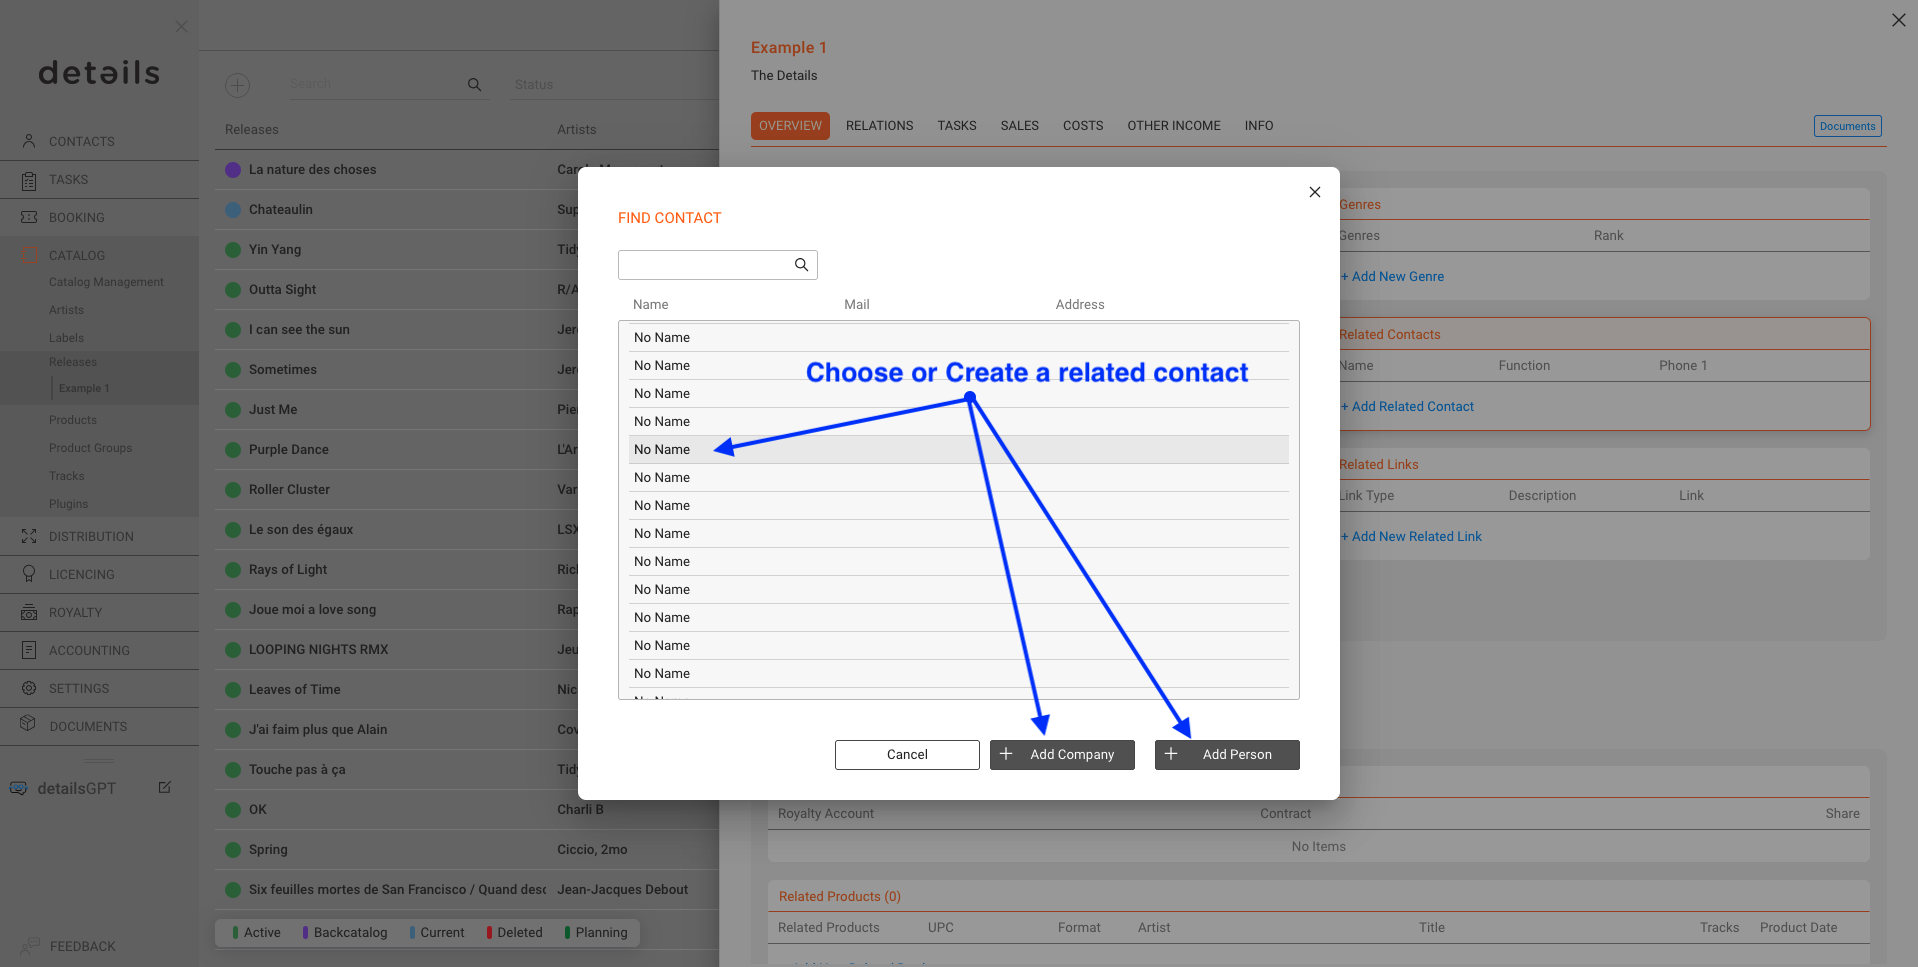
Relate contacts
Click [+ Add Related Contacts] in the OVERVIEW tab. Search for existing contacts and assign them to this Release, for example:
- Artist
- Management
- Mastering studio
- Designer
- Product manager
Relate products & artists
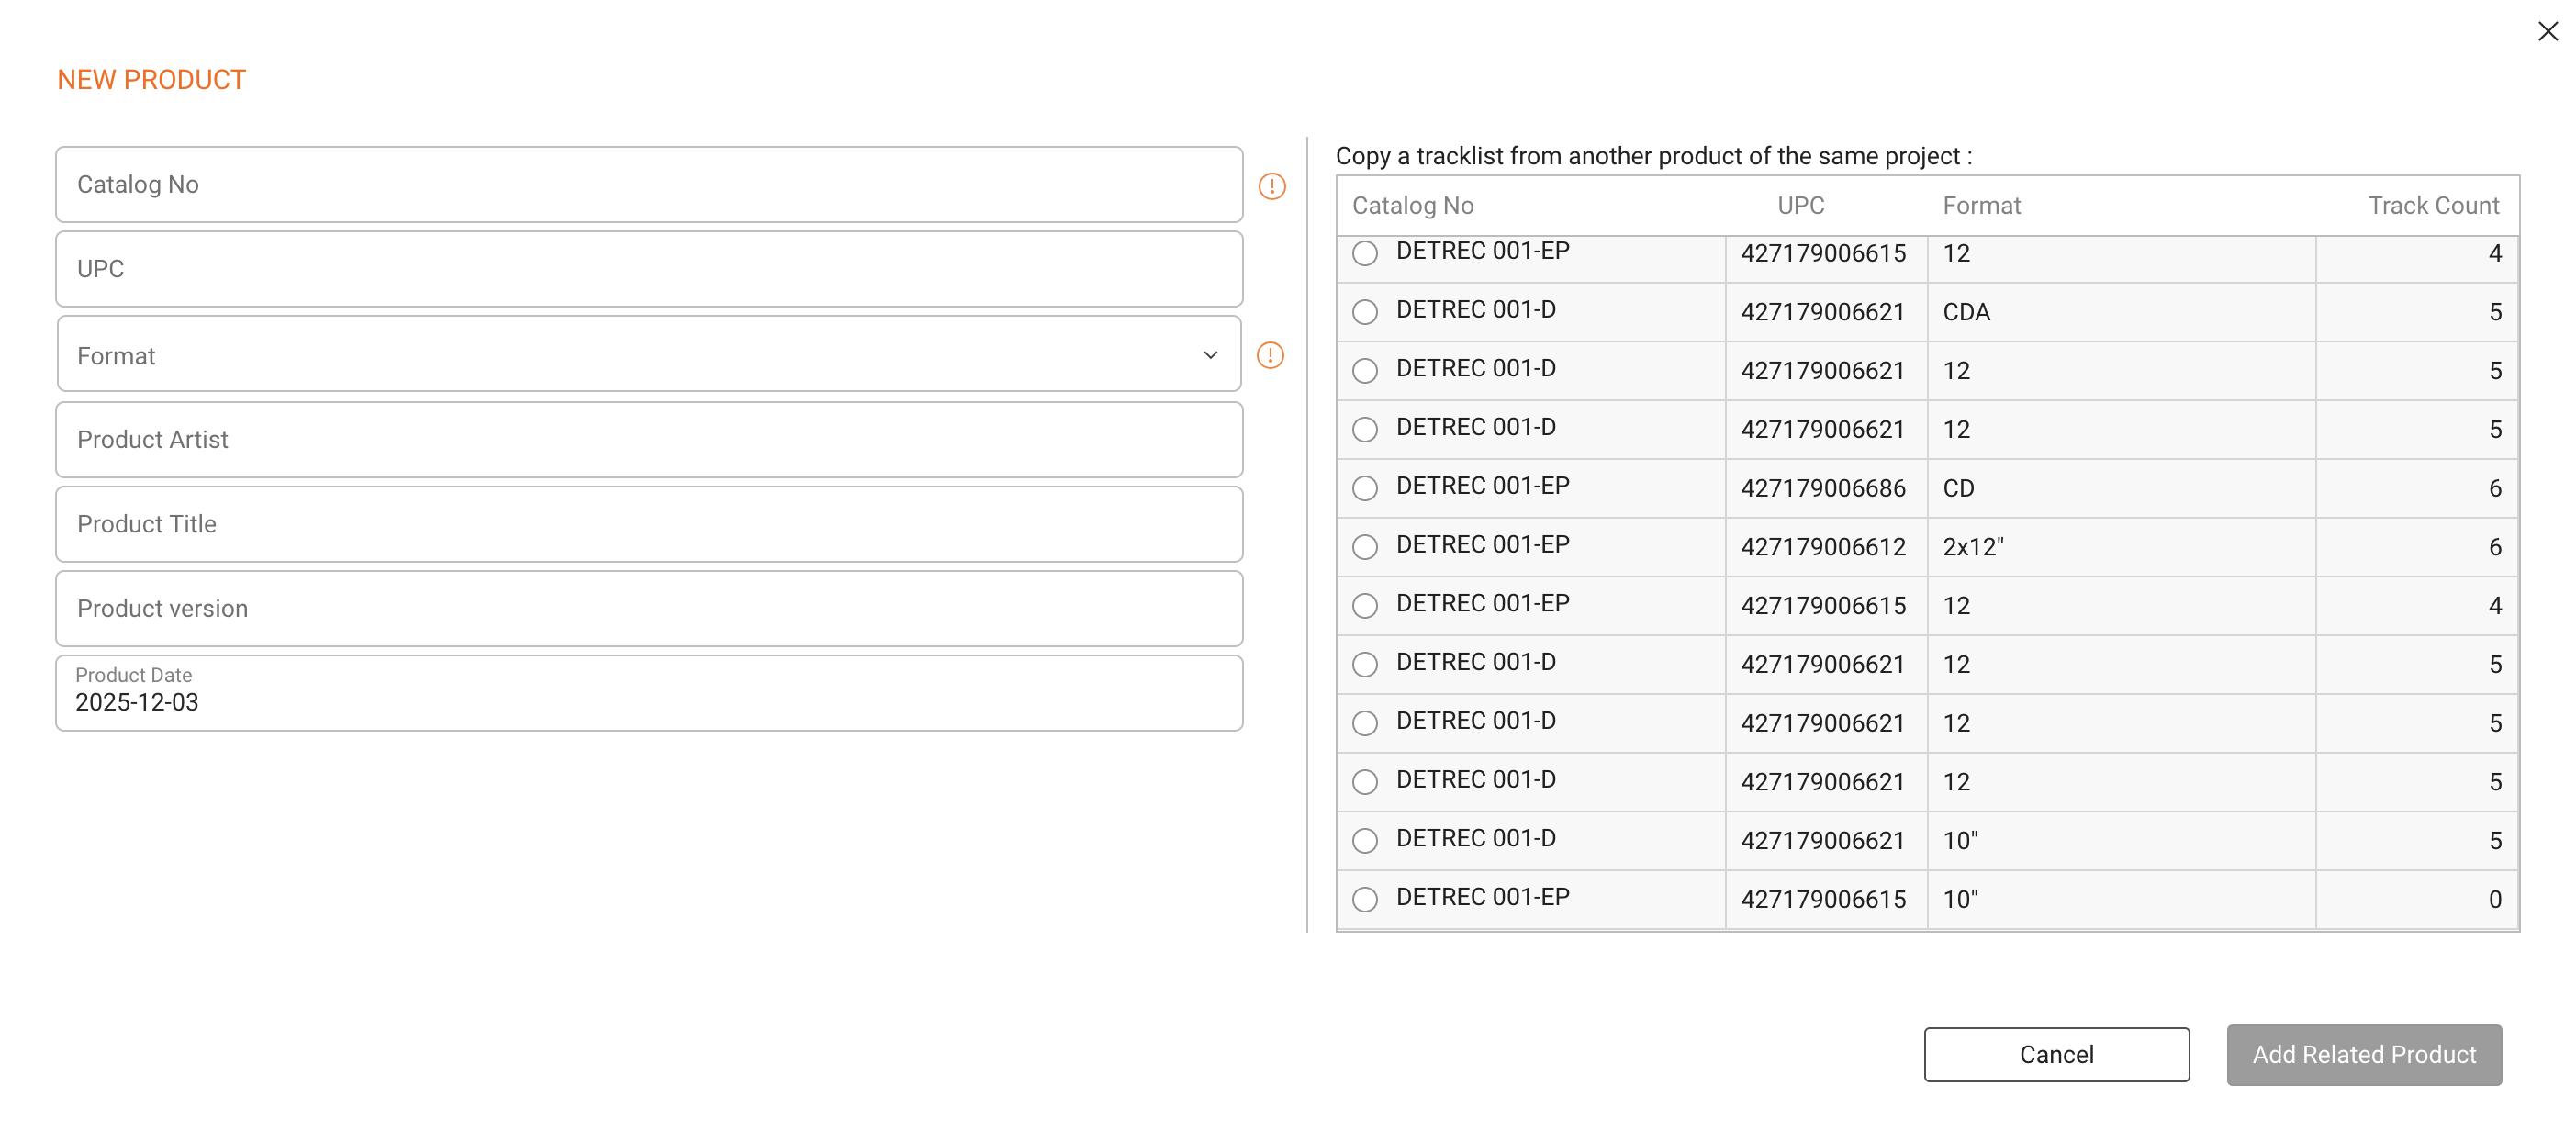
Go to the RELATIONS tab.
- Products: each product belongs to only one Release. Use [+ Add New Related Product] to create a new product.
If you have existing products in the same release you are able to copy Tracks in the new product automatically.
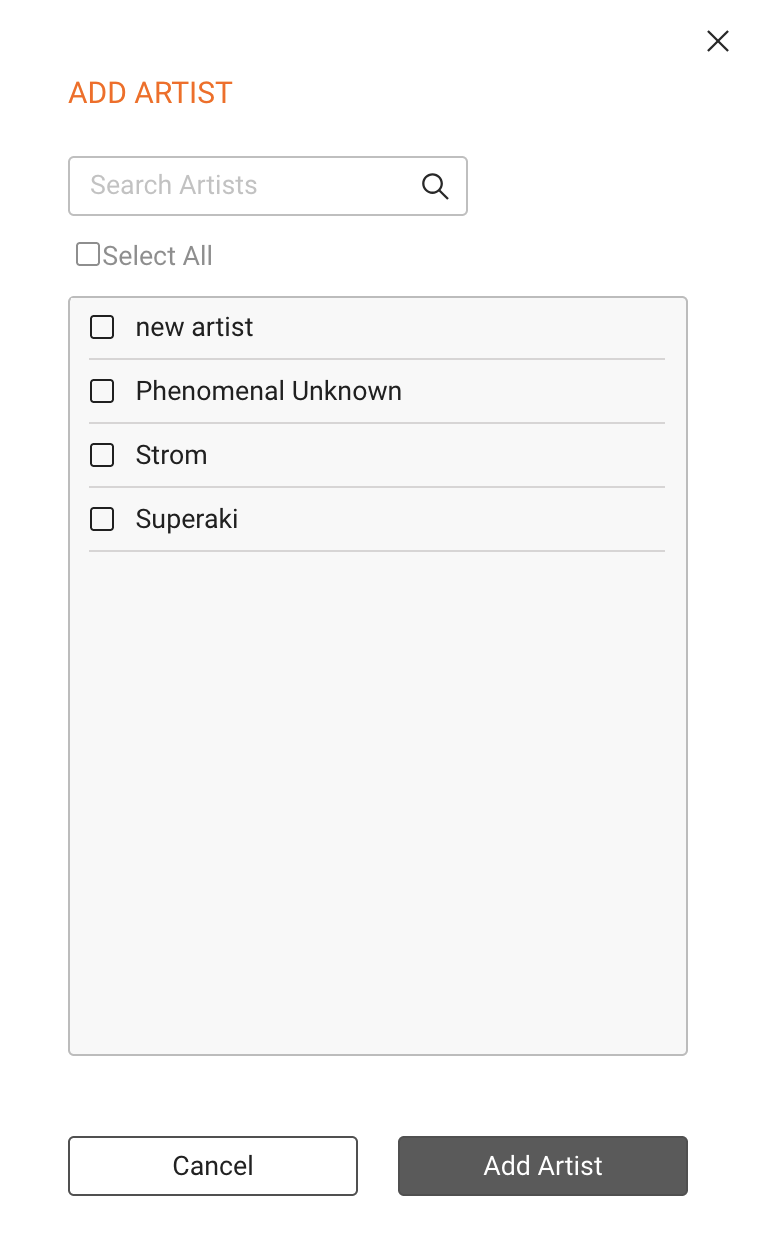
- Artists: Use [+ Add New Artist] to keep track of collaborations and enrich Artist Accounts.
Relate contracts, tracks, and licenses
Related Contracts / Royalty Accounts, Tracks and Licences appear in the RELATIONS tab in the side window of Releases. They are clickable and can be used for navigation.
But they are not editable.
To relate…
- CONTRACTS (& Royalty Accounts): Contracts are created on the ROYALTY level. You therefore have to create a ROYALTY ACCOUNT, where you can then create a contract. In the CONTRACT subpage you can then relate products. The contracts then appear automatically in the RELEASE.
- TRACKS: Tracks are created on the CATALOG / PRODUCT level. So if you connected a product and a track (or multiple) are missing, even after refreshing the page, you need to add them to the related product. They will then appear automatically in the RELEASE.
- LICENCES: Licences are created on the LICENCING level. You therefore have to create a LICENCE ACCOUNT, where you can then create a licence and relate it to a product. In the LICENCE subpage you can then relate products. The licences then appear automatically in the RELEASE.
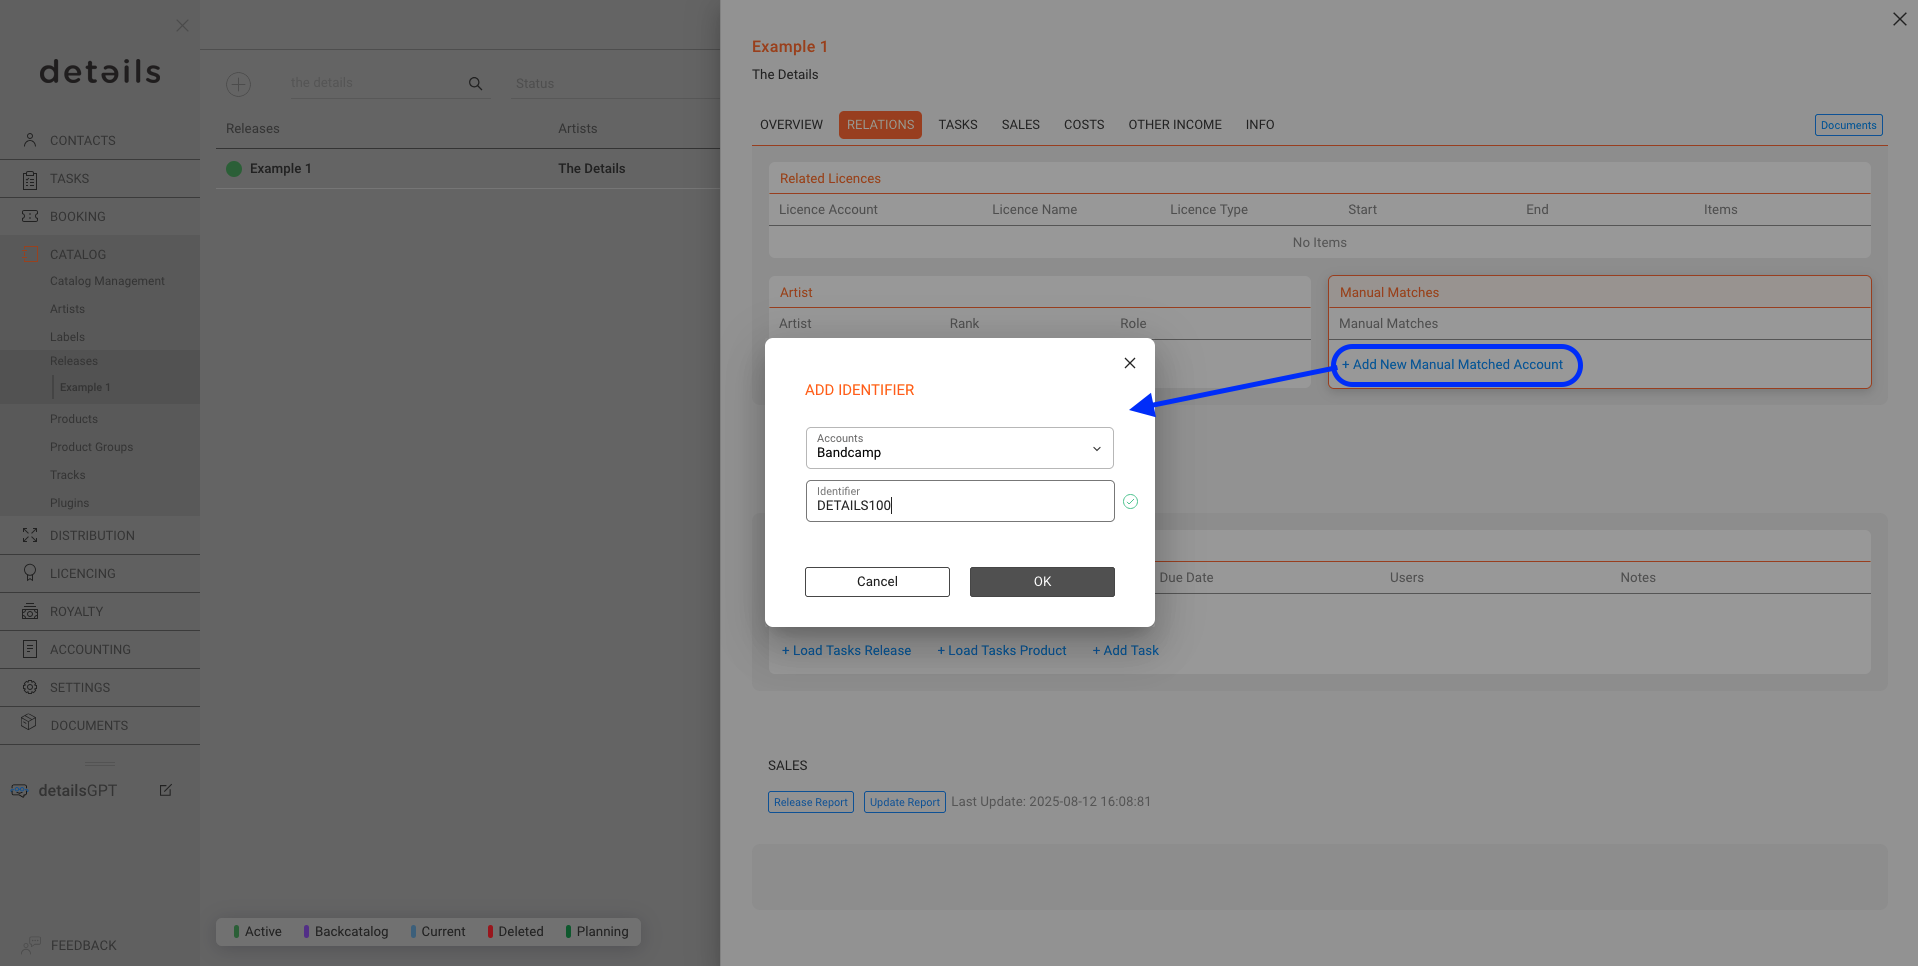
Manual Match Accounts
If your release has a different name or code on external platforms (e.g. Bandcamp), you can store that mapping.
- Go to RELATIONS tab
- Click [+ Add New Manual Matched Account]
- Enter the platform and alternate identifier (e.g. “DETAILS100”)
This helps ensure correct assignment when importing costs or revenues from external sources.
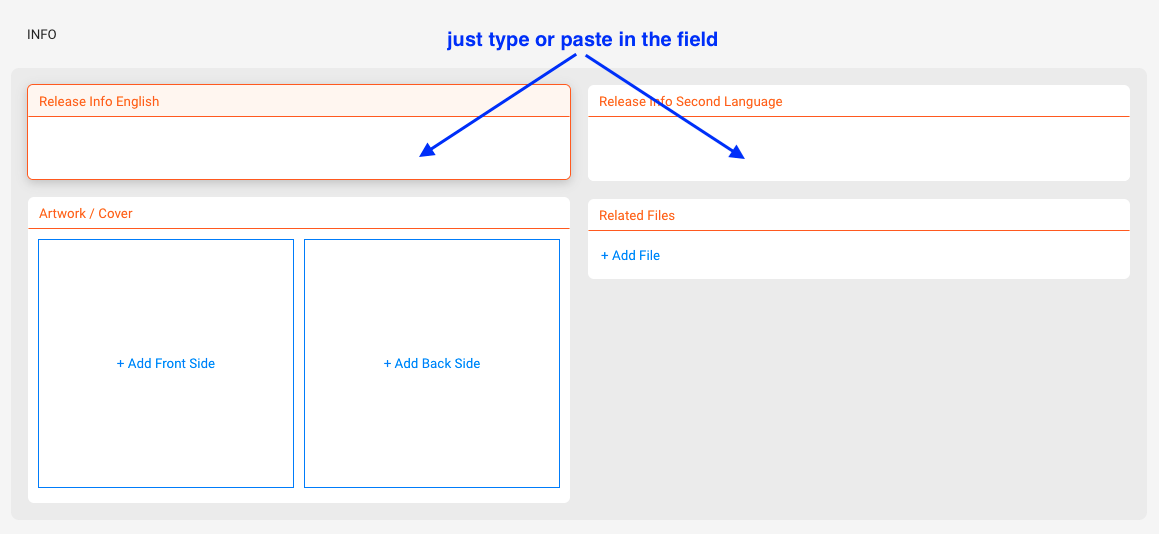
Add files & artwork
Go to the INFOS tab.
- Add texts in English and one additional language
- Upload artwork or cover images
- Attach files like contracts, info sheets, MP3s, WAVs via [+ Add New File].
If you choose Internal Use Only the file will be inaccessible for people without access to details.
These files can be used to auto-generate info sheets for your project.
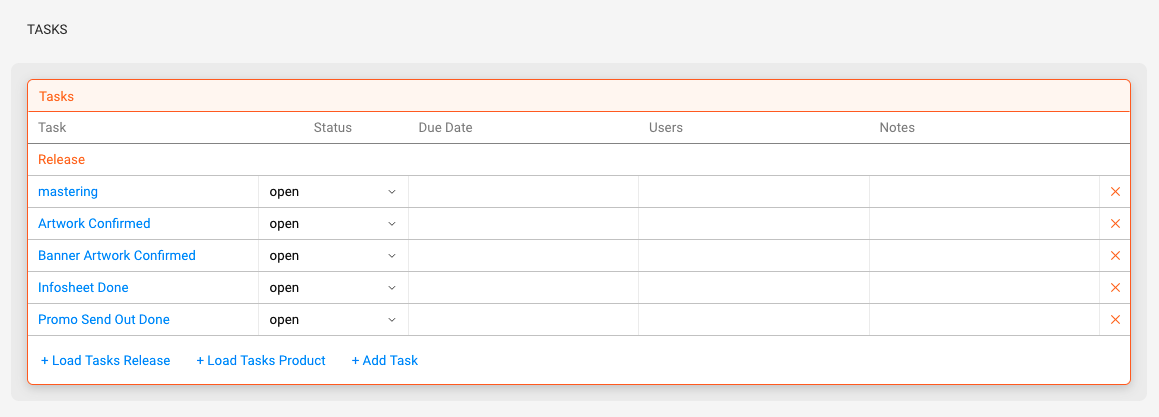
Create Tasks
You can create and assign tasks manually by clicking on [+ Add Tasks].
It’s also possible to apply pre-defined task template groups by choosing [+ Load Tasks Release] or [+ Load Tasks Product] and then using one existing template group.
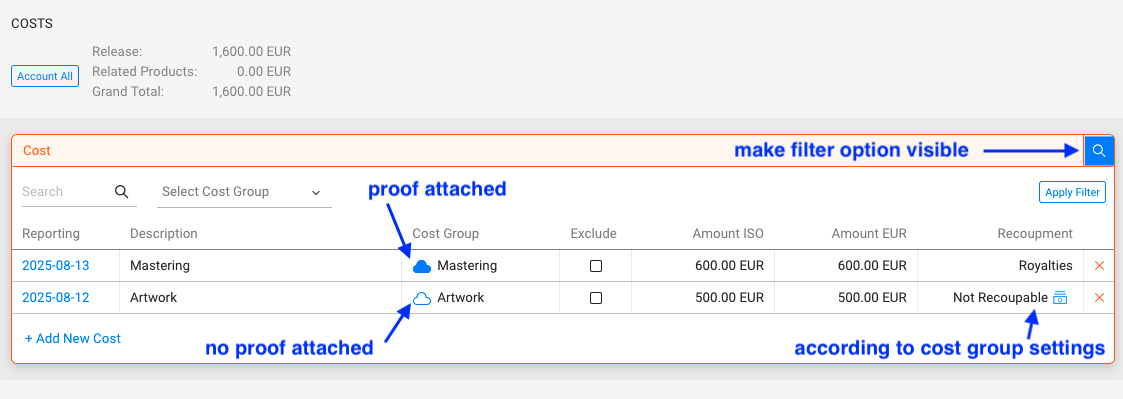
Enter costs & other income
You can record costs and additional income directly in the Release:
- Manually, including uploading PDF invoices or receipts
- Via Distribution Imports as spreadsheet
Every cost entry can be linked to a contract for recoupment tracking.
Supporting documents can be included in royalty statements (e.g. as proof for advances).
Additional income (e.g. grants, awards, or subsidies) can also be registered and will be factored into the Release Report.
Delete a Release
If needed, you can delete a Release from the list view:
- First remove all related Products
- Then click the red [x] icon next to the Release
